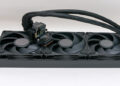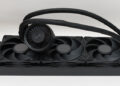
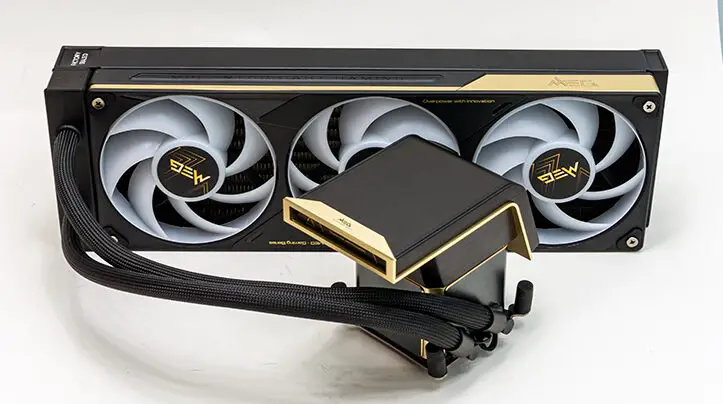

Let us start with the large, pink tutu-wearing elephant in the room: the MSI MEG CoreLiquid E15 360’s size. Even by All In One 3×120 class dimensions, the E15 is a beefy boi. While the radiator is ‘only’ an extra 3mm tall at 30mm instead of the typical 27 when one includes the fan package, you are dealing with ~59mm total depth. This does place it towards the upper end of the ’360-class’ spectrum. So while it may not sound like much difference that little extra can indeed make a difference. Enough difference that you should take your time and plan every step out in advance so you avoid the typical 360 pitfalls.

By the same token, this is not a difficult-to-work-with cooling solution. Some builders will see that oversized radiator and immediately come to the come the conclusion that the MEG CoreLiquid E15 is a royal pain in the a… butt. However, nothing could be further from the truth. Yes. The radiator and fan combination is slightly oversized to enhance overall aesthetics and cooling performance. Yes. When the waterblock has its gorgeous screen attached, it is taller than an Arctic Liquid Freezer 3, and is pretty much edging into “air tower” cooling solution territory. On paper, that is a major red flag to say the least.

In the real world, it is not overly concerning. MSI has put the work in to make it as user-friendly as an AIO 360 can be. So while you should take the installation seriously, and should plan everything out in advance, it is not a primadonna cooling solution. Rather, it’s user-friendly and is easy to work with, as nearly any 360-class AIO. So respect its size, and you will be fine with the surprisingly few quirks it does have.

So let’s back up and start at the beginning. Where this waterblock weighs more than many entry-level air-based cooling solutions, MSI made the right call to use custom AMD and custom Intel mounting hardware. On the Intel side, the metal backplate is confidence-inspiring as no polymer bracket could be. Yes. The top brackets for AMD are ‘plastic,’ but they are made from a co-polymer very similar (and possibly the same) as what Arctic uses for the latest generation air-based cooling solutions. In fact, these two pieces of “plastic” are extremely robust and come with a nice little tweak few ever include – directions!

Simply flip them over, and you know which orientation they need to go… as they spell it out for you. Thus avoiding a common surprise that Mr. Murphy loves to spring on inexperienced builders.

Also firmly in the quality-of-life enhancement end of the spectrum is that the backplate mounting bolts come in their own labeled bag inside a bigger bag. One for Intel, one for AMD. Meaning no need to guess if you are trying to use the Intel bolts on an AMD motherboard… or vice versa… and yes we have all been there at one point and learned the hard way.

Next tweak is that, thanks to the contact pad and magnets on the top, the block is actually not that much bigger than most AIOs ’ water blocks. All we would suggest is that if you do plan on using the included screen is flip the top protective covering off before installing it. Those four retaining magnets are rather strong and can be persnickety if you don’t have a plastic spudger on hand to lever the metal topper up and off. Other than that, you can’t really install the block wrong. You technically get two directions – tubes to the front vs tubes towards the back of the motherboard. Neither are ‘wrong,’ but we would suggest that, if you can, we would place the tubes towards the rear I/O. That way you can easily hide them underneath the screen topper.

Due to some nifty engineering, both AMD and Intel make use of the same block mounting top hardware… that comes preinstalled. So one simply has to pop off those slightly suboptimal rubber coverings over each of the integrated bolts, place it, and bolt it down in a standard figure 8 / Z / 1-4-2-3 pattern… just like with any cooling solution.

Then stick the caps back over the bolts to help hide them and move on to the next step.

Before we do move, we do have to comment on those coverings. It is a major step backwards compared to the area-covering fascia other MSI 2026 AIO models are using, and we much prefer them to these socket covers. MSI needs to work with LuxShare-Tech to figure out how to do both the socket area cover and the gorgeous screen. Since they have not, this E15’s way of doing things is above average in this portion of the aesthetics department compared to most, but below average in what we have come to expect from MSI.
Moving on.

Thanks to the fans already being pre-mounted inside their custom bracket and said bracket is pre-attached to the radiator, installing the radiator is faster and easier than most. Emplace it, hold it steady, and secure it with the included bolts. A second set of hands does come in handy, but if the case is on its side, it is not that difficult a procedure to solo.

Before moving on, we once again feel it necessary to point something out: the cleanliness of this rad and fan combination. Yes, many AIOs (including MSI models) come with the fan wiring neatly done, and if you orient the radiator properly, you can hide all the fan wires. You still have to deal with them on the motherboard end of things, and you still have to get them from A to B.

MSI has done away with that hassle thanks to an integrated controller and custom header that ties the fans and bracket to the radiator. Resulting in night-and-day differences in both ease of use and the final build aesthetics. Albeit with one minor quirk. The location of the custom Type-C header.
Both the location and orientation are a touch sub-optimal from a final build’s perspective. To be blunt, placing it between the inlet/outlet tubing on the radiator and orienting it the way they have the lone cable is a bit more noticeable than it could/should be.
To be clear, we fully agree with the off-block decision and having the block’s wiring hidden underneath the tubing (instead of the usual fan’s wiring hidden underneath said nylon sheath). It is insanely easier to tuck that long lone cable behind the motherboard, down, and then snake it out to the header location than it is to try and hide it while it crosses part of the motherboard.

However. If MSI had included 3 ports w/ 3 port coverings and had one place on each ‘side’ of the radiator’s “head,” a builder could easily choose the one that is hidden best and make this cable fully “disappear”. Since they did not, the only reasonable explanation of the orientation and location is that at one point in the design process the cable was supposed to come with a 90-degree head… instead of sticking loudly and proudly up and off the radiator like it does in this finalized design. Worse still is you have to rotate the cable 90 degrees so as to try and hide it behind the tubing, making final tidying a smidgen harder than it needs to be.
To be honest, this is nitpicking. The final build is insanely clean compared to any other AIO one cares to mention. In fact, when paired with an MSI motherboard, it is darn near Nirvana level of cleanliness for OCD builders. It just is one tiny mistake that makes the difference between perfection and simply best in class.

Which leads us to the next tweak. The 90-degree bends. While a tighter ~5to1 ratio bend than we would like to see, there is no denying they work. They do hide the cables behind the screen, and they do make tidying of the tube easier than ever before.

Once again, it is these tiny little ‘extra’ details that transform the ordinary into the extraordinary. Hopefully, like many of the other features of this HALO model, they will trickle down to future MPG and MAG models!
With that taken care of, place the screen in place, and you are done with the hardware side of things. Later in the build, install the software. Make some movie screen magic happen on that purdy screen and wow your client with an ultra-clean, ultra-modern build. Then cash their cheque and move on to the next build.

Overall, we find the MSI MEG CoreLiquid E15 to be a game-changing model. One that not only raises the bar for ease of use but also aesthetics. So much so we can honestly say that these tweaks can indeed justify the asking price when dealing with high-end builds… we know going back to normal AIOs and the normal quirks is going to be difficult, as that is how high the E15 has raised the bar. Color us highly impressed.