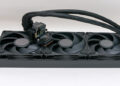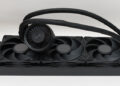
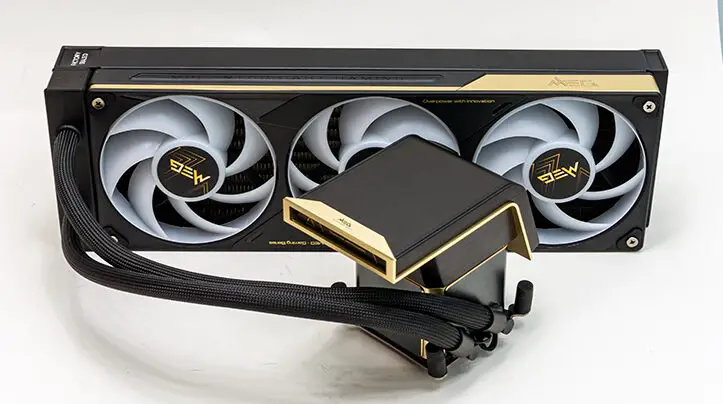
If you do, for whatever reason, want to remove this fan assembly… be warned the process is tricky. Not hard. Not overly difficult if you know what the correct order is. Start as you usually would and remove all the bolts securing it to the rad. Then slide the entire assembly forward on the radiator without lifting it up and away from the rad. Basically, if you remove the bolts and yoink upwards without first disengaging the delicate pins, you will bend and/or break it. Break it in such a way that it will be user error and not eligible for RMA.

So. Please. Slide it forward enough, at the very least, so that the ~10mm ‘gap’ at the front disappears. Then and only then can you lift up and remove. Doing otherwise will bend pins and void your warranty.

If this sounds ‘scary’. It is not. You will feel the resistance from the pins reduce as you slide it forward on the radiator and pretty much will know when they are fully disengaged. If you want to be 100 percent certain… simply keep sliding it along the rad until you can visually confirm the pins on the radiator side are fully disengaged from the fan assembly.

This nifty setup is a game changer for premium AIOs… and it is actually the least of this fan assembly’s features. This is because it is more accurate to consider this an oversized video card fan assembly rather than one intended to be attached to a mere All In One CPU cooling solution.
To be concise, MSI has taken all their knowledge and decades of experience in building video cards and applied it to AIO. After all, if you can cool a GPU fin stack, you can cool a CPU radiator (and dodge a ball).
This is why the central fan counter-rotates compared to the two others… as MSI knows full well that this reduces the size and significance of wind eddies that increase static pressure and noise.

This is why each and every fan in the fan housing is independently monitored so that if a fan failure is registered… the other two can not only notify you via software and change their LEDs to a red color but also compensate via increased speeds. Hell, even when they are working, the software can tune each fan’s PWM to match the other fan’s actual rotational speed. Meaning no more “whomp whomp” from the fans fighting each other. No more ‘hot spots’ from a slow fan… and alternatively no needlessly loud fan that just happened to be on the “plus side” while the others are on the “minus side” of the whole “plus or minus 5-10 percent RPM” range baked into the manufacturer’s tolerances. Instead, all three are (what MSI calls) phase-locked with precisely the same rotational speed right from the moment they are powered on.
Let all that sink in. For the first time ever, you will know all your fans are not just functioning but are working together as a unit. Not just a bunch of fans daisy-chained together subject to the whims of the gods of manufacturing (in)tolerances.
The only downside is you really shouldn’t pick red or a variant of red for the fan’s default color… as that is what the default failure color is. So if you see red, a fan is dead.
The only question we have is simple: why has it taken nearly two-freaking-decades of AIO design and the countless millions spent on engineering for these features to become a reality?! This is a game changer and arguably the largest since integrating pumps into the waterblock was released. Simply put, this “tweak” offers: Best aesthetics. Better consistency in performance. Better performance overall. Better noise management. Better peace of mind. All it took was a video card manufacturer to show Asetek, Cooler Master and Arctic (amongst others) how it’s done.
Do these advanced features justify the asking price of the E15? Yeah. It breaks our budget’s heart to say that, but it does. If your budget will allow you to spend 6bills on an AIO, there really is no alternative this side of custom water loops that can compete with these features. Even then, you will not easily get that peace of mind from proper monitoring and control that the E15 offers. Hopefully next gen MPG and MAG models get this feature too… and put another nail in the coffin of Astek’s dominance.

Ironically… the fan array is the lesser of the two impressive “killer” features the E15 boasts, and yet it will have the longest-term impact on the market. So while this quite killer hides in the shadows… the LCD screen topper is taking the lion’s share of the limelight. Arguably rightly so, as it too is a potential game changer.

However, before we go over the screen, we should make mention that the (12-channel-based) radiator is also new and improved. Earlier this year we took a look at an MSI MAG CoreLiquid 360, and it made use of a 3x120mm form-factor radiator that boasted improved water channels. As such, it was excellent for its class… but it was a bog-standard 27mm thick design. With about a 3.5mm (per side) offset. Meaning it had about a 20mm thick core for actual cooling performance.

The MEG E15 makes use of a 30mm thick radiator with a similar fan offset. Meaning it has about a 23mm thick core, or only about 2mm thinner than what an A.L.F. III 360 makes use of. So while not the beefiest of beefy rads, this middle path approach should prove to be rather flexible. I.E., better performance than stock AIO’s yet still have virtually no noticeable difference in installation hassle factor. On paper, that certainly sounds win-win to us.

Of course, as the entire fan hub/controller/brain of the CoreLiquid E15 is located in the radiator and not the waterblock, it makes perfect sense to locate the power and data control header here as well.

To be precise, it makes use of one Type-C header centrally located between the inlet and outlet ports. We are of two minds on this location. On the one hand, since the entire USB controller is here, the waterblock itself brings new meaning to the word clean… as there is no wires nor ports placed higgledy-piggledy on it. On the other hand, we would have to have either seen a better side of the block (left, right, or end) used for the header location… or, better still, had multiple headers with integrated covers on the L/R/C and end. Allowing the owner the luxury of choosing where the thick “USB” cable is plugged into the radiator. Thus making it even easier to hide it. Since MSI did not, it is good, but with every other portion of the E15 so well thought out, this… rough spot is all the more noticeable because of its suboptimal location choice.