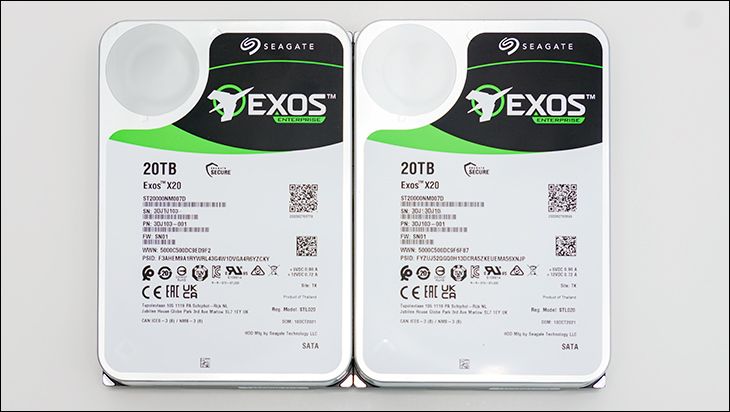
For IT professionals you can skip this section as you should already know how you are going to customize and configure your drives. For ‘home’ owners however, we often get asked “why is my X making noise” or some variant on that theme. The basic answer is different models are optimized for different things. The EXOS and IronWolf models really are not intended for home PC systems. They are meant to be part of an array of drives on server running a server OS. This means noise and OS handholding are really not all that important to the firmware design team. Generally speaking, what does matter is power consumption and overall performance. When dealing with thousands and thousands of drives, a few watts does indeed add up. Furthermore, a one size fits all approach is less than optimal as many want their arrays to enter deeper and deeper idle states when not used for a certain amount of time. Others do not want to pay the latency penalty that goes along with these deeper idle states.
Thus, flexibility is also important to business users and this is where PowerChoice and PowerBalance firmware options enters the equation. Like any modern hard disk drive, Seagate drive’s use multiple power states which are tied to built-in idle timers. These levels offer increased power savings… but at the expense of increases latency as it takes a moment to come out of a deeper idle state than a shallower one. Out of the box these idle states come with rather aggressive power saving settings, but Seagate is fully aware that they will probably not be optimal for any given scenario. Instead, they are meant to be the starting point that any storage admin will use to create a tailormade solution. Basically, the administrator will already have given serious thought to exactly how much of a latency penalty will be acceptable in a given server and then adjust these settings accordingly.
The average home owner does not even know these advanced features exist… and are lucky if they even know how to set the ‘sleep’ timer in their OS’ power plan. We are pretty much sure that Microsoft’s developer team also do not know anything about these features as Windows is pretty much is a random frustration generator when it comes to noise and optimizing advanced storage power features. Thus, Seagate’s baked in defaults are probably not going to be all that great a fit. It really will come down to how sensitive to noise and delays you are.
In either case, when dealing with MS Windows 10/11, a drive that is idle may actually be randomly pinged by the OS (when asked why it does this we joking say Bill Gates stole Heckler & Koch’s unofficial motto of “Because you suck and we hate you”). When this happens, the drive has ‘to wake up’. It has to unpark the heads, maybe even spin up the platters, and then go back to full tilt boogie performance mode. That all takes time and it makes noise. It is also rather hard on the drive’s hardware. So for us, when asked why is a drive making random noise the first thing we will tell people is to go and download and install SeaChest Utilities.
https://www.seagate.com/ca/en/support/software/seachest/
SeaChest Utilities is Seagate’s advanced tweaking command line program for their drives. It is not for the faint of heart or novice. It expects you to know what you are doing. Because we don’t follow MS or H&K’s motto we do not stop there. Instead, we give people the details on how we configure our business and enterprise drives when used in a “PC”. There is no right way, this is simply our way. When you get the hang of things you may tweak to your heart’s desire. It should however make the drives a lot more predictable with a lot less random chirps and the like. Just consider it a good place to start after you do your own research and draw your own conclusions for your own needs.
So once it is installed, open up your command prompt with admin rights (aka an ‘elevated command prompt’).
Then change to the folder where it is installed. For most that will be C:\Program Files\Seagate\SeaChest. So type in “cd C:\Program Files\Seagate\SeaChest” and hit enter.
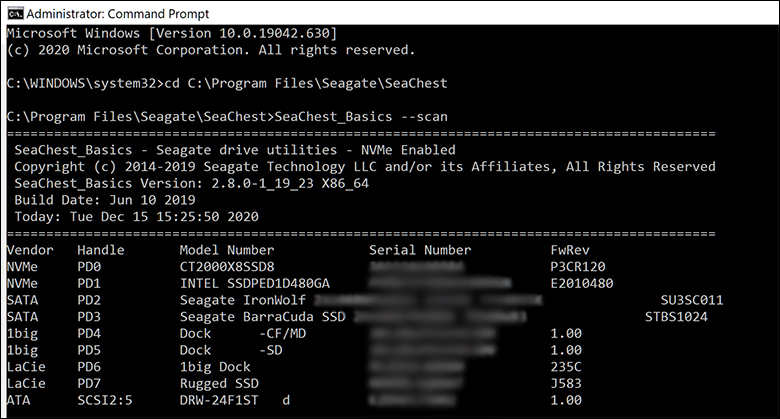
Then type in “SeaChest_Basics –scan”. This will scan all attached storage devices and list them in a nice and neat list. Find the right drive and make note of the number associated with it. In this example it is 6… so we would change ‘x’ to 6 in the following commands. E.g. “PD6”. Be careful and make sure it is the right drive as you may get a wonky error if you try to do these tweaks on say an SSD. If you pay careful attention, you will note that PD6 is for a ‘LaCie’ drive. We typically have multiple drives installed in any given system and when dealing with more than one drive that is the same model… it can get confusing. This is why before we install a new drive it is placed in a LaCie 1Big, and mostly modded from there. You may not have that option and we would not worry too much about it, nor recommend you rush out and buy an external enclosure just because we use one. It’s just a handy bonus / addition to your toolbox that you may want to add at some point down the road.
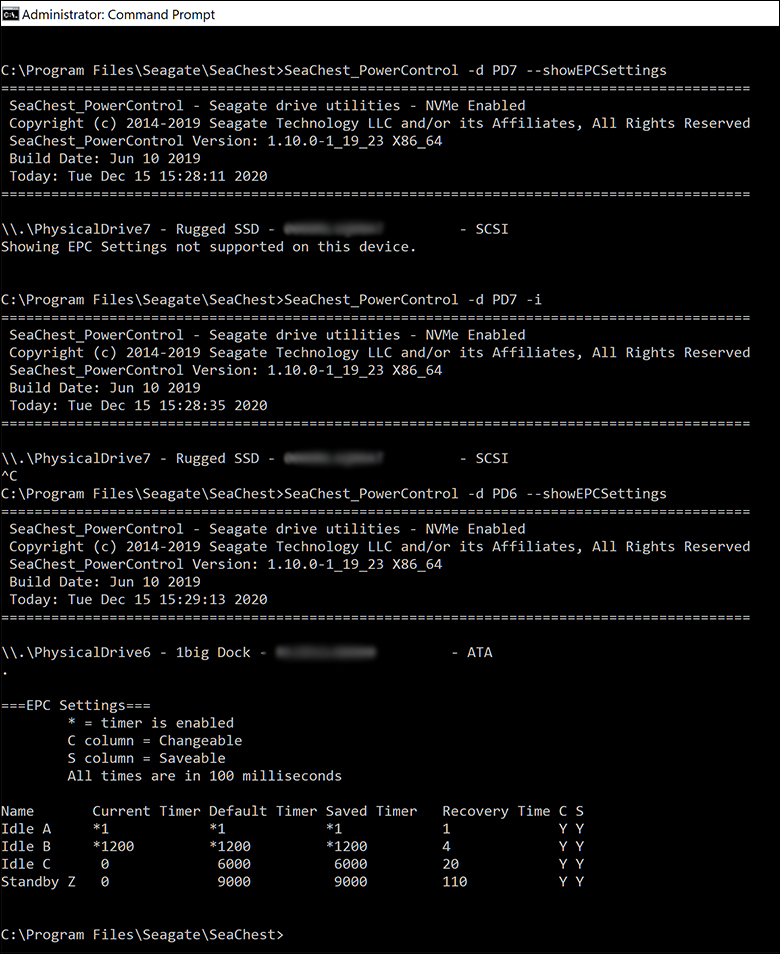
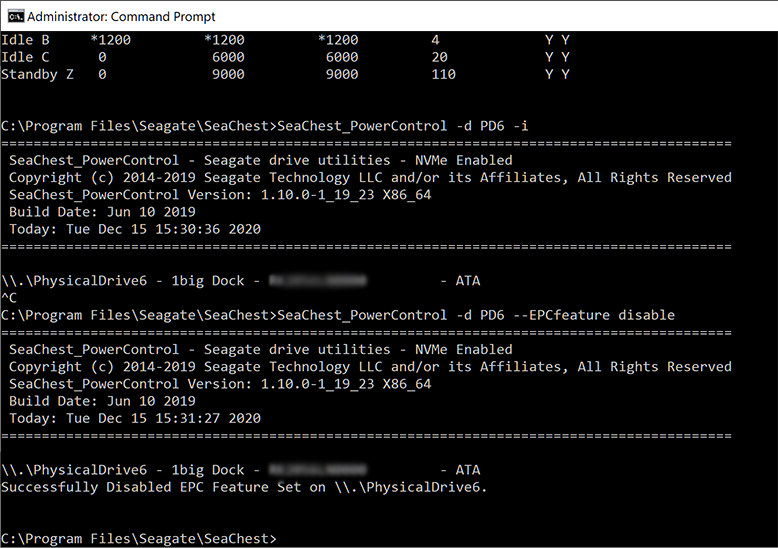
Then we disable Extended Power Control via “SeaChest_PowerControl -d PDx –EPCfeature disable”
Then we disable Power Balance features via “SeaChest_PowerControl -d PDx –powerBalanceFeature disable”
With both taken care of we then confirm the changes actually happened via “SeaChest_PowerControl -d PDx –showEPCSettings”.
This will spit out another pretty little info list on that drive. Scan the ‘Current Timer’ column and make sure it is all zeros.
To confirm type in “SeaChest_PowerControl -d PDx -i” and confirm it for the power control features as well. Though you may have to reboot your system before doing this one as sometimes it needs a hard reset to set the changes (and a big reason we use an external enclosure which is faster to reboot than an entire system). To be on the safe side, reboot then type in that last command at an elevated command prompt.
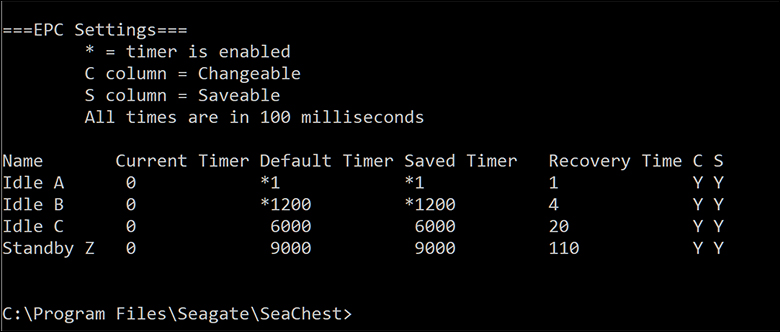
So what did we just do? We told the drive to ignore all lower power state timers. So it will never, ever park the heads (idle B), slow down the spindle speed (idle C), nor set the controller to a lower power state and stop spinning the platters (StandbyZ). It will run all the time, 24/7/365. Just the way a hard disk drive should in a home environment where a couple watts of power consumption and heat production does not matter. For home NAS devices… we do the same if they are being used at least weekly. It is only in business environment that it makes sense to really dial things in… ish. We say ‘ish’ as the wear ‘n’ tear on the drives from spinning 24/7 is less than constant park/unpark and a lot less than a cold startup… which Standby Z basically requires. However, the savings in power (and cooling) may offset the increase in parts replacement costs. Thus the ‘ish’ as it is a decision that needs to be done on a case-by-case basis.
If you find the drive is still a bit annoying (we don’t but maybe you are overly sensitive to the frequencies they produce) before you close down the elevated command prompt… type in “SeaChest_PowerControl -d PDx –showAPMLevel”
This will tell you what the APM is set to. APM stands for Advanced Power Management and its job is to balanced acoustics vs. performance. A setting of 254 max performance / max noise, 128 is balanced between the two, 1 would be ultra-low performance but also extremely quiet etc. etc. etc.
If its 254 try lowering it via “SeaChest_PowerControl -d PDx –setAPMLevel 128”. And run it at that for a while. If the noise is better, you will have to either download a APM setting program to run every time you reboot or do up a simple batch file to the same thing… as Windows is a petty dictator who thinks it knows better than you and will override your wishes on the next OS restart. For home NAS and servers we typically just disable it via a simple batch file that has “SeaChest_PowerControl -d PDx –disableAPM” in it. These types of ‘issues’ are the downside to using business grade drives in a home environment. Personally, a few moments work is more than worth the decreased cost and increased durability. Your mileage may vary.
