While we honestly doubt many owners of the F2-210 will bother with tearing down and replacing failed internal components… some may. In fact, a good argument could be made for swapping out the 80mm fan for a higher performance version as soon as you verify the NAS appliance works on first bootup. Since the F2-210 is not RAM upgradeable, that is the most likely reason for cracking open this inexpensive NAS appliance. Thankfully, it is a rather easy thing to do and with just a bit of patience even the most inexperienced of an IT handyman can do it within mere moments.

To get at the FAN you first need to power it down, and if you are OCD remove the HDDS (after waiting a moment to make sure the HDDs are indeed no longer spinning). If not… (also after waiting a moment to make sure the HDDs are indeed no longer spinning) gently tip the unit up so the drive caddies are now ‘down’ and the rear of the unit is up in the air.

Grab ye olde electric screwdriver, or even just a manual one if you are OCD about stripping out heads of bolts) and remove the four recessed bolts on the back. These are the only screws holding the entire back to the chassis… as the entire back can be considered the fan sub-assembly. They are roughly located in each of the four corners(ish) of the back and are hard to miss. When removed place them in a safe spot.
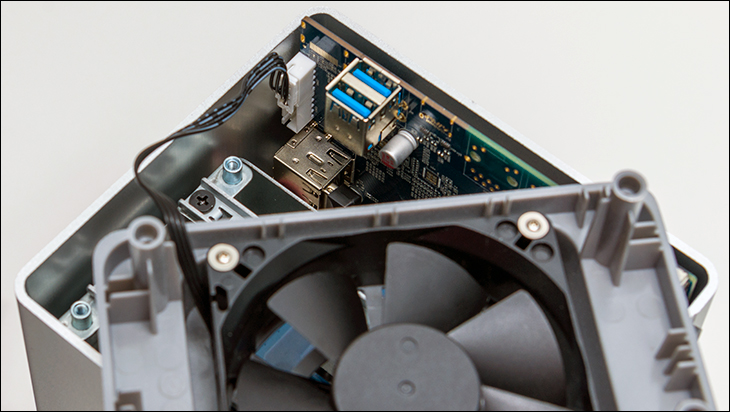
Then gently lift the fan sub-assembly up. Do not move it too far from the F2-210 as the fan’s cable is still attached to the motherboard. Hopefully, if you do move it too much the cable will just pop of the motherboard header… but Murphy’s law states you will probably rip the header right off the motherboard. So be careful. So just lift a small distance and then look inside the back. In the corner nearest the USB ports you will see the fan header. Grab it and gently unplug it. Don’t wiggle it or angle it out. Straight out or you will probably bend the header.

Now you can move the fan assembly away from the F2-210 chassis. Lay it down flat so that the ‘inside’ is pointing upwards to. Unscrew the four screws holding the fan to it. Then… reverse the process with the new fan. Just be careful when reinstalling as it is easy to strip out the plastic inside the posts that secure the fan to its metal exterior shell. For those interested, the 80mm fan that TerraMaster is using is a sleeve bearing Yeehon A8025L12S. Thus our recommendation of swapping it out for a better 80x25mm fan. Preferably dual ball bearing based.
Since there are no M.2 slots (and thus no need to swap out M.2 SSDs), or free PCIe slots, or upgradeable memory, or internal PSU… the only two things left to that can be replaced (easily) is the motherboard or the backplane. Both require a full tear down or a nearly full tear down.
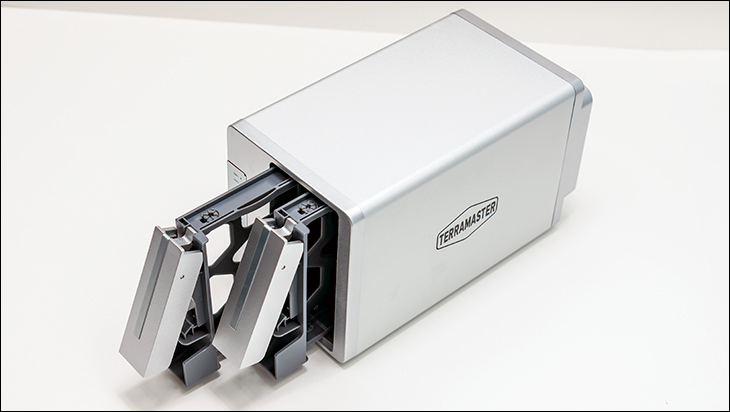
In either case, you will first have to do the above and remove the fan assembly (and unplug the fan). Unlike the above fan replacement, you will also have to remove both drive caddies (even if empty). Flip the F2-210 back into its typical orientation (with the front towards you and the back away).

Then grab the front of the unit with your fingers of one hand inside where the caddies reside and with your other tightly grip the metal exterior. Then slowly pull the internals out of the metal case. It will slide out as long as you do not giggle or wiggly. Straight out is the best.

Place the exterior cover to the side and out of your way.
