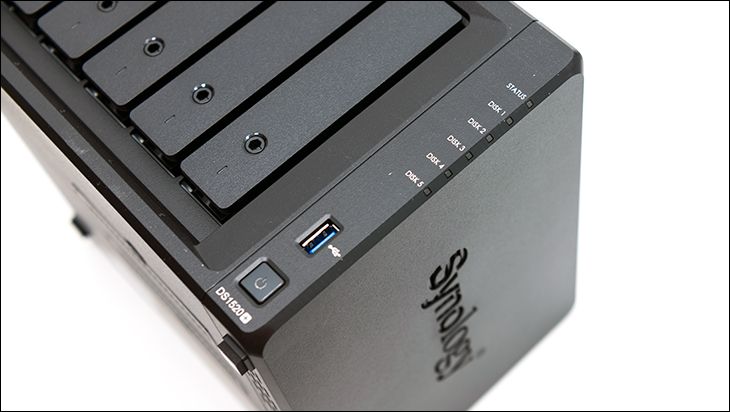
Over the years we have seen many a pretty face that turned out to be horrible when it came to internals. The sad fact of the matter is, many NAS appliances are designed and built to be sold, not used. With most of the engineering and RnD budget to making them pretty. That is sub optimal, but that is what novice buyers prefer (as they do not know any better). As such, it behooves us to tear down any and all NAS appliances we review and prove to our satisfaction (and hopefully yours) if a given model is actually good, or just good looking. In many cases this will be a warranty voiding process… so put another way “we do the stupid things so you don’t have to” is in full effect.
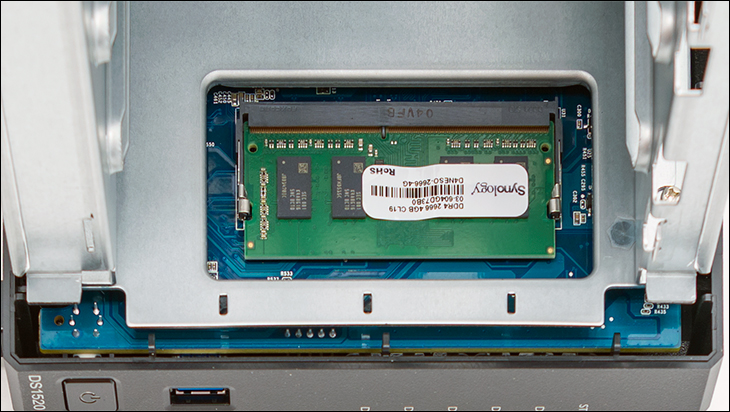
Like any good, and reputable, Network Attached Storage device, gaining access to the major internals is not a difficult process. Time consuming the further you go, but not difficult. First though, the most likely reason the typical owner will want to crack open their NAS is to increase RAM capacity. The DS1520+ already comes maxed out with 8GB of internal memory. If by some quirk you want to increase this, you do not even have to open the chassis up. Simply remove all five drive caddies and look inside. You will see the lone DIMM port right there in a nice, large cut out at the bottom. More importantly, since both channels are already populated for you… most will not even have to do this until a fan dies and dies out of warranty.
This brings us to our first note about the DS1520Plus. If you take the time too look up the RAM ICs actually used, you will find that they are an extremely good choice. To be precise they are Samsung K4A8G165WC-BCTD 8Gbit/1GB DDR4-2666 (CL19) based. CL19 is a touch slow, but we will take Sammy 2666’ers over the typical DDR4-2400s that many NAS appliances pair with their Intel Celeron based models. Color us impressed.
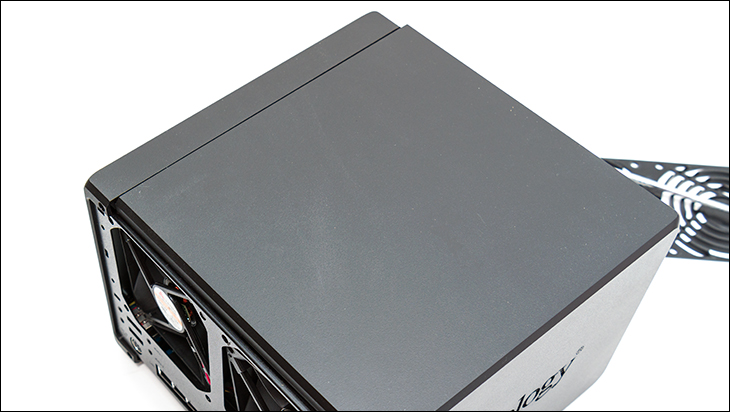
Swapping out a fan is also rather easy. One that uses a well thought out and thus (nearly) pain-free experience. First remove the exterior chassis. This is accomplished by removing two screws at the back and then gently – but firmly- tugging the large portion of the chassis forward / away from the rear IO ports. Then slide it off.

Next, remove the small rear plastic fascia and the eight screws covering both fans. A gentle tug (or persuasion via a spodger) and this will pop off.
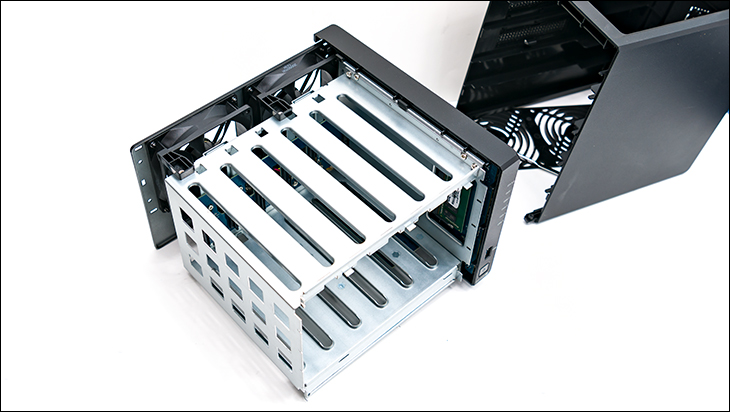
Turn the unit around, and you will see a plastic retaining clip that supports each fan and connects it to the metal chassis. Pop off the correct one. With this done you have a choice of the easy way, or the very easy way.
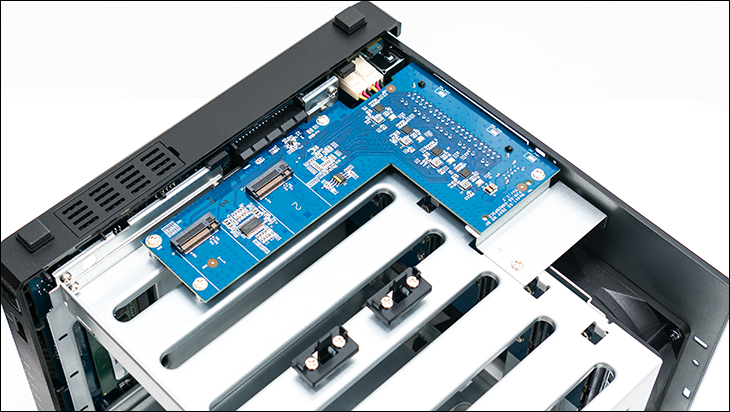
With the very easy way you turn the DS1520Plus around so you can see the M.2 PCB and gently disconnect the proper 3-pin fan header. Turn the unit around again so the M.2 PCB is facing away from you and then pull the dead fan towards you and out. Rinse and repeat in the reverse order for installation. You will probably need long and thin fingers to do it this way… or a pair of pilers and enough dexterity to not damage anything. The sticky wicket will be getting the new fans cable into the proper location so you can plug the darn thing in. Most will prefer the ‘easy way’ over this method.
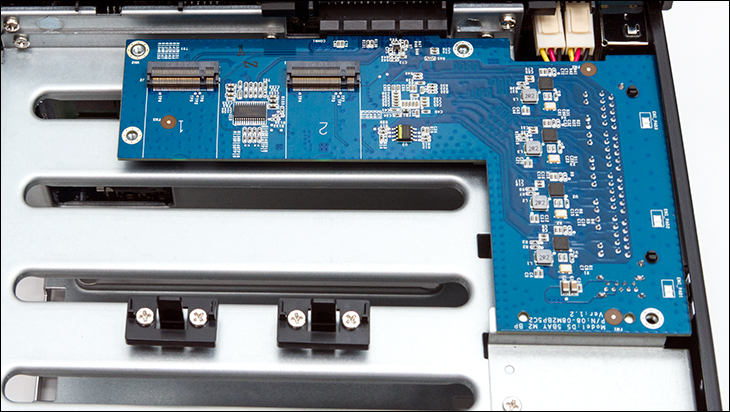
The easy way involves first removing the M.2 PCB. Spin the unit so you can see the M.2 PCB and take a close look. It is held in via four screws. When removed gently slide upwards and towards you to free it from the chassis and PCIe 3.0 slot. Be careful. This PCB also houses the USB and four 1GbE ports. So you may have to bend the ‘back’ of the chassis outwards. We wiggled it free with little issues. Just take your time.
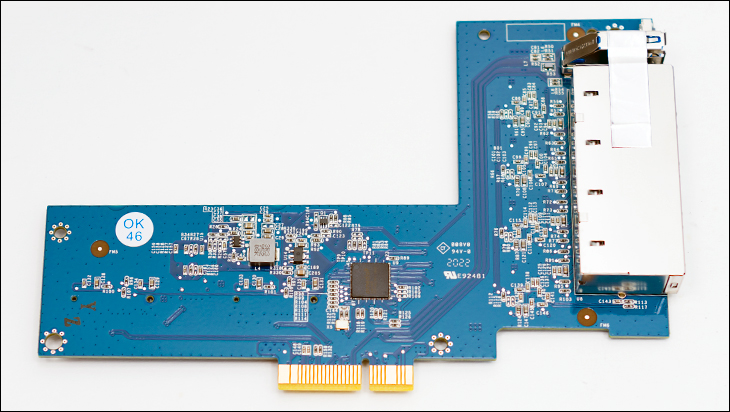
This comes to our second note on the design of the DS1520+. As you can see… this is not a x16 PCIe slot. It is not even an x8 PCIe slot. It is an PCIe x4. Each NVMe M.2 slots need four lanes, the USB 3.1 gen 1 and four NICs need another lane… so the DS1520Plus is five lanes short of what it needs. That is suboptimal.
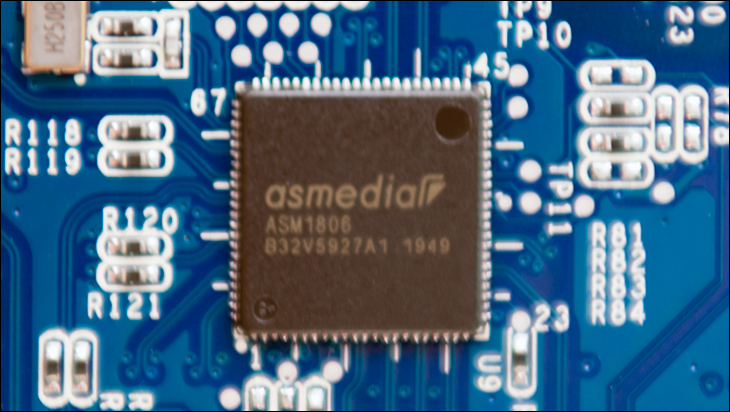
More sub-optimal is that housed on this PCB is an ASMedia ASM1806 PCIe 2.0 x4 bridge controller (https://www.asmedia.com.tw/eng/e_show_products.php?item=199&cate_index=168). Note the word PCIe 2.0 in the product literature. So… each lane is not 985MB/s it is 500MB/s further limiting overall performance. Put bluntly, there is going to be bottlenecking when all four NICs and both M.2 ports are populated. There is probably going to be bottlenecking when one M.2 port and one NIC is populated. To be fair, this should not be a deal breaker for all but high-performance storage enthusiasts… as we are only talking about 4GbE L.A.G. performance potential here. If this was a quad 10GbE or even quad 2.5GbE model we would be more concerned. It is just another thing to take into consideration before option for M.2 caching… as that is an outdated PCIe controller on a teeny-tiny x4 bus.
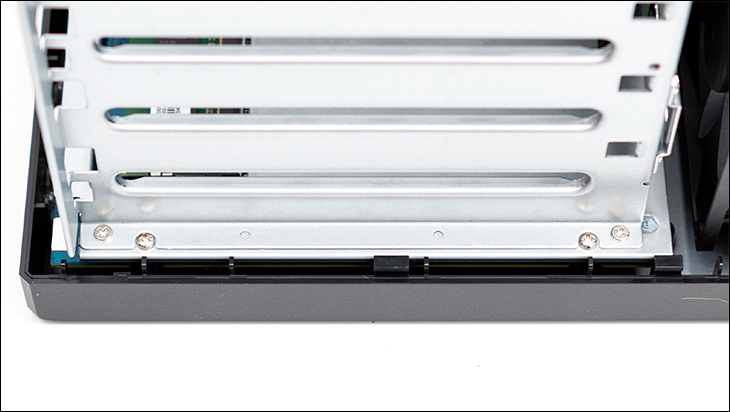
Moving on. The next likely culprit to die in a NAS appliance is the hard drive backplane. Vibrations plus soldered power and data connectors means they all eventually die. We have had ports go bad on HP, IBM, SuperMicro… it does not matter. Even high-end enterprise backplanes can and eventually will go bad. To pop the backplane off the DS1520Plus remove two screws per side at the base (looking from the side) connecting the chassis to the five bays. Then lift directly upwards to remove this chunk of metal from its PCIe port. When done, the backplane is then held in place with a few more screws. So all told this is a very, very easy process.
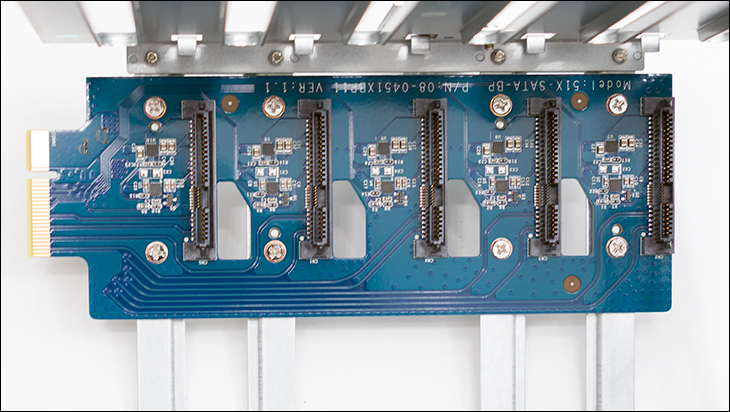
This brings us to our third comment about the DS1520Plus. The backplane is good. It is good because it is a ‘dumb’ backplane without any controllers on it. Fewer parts to die from vibrations the better. Also of note, this backplane uses SFF-8482 internal single channel connectors. Unlike typical SATA power and data connectors these are compatible with both SATA and SAS 6Gb/s drives.
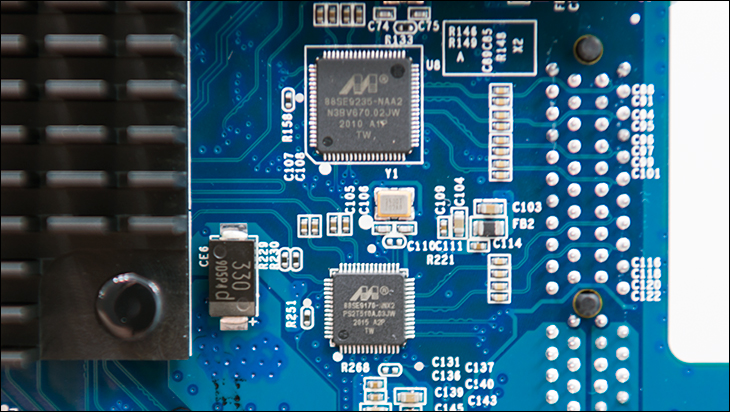
Sadly, zero SAS drives are on the compatibility list… as the PCIe to SATA bridge controllers is a combination of Marvell 88SE9235 (a four SATA port controller) with a secondary Marvell 88SE917x controller for the fifth bay. This is an… odd combination. One not needed but often used on 5-bay models (i.e. generally speaking both 4 and 6 bay models use a single controller but 5-bays use two). A single newer Marvell controller would handle all five natively and these dualies are one of the reasons 5-bay models are considered the ‘black sheep’ of most model line-ups. In our opinion single vs. dual controller performance differences does not really matter when talking about 1GbE models. On a 10GbE or 20GbE LAG’ed an argument could be made for why two controllers are worse. For these Celeron based models? Not so much.
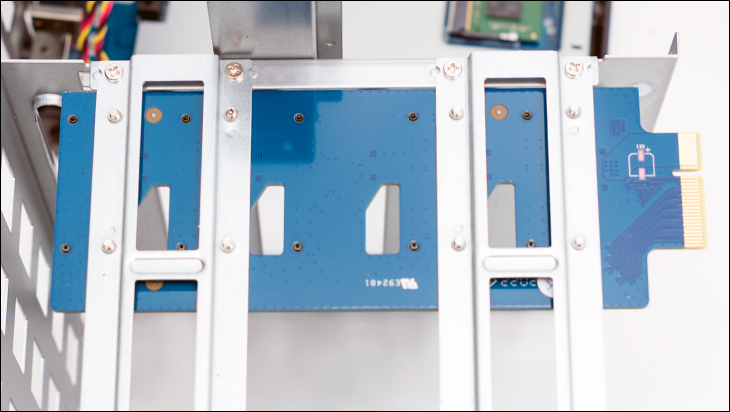
In either case, this controller combination does not work with SAS drives. If Synology had opted for say, a single SAS aware Marvell 88SE9485 (8 SAS/SATA ports abilities) this choice of backplane port would matter. It doesn’t. It is SATA only because the controller is all matters with 8482 connectors. It still however is a good backplane. We have lost track of the number of backplanes that have gone offline because of a broken solder joint on its integrated controller. No controller does not mean no problems, but it does reduce problems nicely.
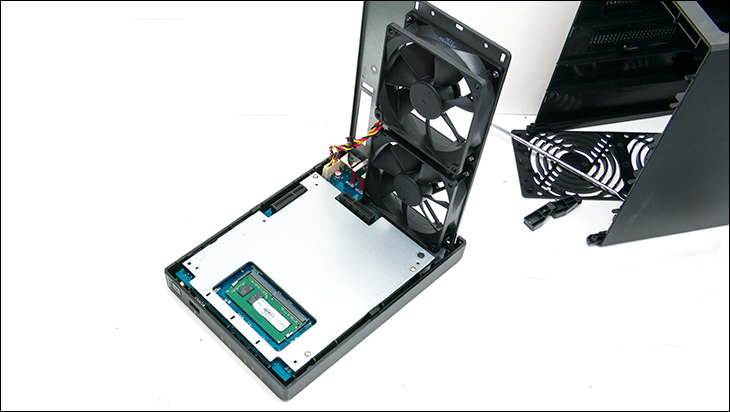
To gain access to the actual DS1520Plus’ main PCB requires the removal of a couple more screws. These screws are dual purpose as they lock the metal top plate in place and lock both it and the PCB to the chassis. As is with common with NAS appliances, the DS1520Plus uses an ‘upside down’ configuration with the actual main controller on the ‘bottom’ and the ‘top’ mainly used for the RAM ICs, DIMM, PCIe ports, power port and eSATA ports.

Before we flip it over, we have to beat a dead horse over RAM. This is not an entry level “Value” model. It is a ‘Plus’. One that uses soldered RAM ICs instead of a second DIMM slot. Just… why. What rational reason could a Plus model come with soldered RAM instead of a secondary DIMM slot beyond cost savings?
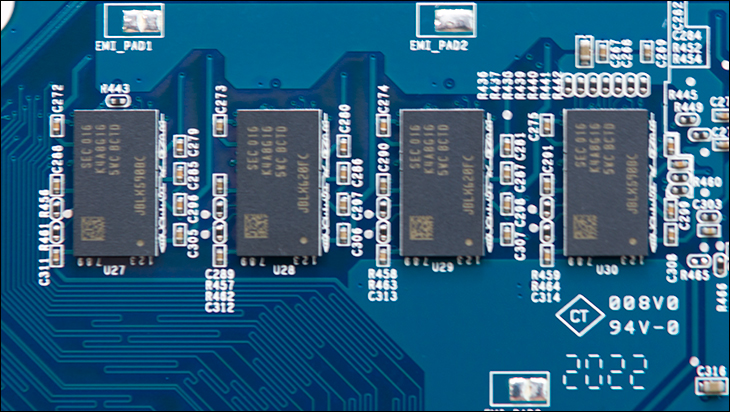
This is sub-optimal and is inferior to QNAP’s comparable solutions that does have two DIMMS. Thankfully it is not a deal breaker. If you actually need 16GB of RAM in a NAS you will also need more CPU horsepower than any Celeron can offer.

Speaking of the CPU, the Synology uses Intel’s 2019 refreshed Celeron “Gemini Lake” J4125 as its central processor. With a base of 2GHhz, and an all core max boost of 2.7Ghz and four cores of processing power it is actually peppy for its class (above 3K PassMark CPU score). Certainly not Xeon D-2100 series peppy, but thanks to DDR4 instead of DDR3, more L2 cache (now twice the amount at 4MB), and the extra 400Mhz/500Mhz (single/all core boost)… it is a nice little upgrade from the older J3455 Apollo Lake processor used in the DS1019Plus. So those interested in Plex transcoding, should not worry. This CPU can handle a couple transcoding tasks at the same time. More importantly, it does run cooler and consume less power than an arguably overkill Xeon processor would. So, it is a solid choice that blends power usage vs. performance vs. heat production nicely for its class. Just understand it is a 10watt TDP processor, not a 35-45 watt TDP like the larger XS+/XS models make use of.
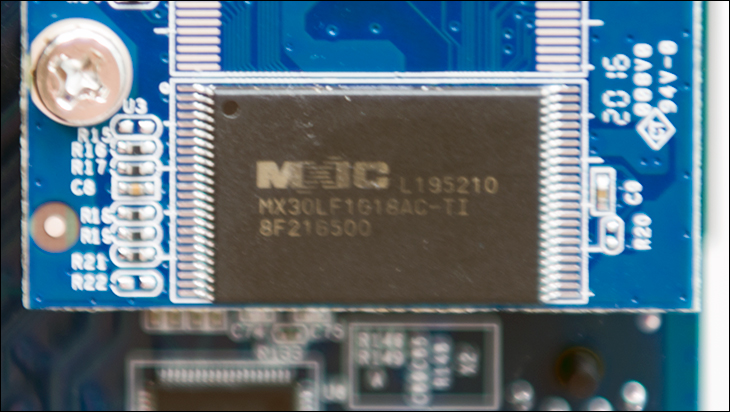
The last thing worth pointing out about the DS1520Plus is the use of SLC NAND. The included MacroNIX (MX30LF1G18AC-TI), 1Gbit (128MB) is old school cool and we have zero issues with its use. Yes, it is ONFI 1 not 2 or 3 or 4 rated, but what it lacks in shear performance it makes up for in durability. With 100K erase cycle rating and 4-bit ECC (per 512+16 Bytes) it is rated for 10 years of data retention. Good luck finding that outside of the handful of SLC NAND options available… and let’s face it. This is a NAS appliance. Boot up performance is way, way down the list of priorities. We just wish they had used two of these NAND IC’s to double theoretical performance on tap.
Overall, the DS1520Plus is a very decent offering from a hardware perspective. It does make a few interesting design choices, and certainly has a couple ‘warts’, but it is not more than just a pretty face. Not perfect, but decent for its class.
