It should come as no surprise that the EVGA CLC 240 has a very good, very easy, and very straightforward installation process. Some of this is because EVGA has factory pre-installed the fans, some of this is because it is an Asetek gen 5 AIO (with years and years of experience baked into it). Some of it is simply because the installation procedure for the EVGA CLC also, just like nearly all Asetek gen 5 AIOs, comes with the Intel top bracket preinstalled and has clearly labeled all the little bits and pieces needed for hardware installation. Put another way, even if you have recently installed any Asetek All In One water coolers, the EVGA will be noticeably faster and simpler to install.
Now on the specifics.

Like most AIOs the first step in the process will be to prep your motherboard to accept the new CPU cooling solution. Obviously, this will mean first uninstalling your existing CPU cooler, cleaning the CPU IHS of TIM, etc. etc. With that accomplished the real first step will quickly diverge depending on which type of CPU you are using. For Intel users the included plastic backplate will be needed. For AMD the motherboard’s metal backplate will be used… but you will have to remove the ‘stock’ top plastic AMD mounting bracket(s). Further making things tricky, is for Intel users the backplate will only be needed for non-HEDT systems. If you have an Intel socket 20xx system you basically can skip this step all together as the EVGA CLC 240 uses both the Intel stock backplate and these motherboard’s dos not come with a top bracket preinstalled. Basically, this first step will vary from easy to very easy.

For most Intel based system users the backplate will be used. This backplate is a multi-socket backplate that covers numerous Intel socket types. If you play careful attention to the four integrated posts you will notice they can slide in or out. For 115x users you slide them inwards toward the center of the bracket. For 1366 users… slide them outwards. While this backplate is plastic, it is thick plastic that really does not have much stress applied to it (as it just has to handle the waterblock’s weight). More importantly the posts are metal so stripping a post is an extremely unlikely event.

The next step is to place the backplate (if needed) so that all four of these posts go up and through their proper holes in the motherboard. At this point all three ‘paths’ converge (for a moment) as then you have to screw in the proper standoffs to the backplate (be it the EVGA CLC’s or the motherboard’s). Once again there will be different parts used depending on which socket type you use… but they are all properly labeled. The only hitch is the Intel HEDT and Intel mainstream posts all come in the same baggy. The smaller posts are for HEDT, the longer are for 11 and 13 series Intel socket types.

At this point Intel users are good to go and can go directly to mounting the waterblock to the motherboard.
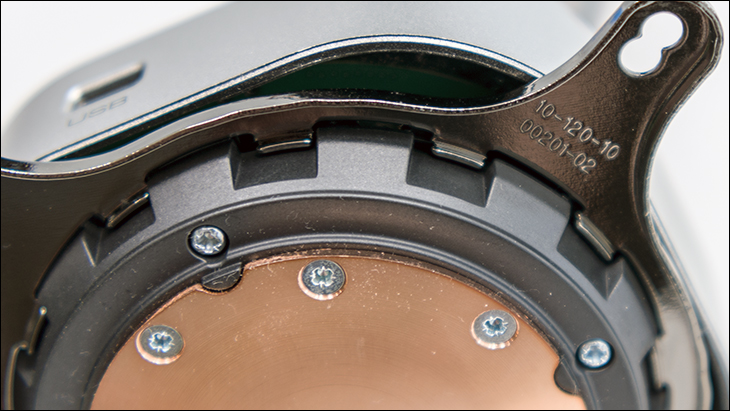
AMD users though will first have to remove the factory installed Intel metal top-bracket from the waterblock. This is actually very easy and will not require any tools. All you need do is flip the block over so you are looking at the copper base. Then push in and gently twist the bracket counter-clockwise. You do not have to turn it much, just enough so the thick plastic teeth on the bottom of the block disengage from the metal tabs of the bracket.

Then slide it off, install the AMD bracket and reverse the process.

The only trick to doing this right the first time is to make sure you start with the AMD bracket slightly offset – at about the 11 o’clock position. Then twist clockwise.
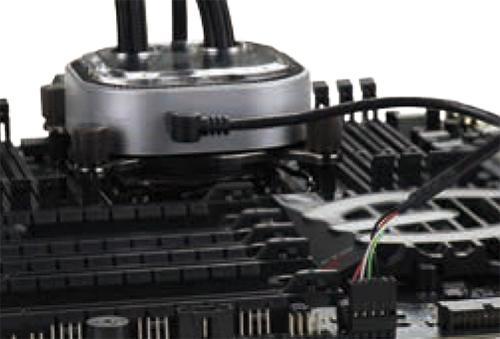
Before mounting the block to your motherboard one decision has to be made. It regards inlet and outlet orientation on the motherboard. Now, since the top mounted tubing pivots in place around a set axis worrying about kinking the tubing during installation is almost moot. The actual issue is whether you want the tubes positioned towards the back, front, top, or bottom of the case. This really comes down to – pardon the pun – a case by case basis. For larger cases with a large ‘gap’ between the motherboard and the top of the case may be having the inlets towards the back will be most optimal. For others, the opposite will be true. For most, the deciding factor will be the location of a free USB 2.0 header. For most motherboards, this will mean having the inlet/outlet ports positioned towards the top of the motherboard and the USB header towards the PCIe slots. There really is no ‘wrong’ way to do this, but most will probably want to pay careful attention to the length of the included USB cable and where the nearest USB 2.0 header is located. If you want you can easily try multiple orientations before mounting the block, just be careful to not touch the block to the CPU or you will have re-apply TIM (that is not included).
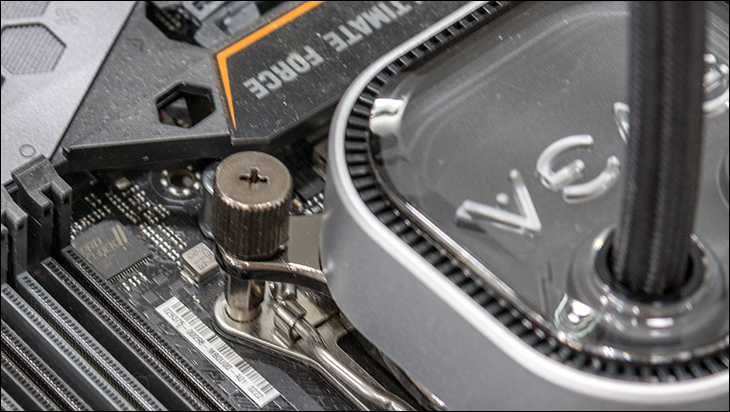
In either case, the next step is secure the block to the motherboard via the four nicely sized nuts. These nuts are both knurled and come slotted in the top for a screwdriver.

We would recommend tightening them one twist per, in a nut 1-nut 4- nut3 -nut 2 ‘zigzag’ methodology so as to reduce unnecessary stress on the CPU. Keep doing this 1-4-3-2 tightening process until are all hand tight… then break out a screwdriver. A screwdriver not included with the accessories.
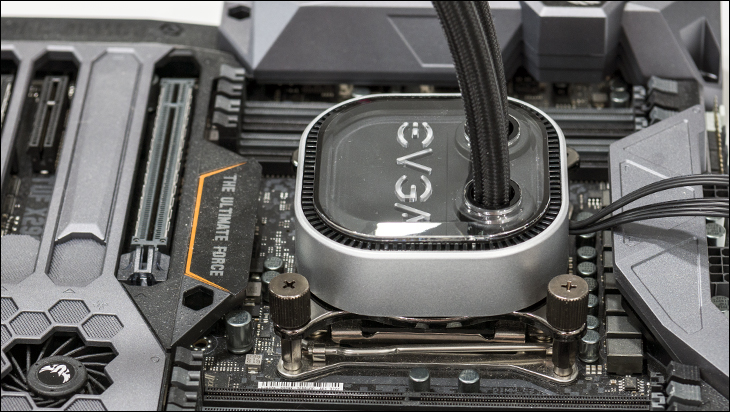
Then it is time to mount the radiator and fans. As mentioned previously this is almost absurdly easy compared to typical Asetek based AIOs… as the fans are already mounted for you. Just make sure to use the small bolts (and a washer per) so you do not mess up the radiator when mounting the rad to the top of your PC case.
At this point all that is left is to install the USB cable, plug in the various cables… and enjoy.
Overall the EVGA may not be perfect, or rather perfectly free of hassle factor, but it is well above average. So above average, it is amazing that is also less expensive than most Asetek based units. Color us impressed.
ADVERTISEMENT
EVGA CLC 240 Review
ADVERTISEMENT
$155.58
out of stock
9 new from $154.31
3 used from $143.72
as of February 3, 2026 3:12 pm
Amazon.com
ADVERTISEMENT
Page 4 of 12
ADVERTISEMENT
Leave Comment
