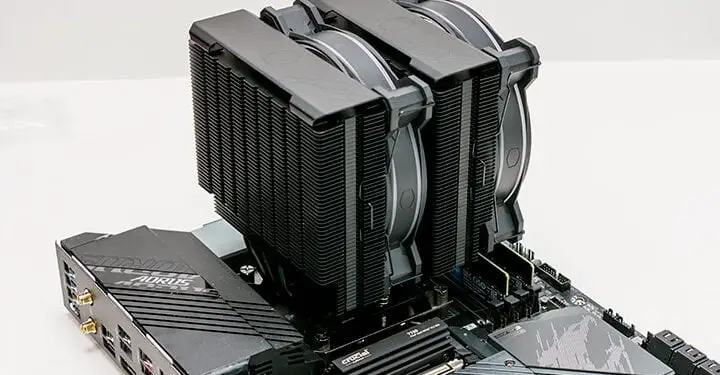
When thinking back to the times we used the Cooler Master MasterAir MA600-series a few things do stick out. First and foremost, it was not a hard endeavor by any stretch of the imagination. Sure, blindly lining up those two integrated bolts was a bit tricky… but considering we always seat and then twist the cooler before actually bolting it in place it was not that much more difficult than say a big single tower cooling solution like the various Scythe’s we (love to) use. The next thing that sticks out was the fact that for a big… big cooler we never really ran into any compatibility issues with oversized RAM or oversized motherboard VRM heatsinks – even when said heatsinks surrounded three sides of the CPU socket.
Sadly, going hand in hand was the fact that it was too bloody tall to fit in many cases we like to use. Which in turn did sour us to the MA600-series fairly quickly. After all, it can be a joy to install. Look like the premium cooler it is, and even offer (for its time) very decent cooling… but if it won’t fit inside a given builds PC case it is not a cooler we would blindly spec’ out for future builds. That is why when we do opt for air over water in high end builds… we usually opt(ed) for a Thermalright Peerless Assassin 120. Note the lack of ‘SE’ at the end of that statement… as the SE is not an improvement in any shape nor form over the harder and harder to source “original”.

This is where the Cooler Master Hyper 622 Halo enters the chat. This is a big cooler that belies its size. It seriously is a big cooler that is just as easy to install as its smaller sibling the Hyper 212 Halo. In fact, thanks to the fact that there are fewer steps to the installation, one could make a very good argument for why the Hyper 622 is easier than the Hyper 212 Halo. Bluntly stated, by factory installing the two top brackets to the base, and factory installing the two captive spring bolts this is an extremely easy to install cooling solution. One that is pretty much best in its class when it comes to user-friendliness. So much so this is an excellent option for novices who want to install their first aftermarket cooling solution… but don’t want the end result to lack in the performance department either.
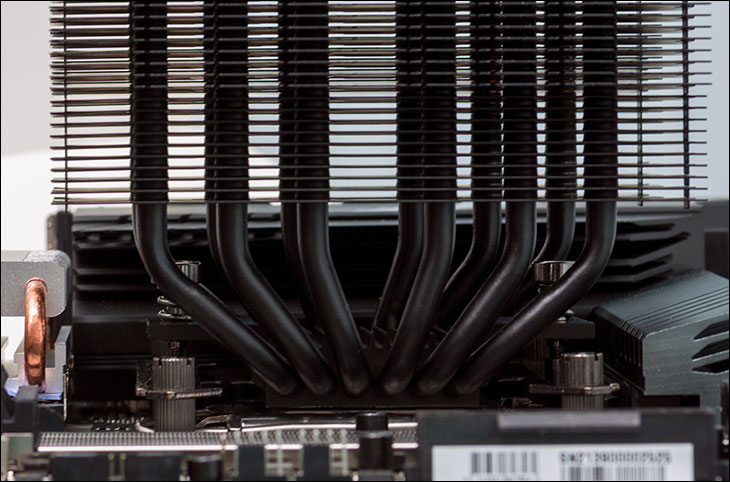
Equally impressive is while there are two cooling towers vs. one to take into consideration when planning the bill of materials for your build… it pretty much is a non-issue. By starting a generous 40 millimeters off the motherboard, and then further cutting in the bottom fins another ~20 mm, RAM height considerations and even motherboard heatsink considerations are almost a non-issue. The only potential issue that may catch you by surprise is if you opt for a mega-sized heatsink for your NVMe M.2 SSD. Even then fairly tall M.2 heatsinks like an Acidalie style, or even Thermalright HR-10 / HR-10 Pro should easily fit. Only ones like the HR-9 Pro may or may not play nice with this big boi CPU cooling solution… but considering the TR P.A. 120 usually plays nice with the HR-09 Pro we are talking edge cases here and are nitpicking to the nth degree. In fact, the only reason we mention M.2 heatsink height might be an issue is that is about the only secondary compatibility issue we can think of. It just is that nice a cooling solution.
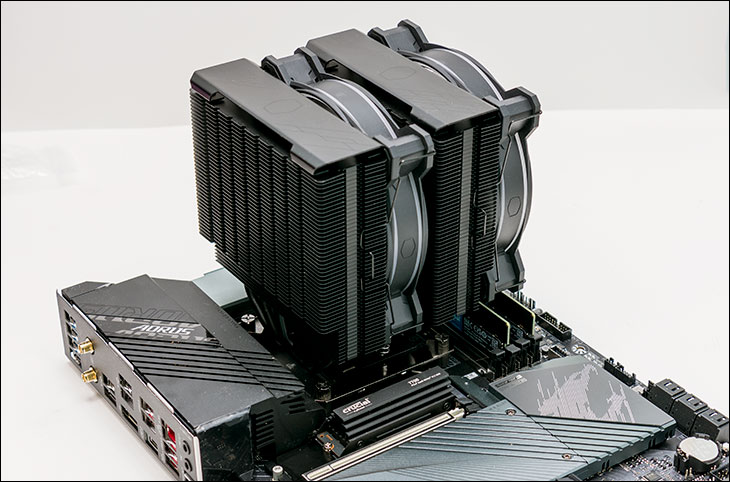
Of course, it goes without saying that this is still a (fairly) tall cooling solution so you need to make sure your case can accommodate coolers that are 157mm tall. So, cases like Antec’s ‘One’ will not play nice with it. Neither will CM’s own MasterBox NR200 (both of which only accept 155mm CPU coolers… and a PA 120 SEs barely fit in them); however, CM’s other ‘small’ cases like the Silecnio S400, TS300 or Q300 will accommodate the Hyper 622 Halo. Corsair’s Carbide Spec 02 will also let it (barely) fit. More importantly, most modern ‘mid-tower’ cases allow for 160mm tall coolers so 9 times out of 10 you can blind buy the Hyper 622 and expect it to work. Just take the moment to look up the CPU cooler limitations before you buy either component.

Please do not get the wrong idea, the lack of issues with the Hyper 622 is pretty much what one should also expect from any modern dual 120mm tower cooling solution. For example, the Thermalright PA120 is only a smidgen more difficult due to the fin arrays being closer to the motherboard but will fit in a couple more cases; whereas the DeepCool AK620 is a smidgen better with even more height before the fin arrays start… but negates most of this by being taller.
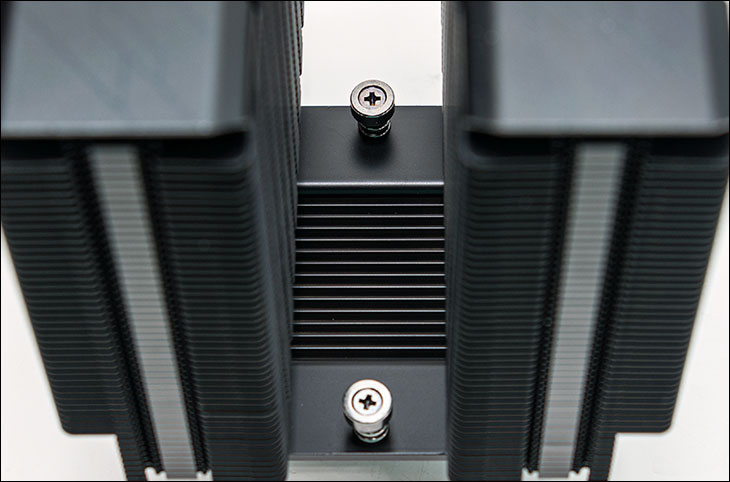
No what sets the Hyper 622 apart from the clones is the fact that the mounting hardware is rock solid reliable. Noticeably less flex in the steel top brackets (vs. chinseium top brackets) more than makes up for the fact that Cooler Master uses a polymer backplate vs. the (chinseium) alloy backplate the ‘other guys’ use. When one than mixes in the noticeably more robust bolts that actually hold the cooler to said top brackets, we have zero concerns over even the most Hammy McHamFist of novices ruining any of the mounting hardware. Something we can not say about DeepCool (recently we nearly stripped out the Philips head on one of the captive bolts when upgrading a AMD 5000 system to an Intel 13th Gen for a client)… let alone Peerless Assassin 120 SEs (which sometimes come with downright fragile slot headed bolts).
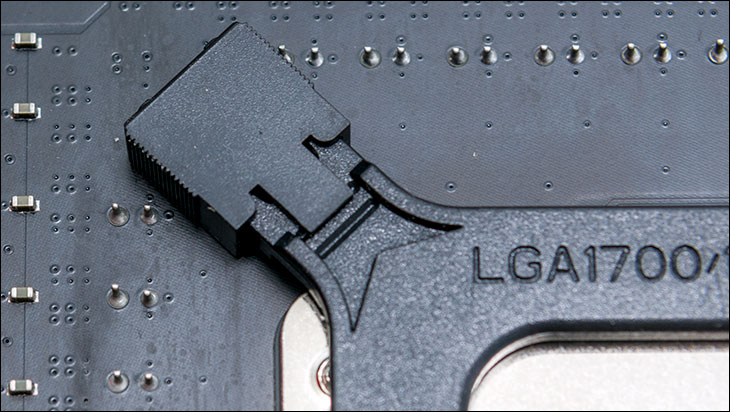
As for the actual installation process, place the polymer backplate in place (so that the posts go up through the holes in your Intel system w/ 1700 systems having the posts towards the outside edge, 1200/115x is in further… and AMD rigs use the OEM backplate). Then screw in the four standoff bolts (once again make sure to pick the proper Intel for Intel systems… and the AMD bolts for AMD. When in doubt its easy to tell them apart as AMD bolts will not thread onto the Intel backplate posts and the Intel bolts are too small for the AMD OEM backplate).
Install the two brackets, lock them in place with the included nuts. Apply some TIM to your CPU. Remove the center fan from the Hyper 622. Line up the two integrated top bolts… and using ¼ to ½ turns per side secure it in place. Reinstall the center fan. Plug both fans into the include dual headed cable. Plug that cable in, plug in the included RGB header… and enjoy.
Once again this is an easy and confidence instilling installation process. One that you can trust to ‘just work’. Color us impressed.
