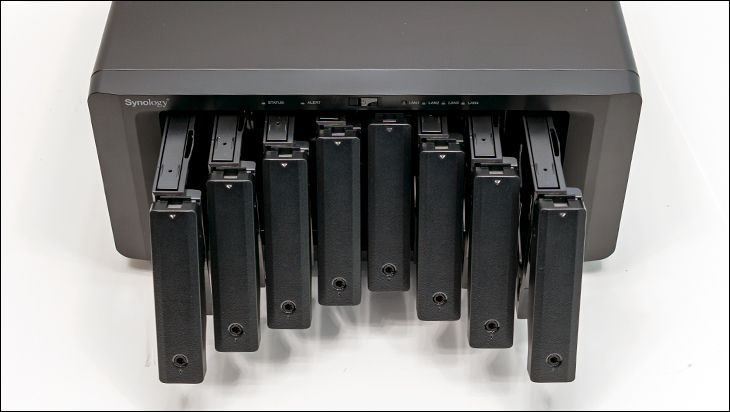
When it comes to the internals of the DS1821Plus one can basically consider this the ‘full version’ of the DS1621Plus. One where decision decisions made in the 1621+ make a whole lot more sense when used in an 8-bay model. That is a good thing… as the DS1821Plus is firmly in the easy to service end of the spectrum. Yes, there will be a few finicky spots. Yes, you are going to have to remove a lot of screws if you plan on doing ‘end-user service and replacement’ level maintenance. Quite honestly, the larger form-factor combined with sensible layout means that, unless you are going to be replacing the backplane board, even a novice will be able to do it.
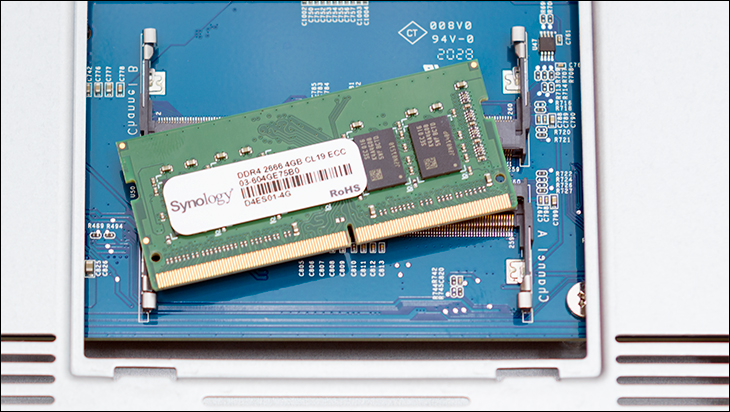
Let’s go in order of likelihood. The most likely reason the typical owner will want to crack open their NAS is to increase RAM capacity. The DS1821+ only comes with one memory channel populated and only 4GB total. That is a bit on the thin side, to say the least, by modern standards. Thankfully one does not even need to crack open the case to upgrade the ram. Power it down, and if you are OCD remove the HDDS (after waiting a moment to make sure the HDDs are indeed no longer spinning). If not… (also after waiting a moment to make sure the HDDs are indeed no longer spinning) gently tip the unit on its side. Grab ye olde electric screw driver and remove the two screws covering the DIMM access panel. Pull off. Install the new DIMM (or pull old and then install the two new ones). Reverse the order and you are done. Less than difficult a task to say the least.
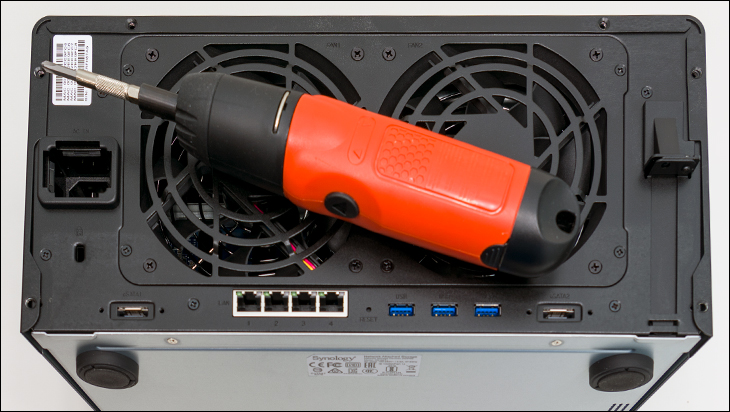
Swapping out a fan is also rather easy. One that uses a well thought out and thus pain-free experience. First remove the exterior metal covering from the chassis. This is accomplished by removing the six screws holding it in place. Then gently – but firmly- tugging the metal covering forward / away from the rear IO ports. Then lift it up and out of the way. Once again, there are six screws to be removed not four. If you do not see them right away, run your finger along the entire edge of the ‘C’ shaped metal covering. You will find them – one low, one high, two center(ish), one high, one low.
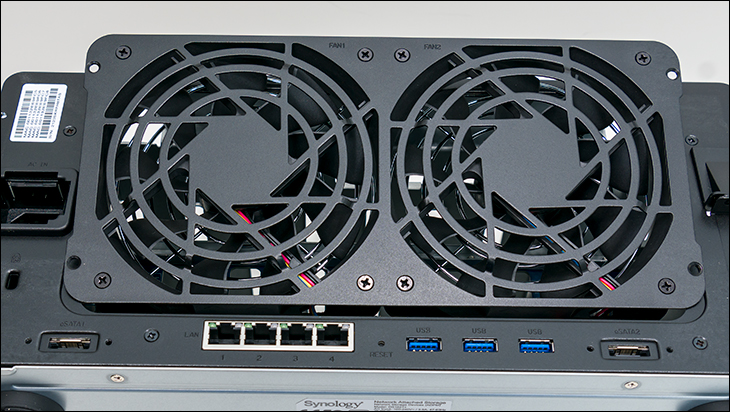
Next unscrew the four screws holding the DS1821Plus’ fan sub-assembly to the sub-frame. These are not the eight that hold the fans in place. They are the four other screws… the two are nearest the recessed power port (one high, one low… neither highest nor lowest here, just nearest to power port), and two are nearest the PCIe slot (one high, one low… neither highest nor lowest here, just nearest to PCIe slot).
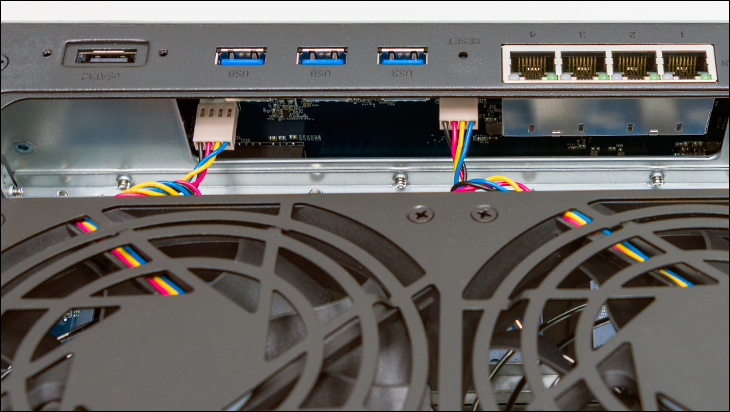
Unlike with the DS1621Plus, this sub-assembly will come right out. Do not move it too far from the DS1821Plus as the fans are still attached to the motherboard. Hopefully, if you do the cables will just pop of the motherboard headers, but they may bend the headers first. So be careful. So just a small distance and then look inside the back. You will see the two fan headers that need to be unplugged. Unplug them both. Now you can move the assembly away from the DS1821Plus. Lay it down flat so that the ‘inside’ is pointing upwards to you (and you can see the chrome safety wire over each fan). Unscrew the four screws holding the wire mesh, gently flip the entire assembly over, and unscrew the four screws holding the fan to it. Then… reverse the process with the new fan. Bam. Done. No need to be a contortionist or worry about finger cramps.

Arguably the next likely change that will require ‘end user engagement’ will be to install (or replace as NAS appliances eat NAND for breakfast, lunch, and dinner… with snacks every 30 minutes in-between meals) a M.2 drive (or two). Simply pull all the hot-swap drive caddies from the unit, look inside and you will see the two M.2 ports. M.2’s in the DS1821Plus are installed port side down, and are meant to be inserted at an angle (bottom in, top out). Then when in their port push at the top until the other end is secured by the plastic clip at the top (think proper laptop memory insertion for a frame of reference). Have at it. Unfortunately, the M.2 to PCIe adapter card is a PCIe 3.0 single lane card. What this means is total speed is limited to 1GB/s (technically 985MB/s)… or less than SATA speeds per drive. No wonder Synology only allows them to be used as cache drives.
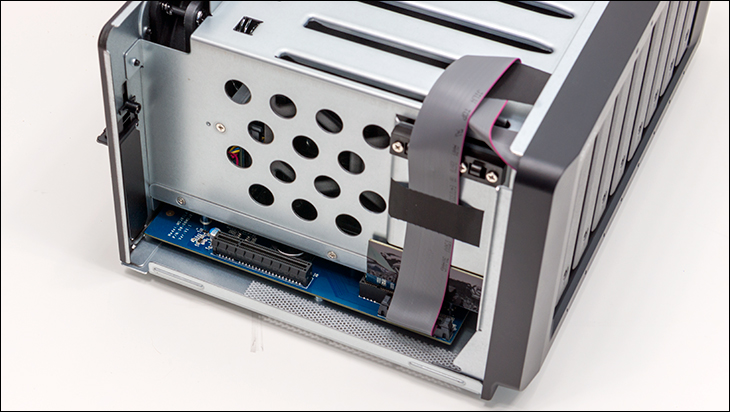
Installation of a PCIe Add In Card follows the same basic starting procedure as in nearly Synology NAS. Pull the metal cover off the unit, remove the blanking panel (and its screw) from the back… and have at it. Just be aware that you are not going to have tons of room for large AICs. Length yes. Width and height? Not so much. Single slot, half height devices only.
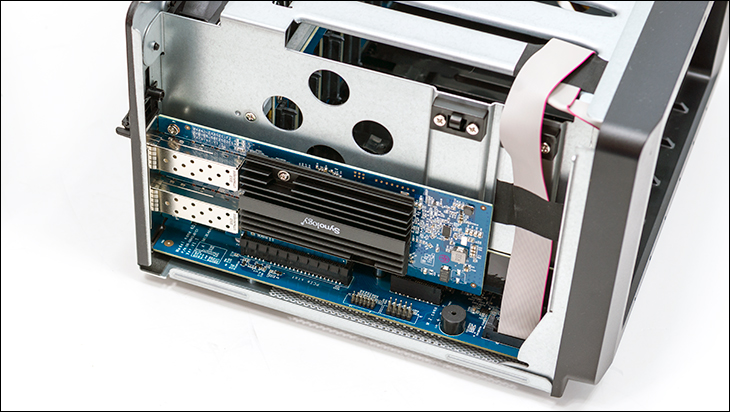
Also please be aware that while it is a x8 form-factor PCIe 3.0 slot… it is limited to 4 lanes (or 3.938GB/s) for anything and all attached to it. Thus, if you do use this PCIe slot for a M.2 adapter… only one M.2 will run at full speed (assuming you are not using PCIe 4.0 based NVMe drives). Two will run at 1.97GB/s per drive, and if you do use a dual M.2 w/ 10GbE NIC (1.25GB/s) all three devices will be sharing this 3.938GB/s bandwidth. It also should go without saying that a 40GbE Network Add In Card… will not run at full 5GB/s speeds (but 25GbE’ers will). On the positive side, the PCIe and M.2 slots are directly attached to the AMD V1500B controller. A controller that offers 16 lanes of PCIe 3.0 goodness. Which is a vast improvement over Intel Celeron J4000-series which only have 6 lanes… but is noticeably less than the 32 the Xeon D-1500 series offers (as an aside the AMD V2000 series will have 20 lanes of PCIe on tap).

On the positive side, if you do find a slot actively cooled PCIe card that will work in this device, it will suck fresh air in through the ventilation slits on the side panel as that nice ‘Synology’ stamping in the side is more than a pretty face. Instead, it is mesh covered venting for the internals and somewhat aligns with where a PCIe’s cooling fan will be. This attention to detail really shows that Synology actually takes the time to get the little things right. With that said the mesh is not removable… so over time you are going to have to clean it with compressed air. Not precisely a hardship, but certainly room for improvement.

Moving on. The next likely culprit to die in a NAS appliance is the Power Supply. In this regards the DS1821Plus shows its S/MB roots nicely… as it is a real, legit internal PSU. Specifically, it is a Delta DPS-250AB-89B. AKA the same used as in the DS1621Plus. This is not a bad thing. Far, far from it. Where it is based on an older design (and why it is ‘only’ 80Plus Bronze) it will be more energy efficient than when used in the DS1621Plus, as it has two more HDDs to power. In either case, it is a widely used, widely respected PSU series from a company that knows how to do server grade PSUs ‘right’. So, it should last a long, long time.
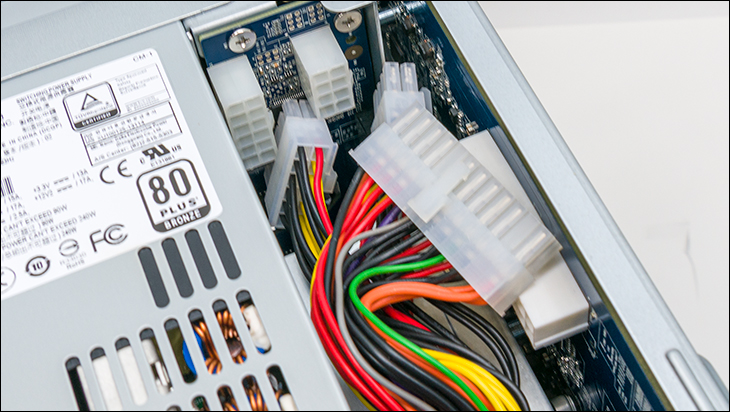
If perchance it does die… it is an easy swap. Pull the metal top cover, unplug the three PSU cables (24 mobo, oddball 12pin and 8pin), unscrew some screws, remove a bracket, clip a few cable ties, yank PSU, replace and then reverse the procedure. Just understand that not every Flex PSU will have the proper cables (and pinout configuration) as Synology PSUs can be… quirky in their pinouts and power cable requirements.

The other fly in the ointment is the included 40x20mm Delta fan is loud when running full tilt boogie. At typical loads… not so much as to be terrible. It is internally controlled and in fact it’s pretty decent at staying mild(ish) mannered (by 1U FLEX PSU standards) under a typical load – hiding it inside the chassis really does cut down on its noise compared to it being outside the case. Just understand that by their very nature Flex PSUs are typically louder than larger PSUs… as their design shows their server roots more than they ‘should’. As such, it is going to be audible over the two 120mm fans and will get louder if the PSU needs the cooling.
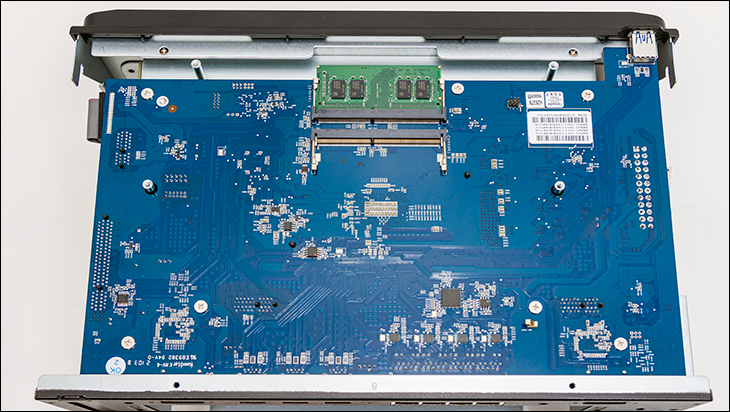
If you are A) unlucky enough to have the motherboard die out of warranty (aka the dreaded ‘OOW’) and B) lucky enough to find a replacement (we typically buy used off (fl)e(a)Bay to salvage them), the motherboard replacement will not be a difficult task. A bit trickier that the above options, but doable with a bit of patience. First though, we do like the setup and design of this moderately large motherboard. It is extremely easy to get to… as the entire bottom of the DS1821+ is its cover panel. Mix in well thought out ventilation that uses the two rear fans to suck air up and over the mobo (and its moderately large heatsink for the V1500B) and it is decent. A more optimal configuration would have been to have the motherboard behind the drive caddies (like in a rack NAS) so that a taller 1U or 2U heatsink could have been used, but certainly good enough.
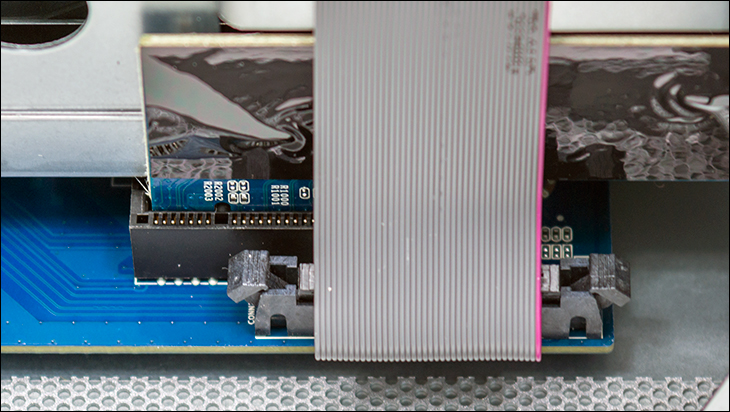
With that said… novices may think it is as easy and removing the bottom panel and then yanking the mobo out. The reality is… that is a recipe for disaster. We personally would start by removing the drives, and top panel. Then the back panel + fan assembly (and removing the two fan cables). With all that done we then would turn the NAS so that the PCIe ‘side’ is facing us. See the ribbon cable in the front corner? The one covering/ hiding the M.2 daughter card? That cable is not just held in place with friction. Instead, it has two clips that you need to release before gently lifting the cable up and off the motherboard. If you miss this ‘hidden’ clip… you are going to have a bad day. The same is true if you forget to unplug the 24pin Power cable on the other side of the NAS. So do both before moving on.

With both the ribbon cable and the power cable uninstalled, we would then gently flip the unit over, unscrew the bottom full-size metal covering and get down to actually removing the motherboard. First though, as you can see the ‘bottom’ of this motherboard is rather clean it its layout. All you will find is the two DIMMS at the front… and the Network Interface controller subsystem. Paying careful attention, you will find the exact same configuration Synology has been using on their 4-way NIC enabled NAS appliances for quite some time now. To be precise you will find four Realtek RTL8111H 1GbE Network Interface Controllers all tied to a ASMedia ASM1806 two lane downstream, four lane upstream PCIe 2.0 controller. This combination is a direct carry over / legacy of when Synology were using lower powered Celeron processors… which had at best only 6 PCIe lanes of bandwidth. Furthermore, it is a downright odd combination and choice of components for this next gen NAS. The AMD Ryzen Embedded V1000-series of SoC’s come with native support for not one, but two 10GbE NICs. Synology literally had to go out of there way, and spend more money, on not including two 10/5/2.5/1/0.1 GbE connections. Yes, that is frustrating. Eight modern high performance, high capacity, hard drives can indeed saturate a 10GbE bus… but it is a bigger bus than 1GbE! To be brutally candid, if you only ever plan on using your NAS on a 1GbE network, the only time this model makes sense is if you plan on having a high number of users at the same time… or doing 4+4 configurations (I.E. with four drives per array in either a mirror configuration or dual ‘drive letter’ configuration). If that sounds unlikely or a waste of storage space to you, we would suggest that the DS1621Plus is a more optimal use of your money.
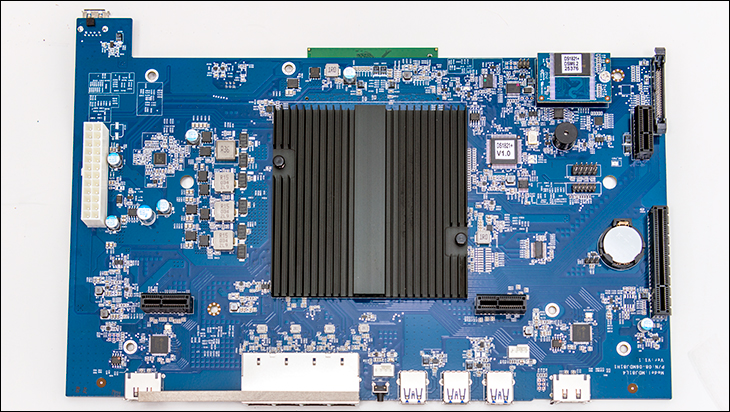
Moving on. At this point of the removal process, one should remove the remaining screws and then gently lift the motherboard up from the sub-chassis. Directly up is best. You will be disconnecting three PCIe connectors as you remove the motherboard so go gentle and go slow. Bam. Done. Now reverse the steps with the replacement motherboard.

Taking a close look at the ‘top’ side of the motherboard we were once again impressed with the clean and well thought out layout of this board. We have already gone over the PCIe x8 (which is really a x4) and PCIe x1 slots, the third is for the drive backplane. It is a true PCIe 3.0 x4 slot, and the backplane is a ‘dumb’ powered backplane. One that feeds power to the hard drives and the motherboard via the PCIe slot (which in turn is fed via the 12 and 8 pin power connectors. As an aside the backplane uses a NXP PCA9555A controller for i2c / system management bus communications and control of the HDD).
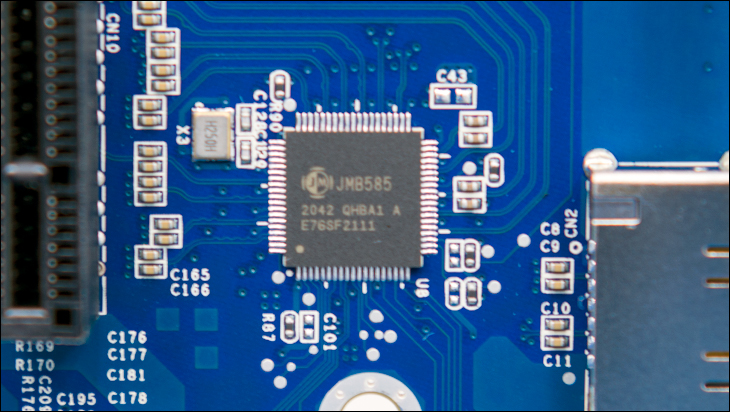
Acting as a ‘man in the middle’ between the V1500B and the PCIe subsystem is a pair of JMicron JMB585 PCIe (3.0 x2) to (5) SATA controllers. While we are not a fan of any SATA only controllers in 8-bay NAS models, Synology likes using this particular IC. They like it because it is inexpensive, ‘good enough for SATA’ and a pair of them allows up to ten SATA devices to be connected at any time – with each IC covering four of the drive bays, and one for the eSATA ports. For its class it’s a decent enough SATA only controller, we just think it might be time to upgrade their design choices for the next generation of actually powerful SoCs like the Ryzen Embedded Vx000 series.
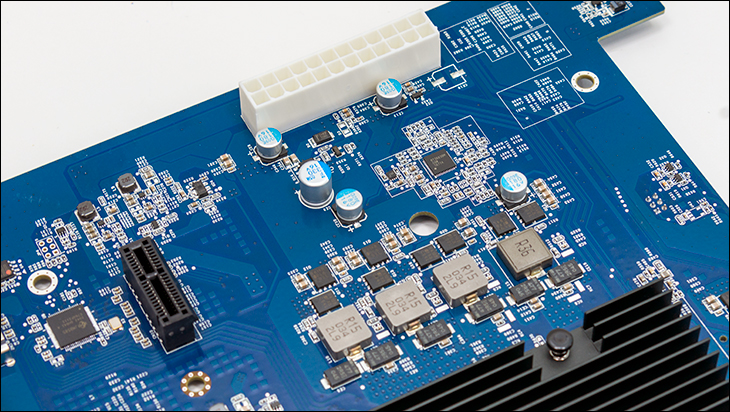
Moving on. As you can see this motherboard uses a 3+1 power delivery subsystem for the CPU (3 channels) and the memory (1 channel).
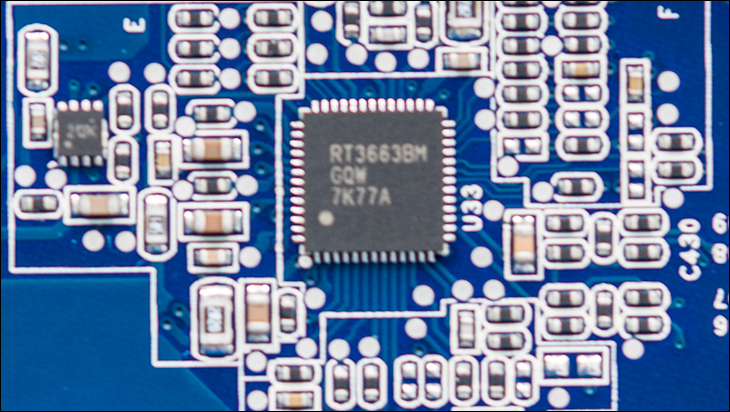
The VRM controller is a Richtek RT3663BM 3+2 digital controller that is starting to become popular with AMD based mobile devices. Considering the fact that no one in their right mind will be doing any ‘memory overclocking’ the lack of a secondary phase for the memory falls firmly into the ‘meh’ category. The same is true of the use of Kemet KO-Cap polymer capacitors and ON Semiconductor Mosfets. Good enough for a piddly little 16watt TDP processor… and we certainly take zero issue with the use of Nippon / United Chemi-con poly caps.
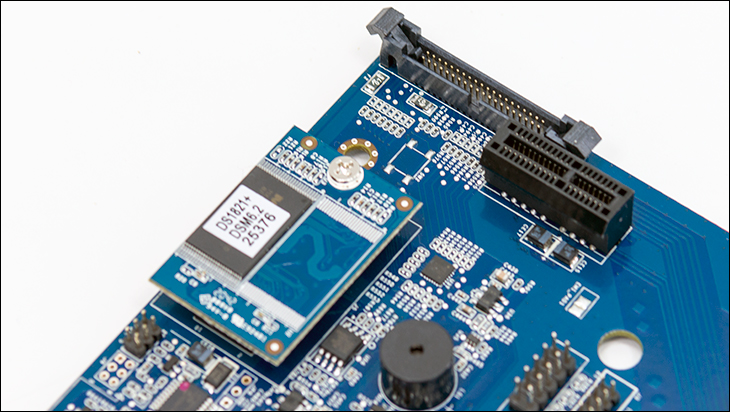
The last thing worth pointing out about the DS1821Plus’ motherboard is the use of SLC NAND. The included MacroNIX (MX30LF1G18AC-TI), 1Gbit (128MB) is old school cool and we have zero issues with its use. Yes, it is ONFI 1 not 2 or 3 or 4 rated, but what it lacks in shear performance it makes up for in durability. With 100K erase cycle rating and 4-bit ECC (per 512+16 Bytes) it is rated for 10 years of data retention. Good luck finding that outside of the handful of SLC NAND options available… and let’s face it. This is a NAS appliance. Startup performance is way, way down the list of priorities. We just wish they had used two of these NAND IC’s to double theoretical performance on tap.
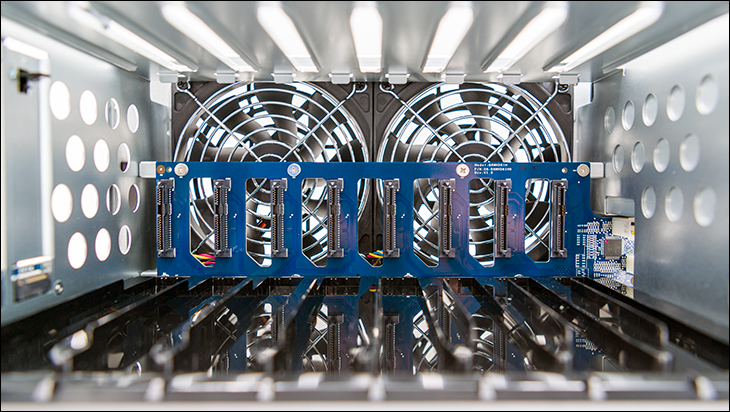
For those interested in replacement of the backplane. We would recommend it only for the experienced user. You will basically will be doing a full tear down of the NAS to get to it, and there is a very good reason this is always considered a repair depot job.
Overall, the DS1821Plus is a very decent offering from a hardware perspective. It does make a few interesting design choices, and certainly has a couple ‘legacy issues’ that are carried over from previous Intel based designs, but it is more than just a pretty face. Not perfect, but very good for its class.
