TL;DR:
While RAM overclocking enthusiasts will still flock to Z170 and LGA1151, for everyone from the average PC gaming enthusiast looking for a gaming system, to the professional looking to get work done X99 and 2011-v3 is still the way to go.
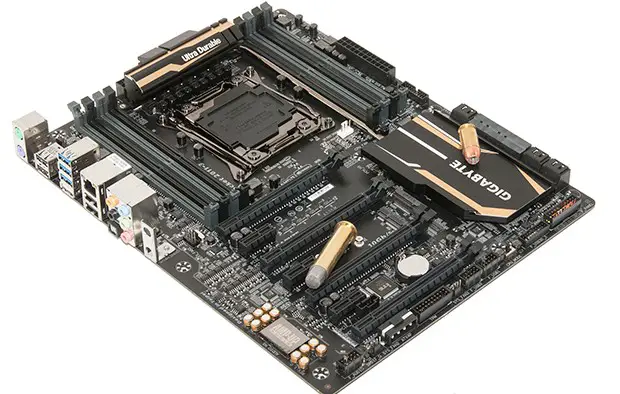
In its class the GA-X99-SLI is one darn fine example of what $250 can get you. Everything from its excellent PCIe layout, to its excellent VRM, to its great onboard sound solution is sure to impress. Just expect to pay the “Intel enthusiast tax” as these grade of systems are on the expensive side! As you can see the X99-SLI’s box is both eye catching without being garish, and yet is filled with all the information a consumer needs in order to make an informed decision.
 Much as the shipping container itself leaves a good first impression so too does the accessories. With that being said the included features do reflect this boards more frugal asking price. As such you will not find a front USB 3.0 panel, USB 3.1 daughtercard, insulated style IO shield, nor any door hangers or stickers. Instead you will be greeted by the necessary items. Items such as DVD with the necessary software and drivers, a good user manual, four SATA 6Gb/s cables, an old fashioned IO shield, and both SLI and CrossFire bridges. All in all this is a decent selection of parts but we do wish that more SATA cables had been included – as this board does have 10 SATA 6Gb/s ports!
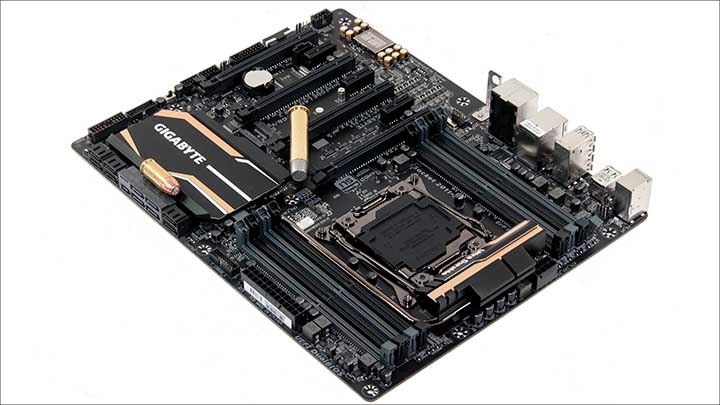 The Gigabyte GA-X99-SLI features a custom all black PCB with black & gray DIMMS slots, black PCIe slot, and black with gold, white…and yes more black colored heatsinks. In other words this motherboard is very good looking and yet does not overdo the aggressiveness like some previous generation Gigabytes did – we are looking at you Sniper and G1.Killer boards. Instead this board should easily fit well with a wide variety of custom builds. The only thing is it may be a touch too busy for some peoples tastes. We prefer either a full monochromatic look, or a black/gray/ plus one more color. This is personal preference only, and many people are the exact opposite. In either case the overall aesthetics of this board are darn good and bordering on excellent considering this is not an expensive X99 motherboard – and usually the inexpensive boards are where consumers will find the most garish ones! Color us impressed with Gigabyte taking the more refined approach.
Once you do get beyond the looks of the board and take a closer look at the layout consumers will be even more impressed. As you can see Gigabyte has spent a lot of time and effort in laying out the PCB so that the connectors and ports easily accessible, and free from possible obstruction.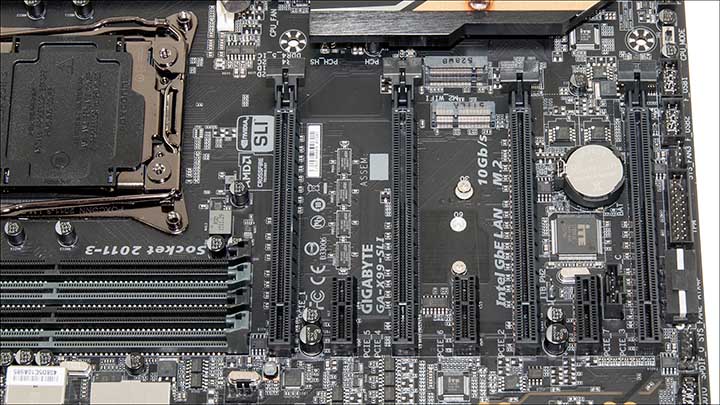 This goes double when consumers pay careful attention to the PCIe layout. As you can see this board can easily accommodate not one, not two, not even three, but four dual slot video cards! Better still is Gigabyte did this and still allows for up to three x1 cards to be used. That is amazing considering that this board is an ATX and not E-ATX form-factored motherboard. Gigabyte has been able to do this by the simple expedient of making the topmost PCIe slot an X16 slot, using an x1 for the next and then rinsing and repeating this process for all 7 slots.
Of course as this is an ATX motherboard, consumers will not be able to use all 7 slots unless all cards are single height designs – as dual height coolers will block the next PCIe slot below it. This is par for the course and well worth it as consumers interested in quad-SLI or quad-CrossFire setups will either be using a custom loop for cooling or have little interest in using a PCIe lane (even just one) for cards that are not ‘video’ cards. The only practical downside to this layout is that triple slot designs – such as the MSI GTX 980 Ti Lightning will not work… or at least will not allow for quad configurations. Instead the best consumers will be able to get is normal SLI with such large devices. By the same token you will still get excellent cooling potential when using two extra-large cards…as there will still be a single PCIe slot separator between the two cards.
There is one thing worth noting about tri and quad video card configurations. Basically while yes X99 has much more PCIe lanes available to it (40 if the right CPU is used) the best you can get is 16+0+16+8 or 8+8+16+8 (i.e. with a 40 lane CPU). Only when using two cards will both run in full x16 mode. Hopefully X109 (or whatever the x99 successor will be called) ups the lanes to 48 from 40 – as this would allow for 16/16/16 configurations. In the meantime this is really not that big a deal as two cards running in full x16 mode is impressive, and having four video cards to spread the pixel load is still going to result in one hell of a powerful rig – and one that smokes LGA115x systems!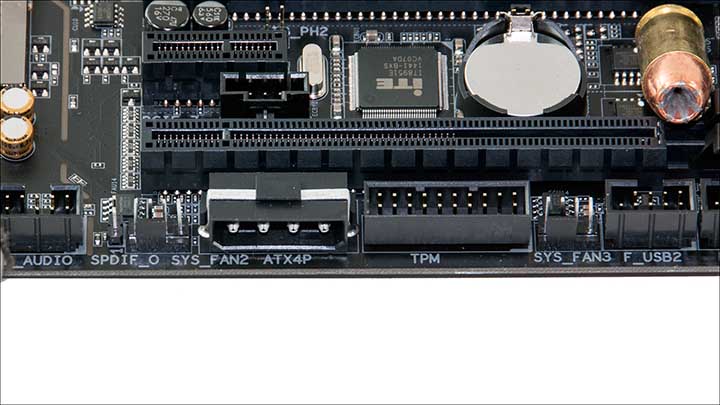 To help ensure stability when using multiple video cards – especially overclocked models – Gigabyte has included a standard Molex connector to help boost the power stability…as the typical power supply designer really did not envision users demanding power for four hungry video cards!
 Besides the Molex connector, the bottom edge of the X99-SLI is filled with a very good assortment of accessories. These include two USB 2.0 ports, front audio header, the first of two USB 3.0 front header ports (the other is located next to the 24-pin connector), a color coded front header, and a CPU Mode switch. This CPU Mode switch will be of great interest to overclocking enthusiasts as when enabled it allows the motherboard to take advantage of all 2083pins found in the socket instead of the typical 2011 (that gives the LGA socket its name). What these additional 72 pins do is increase stability when overclocking and seeing this feature on rather moderately priced motherboards is impressive to say the least!
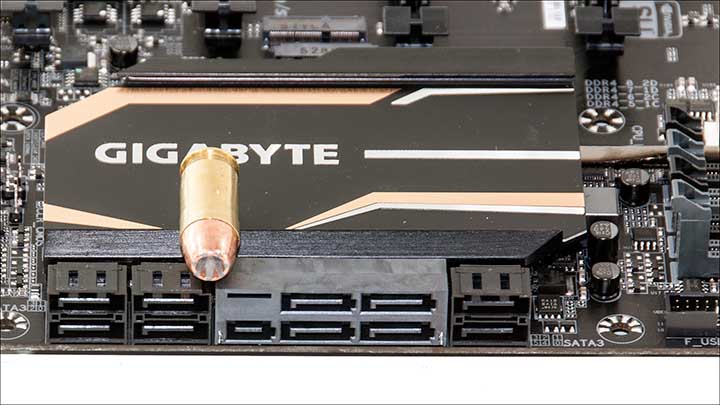 The X99-SLI also comes nicely furnished in the storage department. One of the things that helps distinguish X99 PCH from the mainstream ‘Z’ PCH is the sheer number of SATA devices it supports; so it was nice to see Gigabyte take full advantage of the more powerful PCH. In grand total consumers can expect to find ten SATA 6Gb/s ports, as well as a single SATA EXPRESS port. Of course, if you do use the SE port two adjacent SATA 6Gb/s ports will be disabled but that still leaves eight usable ports.
 Also of especial note is GIGABYTE includes two M.2 ports; however only one is used for storage devices. Basically one is a ‘M’ keyed M.2 port which has access to four PCIe lanes for M.2 SSDs, while the other is a ‘E’ keyed port for wireless and Bluetooth adapters. Since they are stacked – and yet still below the height of the PCIe ports on both sides of it – both can be used at the same time. The only hitch is only 80mm long and not 110mm long M.2 SSDs will fit. Most use the 2280 form-factor but this is something to take note of before purchasing a M.2 SSD. Also be aware that if you do use GPUs in both PCIe slots and a M.2 wireless card the M.2 SSD is going to run hot – as not much air flow will reach it!
 The real star of any X99/LGA2011-v3 motherboard is of course the CPU socket and socket area. Here is where the X99-SLI really shines. As you can see the area around the CPU is rather spacious by X99 systems. Equally important is while a few capacitors do encroach on the CPU socket area all these caps do comply with Intel’s z-height restrictions. What this means is they are little to no concern for the typical user and only LN2 users will worry about it.
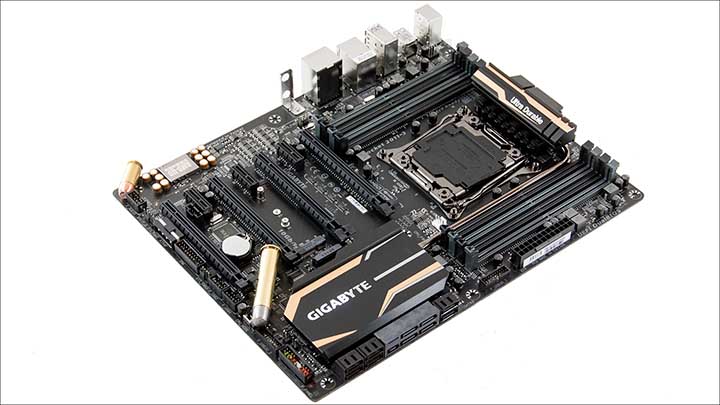 As mentioned previously GIGABYTE has given this motherboard their overclocking (i.e. 2083 gold plated pins instead of 2011 aluminum pins) socket and not the usual socket 2011 found on lower-tiered motherboards. If you take your overclocking seriously this feature alone easily justifies the price of the board.
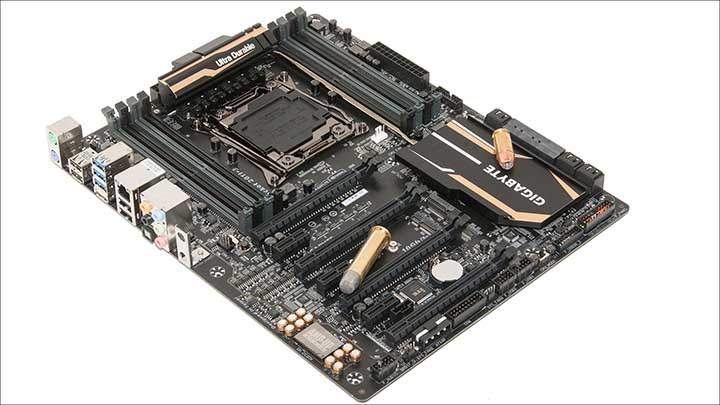 Also on the positive side is that to ensure that the VRM does not overheat during heavy overclocking Gigabyte has tied both heatsinks together via heatpipe. This too is unusual on more value oriented boards.
Hidden unearth this heatsink is an 6-phase all digital power delivery system that ensures clean and stable power actually reaches the CPU. On the surface using ‘only’ 6 phases seems a touch underpowered for the X99 but this is still more than good enough as it’s controlled via all-digital IOR controller. It is just unfortunate as the IOR 3580 used is capable of handling 8 real phases and is being under-utilized in this configuration. Not once in testing did this cause any issues and thanks to its great cooling we have little issues over this setup.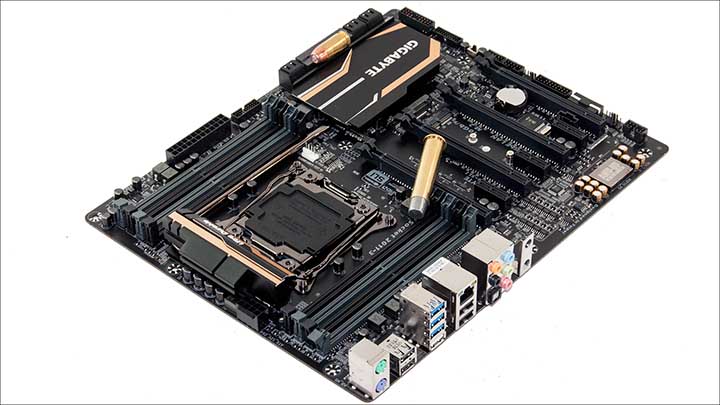 As this is a more mainstream orientated motherboard Gigabyte has forgone the inclusion of an additional 4-pin or 8-pin power connector. Instead it comes with ‘only’ one 8-pin connector. Unless you are looking for insane overclocking levels this is of little concern. As with the 6 vs 8 phase VRM, not once in testing did it ever limit things; rather we felt that our RAM and CPU bottlenecked long before the board did. This is because each phase is capable of handling up to 50amps (actually 76a but the IOR3556 used on each phase is limited to 50a). That means the chances of overloading any of the six phases this side of LN2 overclocking is minimal to say the least.
 Also on the positive side there are no major VRM components on the backside of the motherboard.
 Moving on, the DDR4 slots on this board support overclocking of up to DDR4-3333 speeds. To ensure that you can actually do this both sets of 4 DIMMS are fed by a dual channel all digital VRM design (an IOR IR3570 per set of DIMMS). This of course assumes that you have RAM modules capable of this speed and a CPU with an excellent built in memory controller. In either case, this level of performance when combined with four channels makes for one potent system.
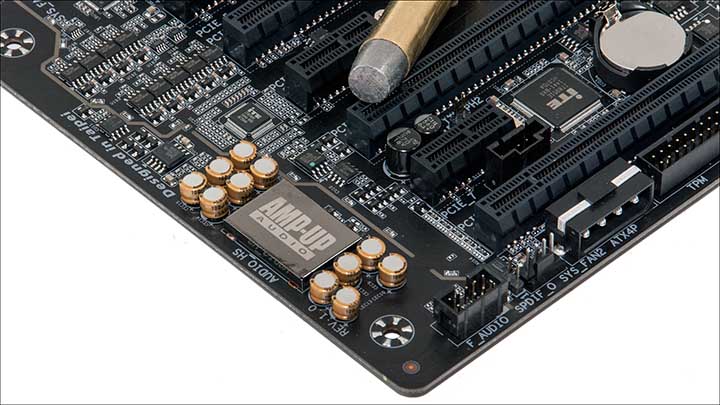 The other star of the show is the integrated sound solution. This is one area Gigabyte has been excelling at the past few years and the X99-SLI is no exception. While it may not have a removable op-amp like some higher priced models, the sound solution this card does have is rather good. At its heart is a Realtek ALC1150 8-channel audio CODEC. This is one of the best sound controllers available today, especially when combined with a Texas Instruments NE5532 op-amp and Japanese capacitors. Equally important is, unlike the UD5, Gigabyte has used an ‘AMP-UP’ branded electromagnetic interference (EMI) shield covering for the Realtek controller. This in conjunction with the PCB isolation line surrounding the audio section of the PCB should ensure the highest possible signal-to-noise (SNR) ratio and deliver the highest possible sound quality. To be blunt the only thing missing is a removable op-amp socket, but the soldered NE5532 is still a very decent choice and should provide a very pleasing experience for consumers.
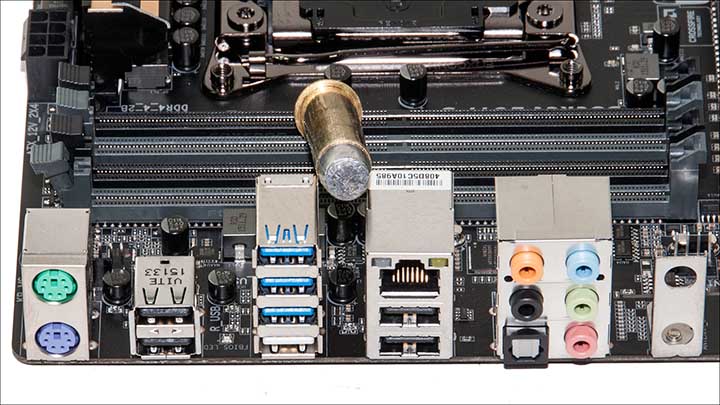 The rear IO panel is also extremely good. In grand total you will find a dedicated PS/2 keyboard and mouse ports, 4 USB 2.0 ports, 4 USB 3.0 ports (one does double duty for the Q-Flash duties), a gigabit LAN port, the five audio jacks, and an optical S/PDIF Out connector. Also included is a bracket with two holes for wireless antennas. This last addition is necessary as this motherboard does not come with any WiFi or BlueTooth abilities, but the bracket will make upgrading this board much easier than usual. This gigabit LAN ports is courtesy of an Intel i218v. The LAN port also features a dedicated protection filter that can protect your system from electrostatic discharge (ESD).
GA-X99-SLI – BIOS and BIOS TL;DR
TL;DR:
Even though this motherboard is orientated towards the enthusiasts of the marketplace you would never tell it by this BIOS. Not only is it user-friendly it is packed with features. This one-two combination is a winning one, and as long as you understand the design philosophy behind it you will quickly grow to really like this boards BIOS.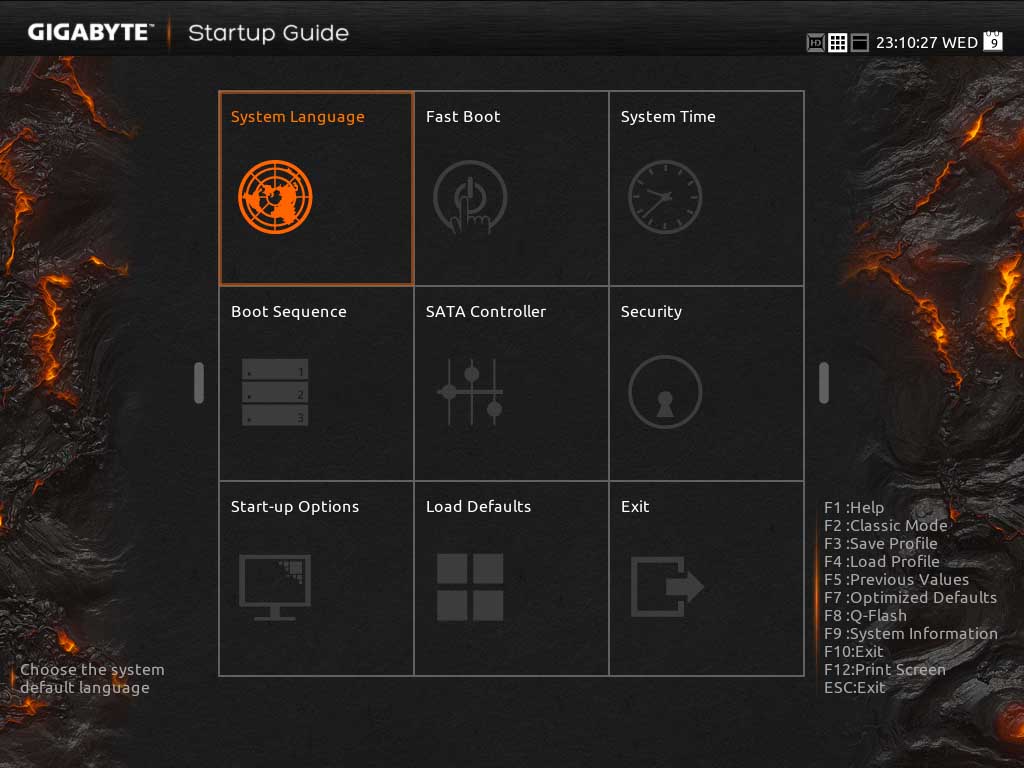 As we have come to expect from Gigabyte the BIOS which accompanies the X99-SLI is as powerful as it is user-friendly. This is all thanks to its two mode BIOS. The first stage is the aptly called Startup Guide which is meant for novice consumers who are not necessarily comfortable navigating a ‘traditional’ BIOS. In this the Startup Guide mode more than lives up to its name. In all honesty, for simple tasks this mode is more than capable and will give novice consumers the luxury of actually adjusting settings without having to ask for help. On the other side of the coin, this mode is a touch simplistic and lacking in-depth features. This is to be expected as it is meant to cover just the basics – and at this it is cracker jack.
This however is where the second mode comes into play. The classic mode is meant for enthusiasts who do not mind getting their hands dirty and know that adjusting features can have a negative impact on system stability.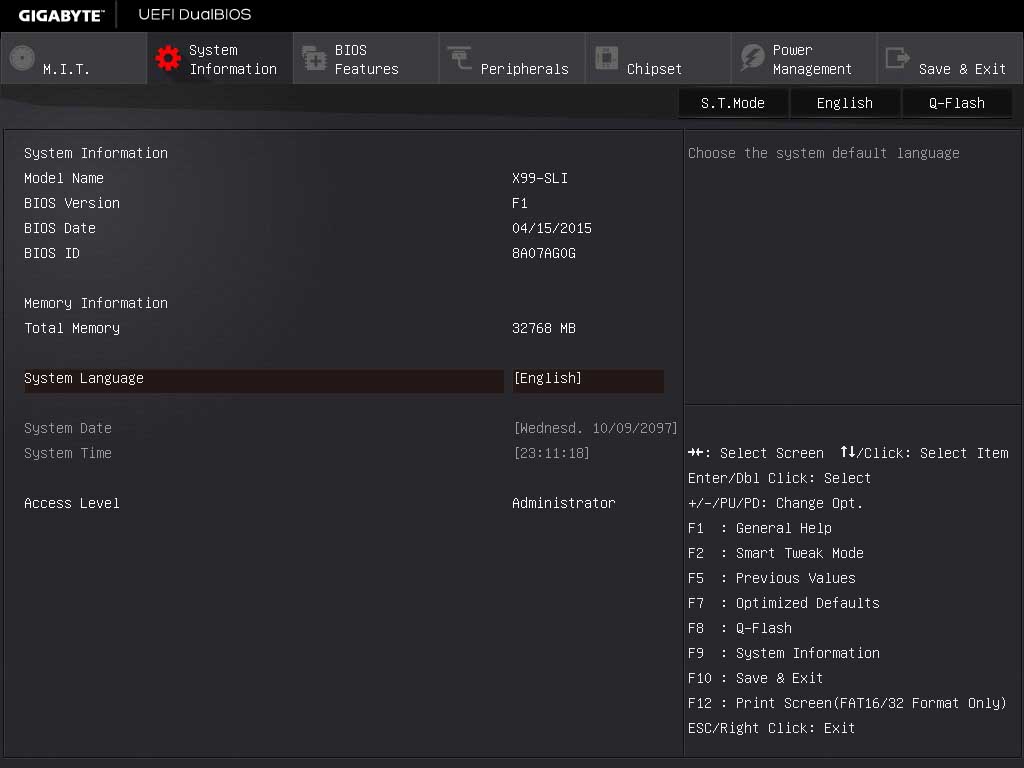 To make navigation as easily as possible Gigabyte has broken Classic Mode down into seven main sections: MIT, System Information, BIOS Features, Peripherals, Chipset, Power Management, and Save & Exit. The Motherboard Intelligent Tweaker (M.I.T.) section has also been broken down into six main sub-menus. These are where enthusiasts should expect to spend most of their time while in the Classic BIOS mode.
The main MIT landing page also gives a brief overview of the major system frequencies, memory sizes and timings. For a more detailed perspective, the MIT current status page is where you should head.
The System Information section displays the motherboard model name. BIOS features, allows users to set the BIOS language and set an administrator password. Boot device priority, enable/disable the full screen logo, selection of Windows 8 features and Boot Mode modifications can all be addressed within the BIOS features section.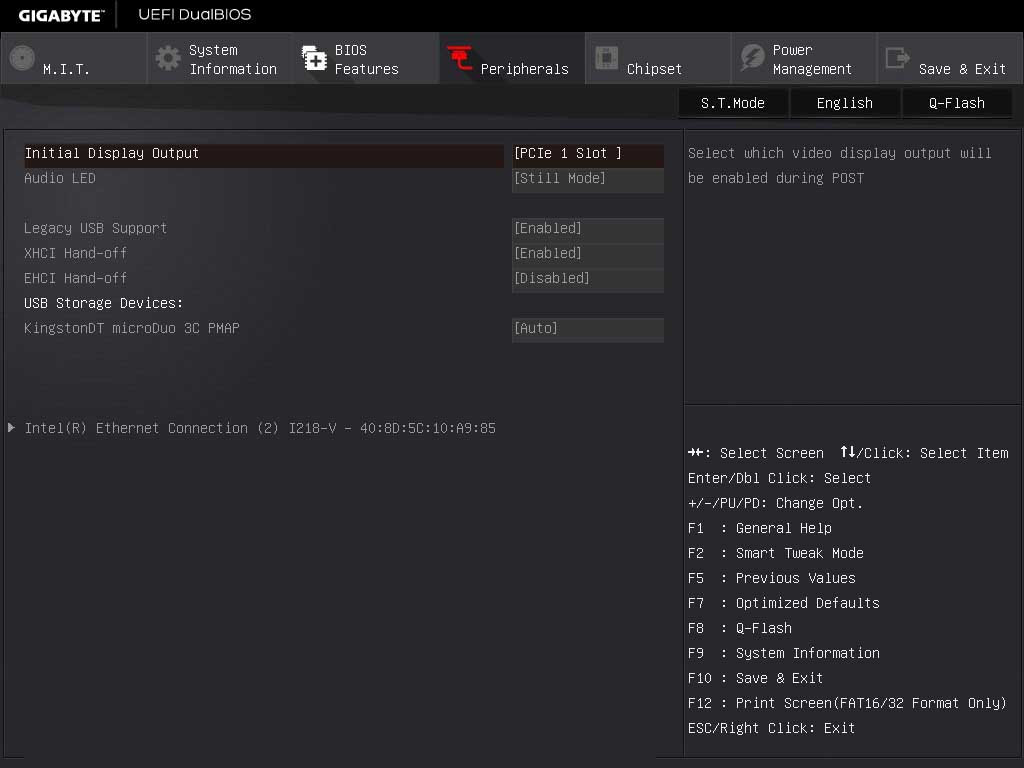 The Peripherals section is where you can enable or disable all of the various onboard devices (FireWire, GbE LAN, audio codec, USB 3.0, RAID, etc.). The Chipset section where SATA devices can be set to IDE, AHCI, or RAID mode; as well as a few other X99 chipset related features.
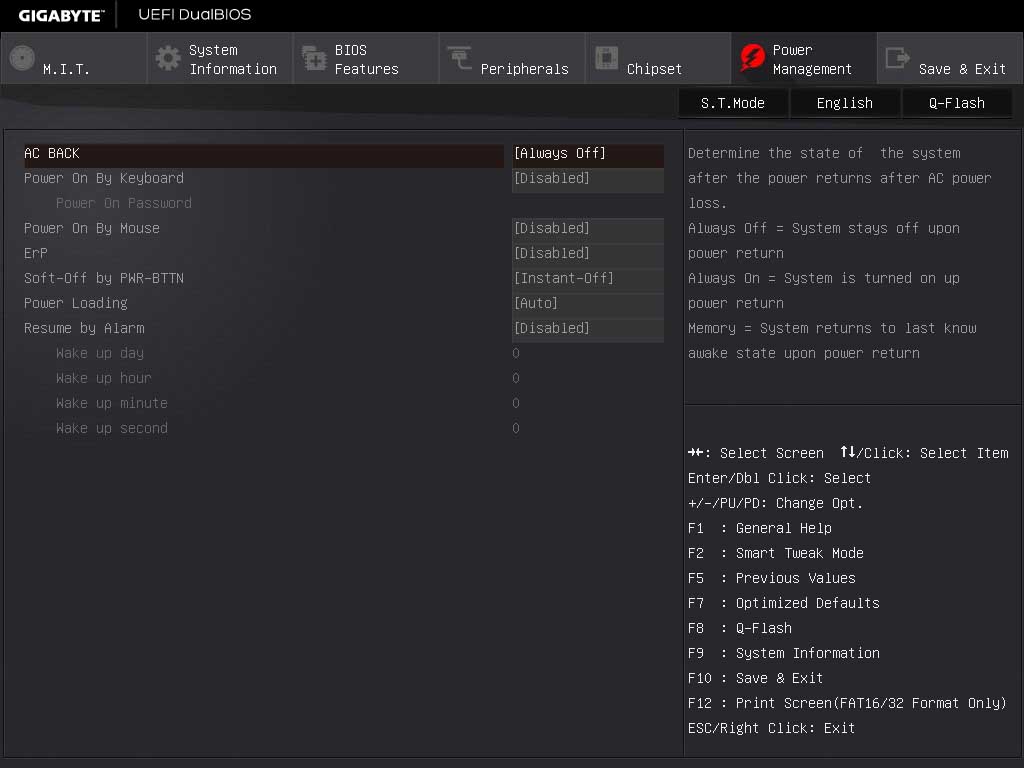 The Power Management section contains the power management settings linked to the various power-saving sleep modes.
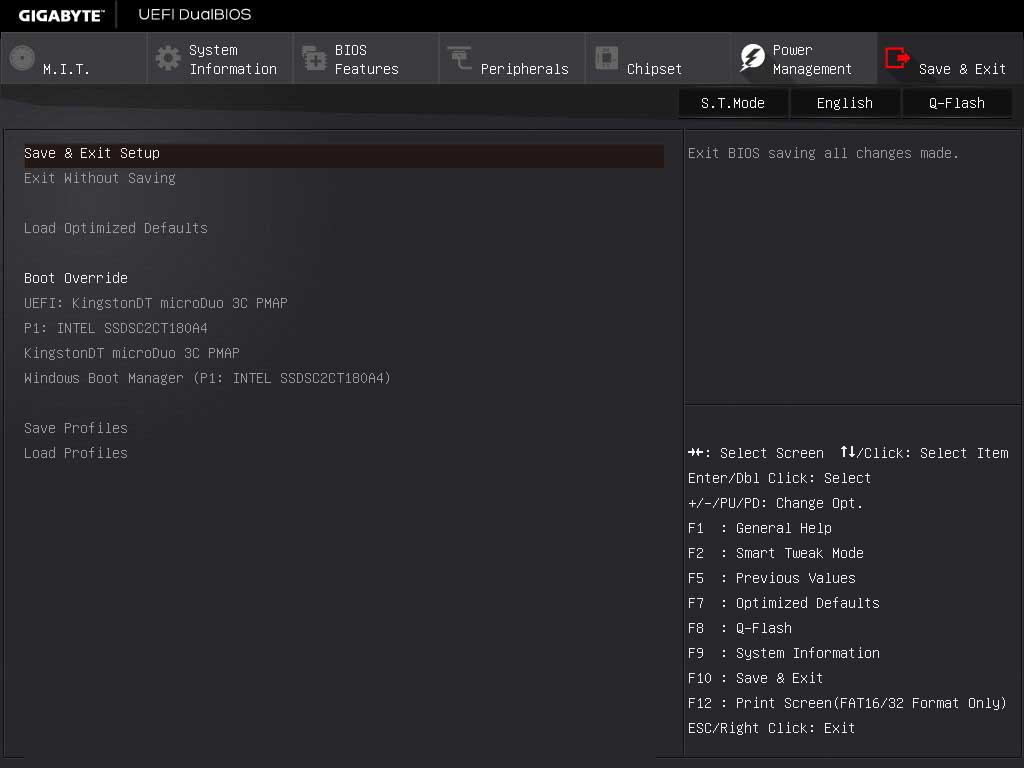 The Save & Exit section is pretty self-evident but you can also save or load BIOS profiles from within this area.
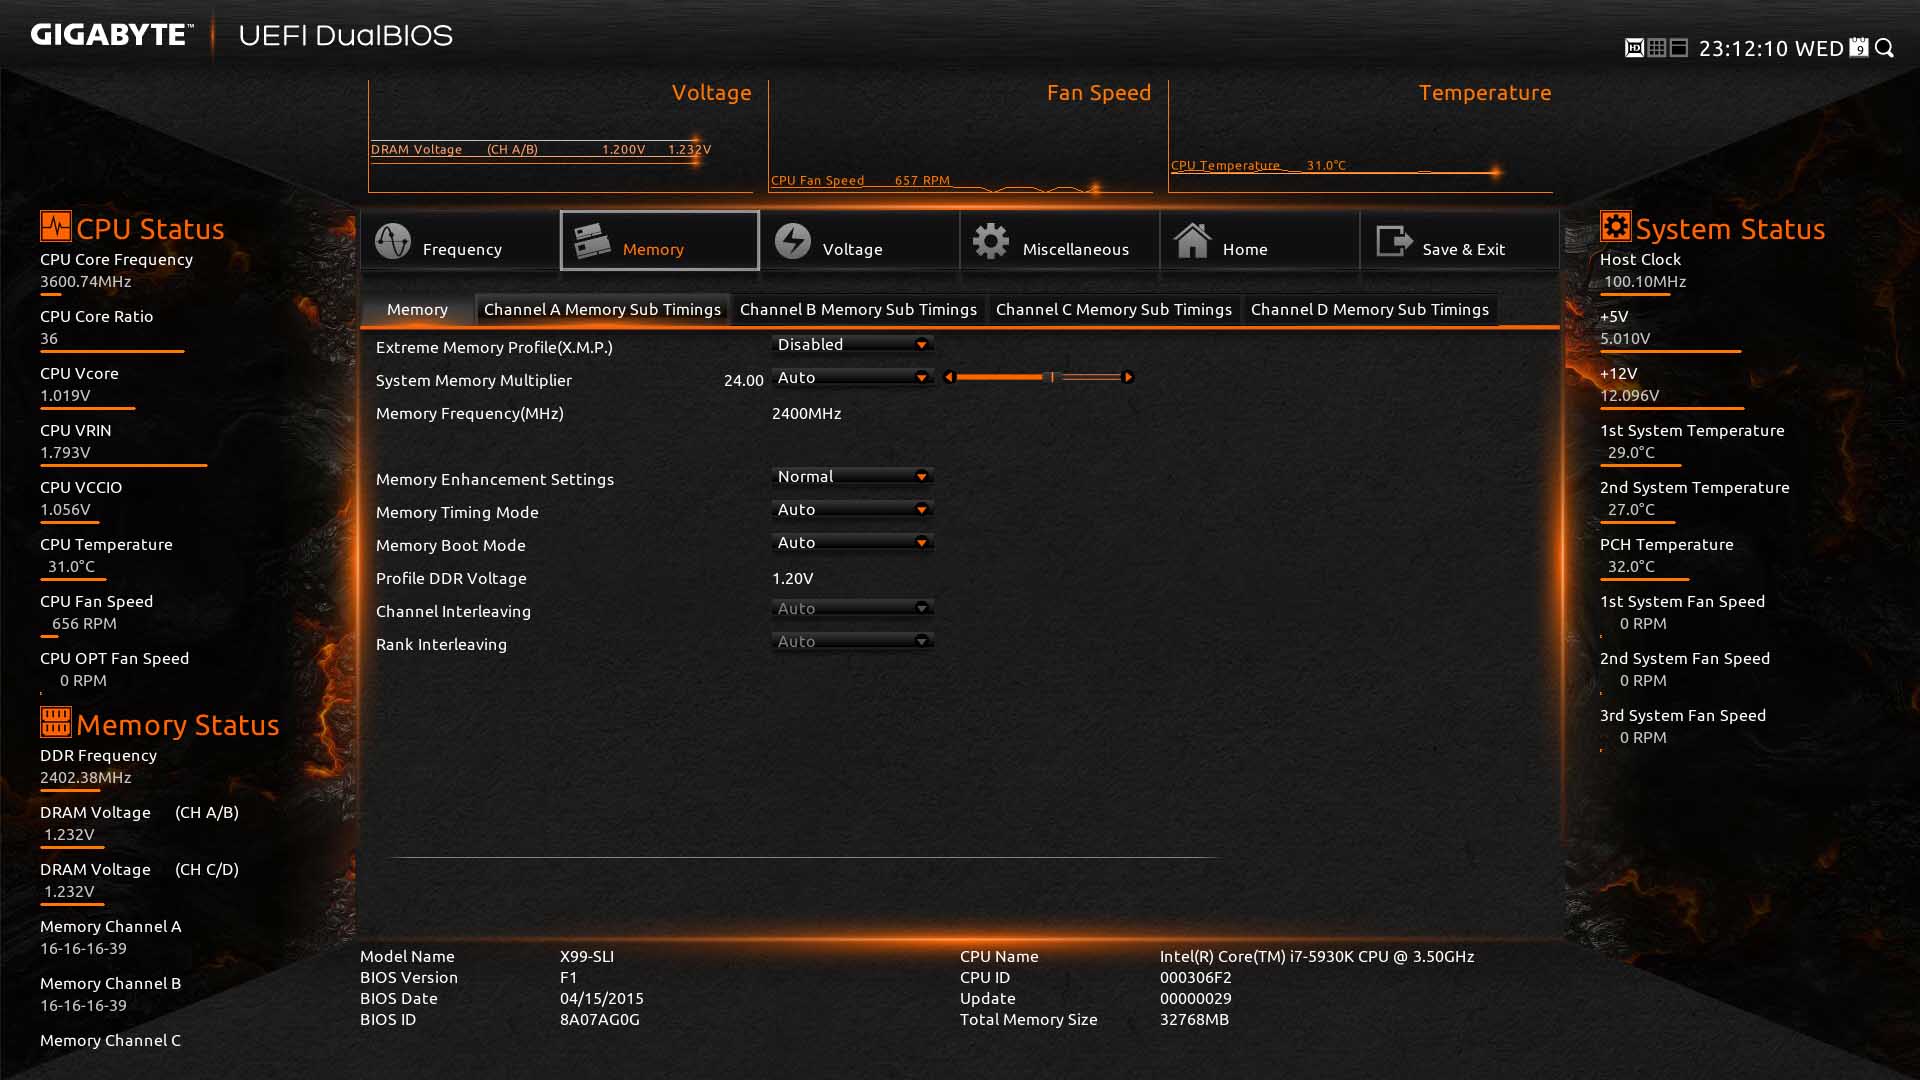 There is actually a third mode called Smart Tweak. This mode is not a true BIOS per say; rather much like the Startup Guide, it has a specific design goal in mind. To be precise this mode is meant for overclocking enthusiasts and if you plan on manually overlocking your system this is where you will spend most of your time. Here you will find all the voltage and monitoring tweaks and customizations anyone could ask for. Better still all these features are grouped together to help make overclocking even easier.
