Let’s preface this by saying that nearly everyone knows what Acronis True Image is… but fewer know what it can offer. Yes, it is a backup and restore imaging software solution. That is only the start. Instead of just offering this, Acronis True Image engineers want to give you as many options as possible. As such it is head and shoulders over the usual competition. It however can be confusing.
This is because a few years ago Acronis upgraded their User-Interface and for first time users… it can be a bit overwhelming. Not because the layout is poor or ‘unique’, but simply because of the sheer number of options and features to choose from. As such this is how we would use it for the first time.
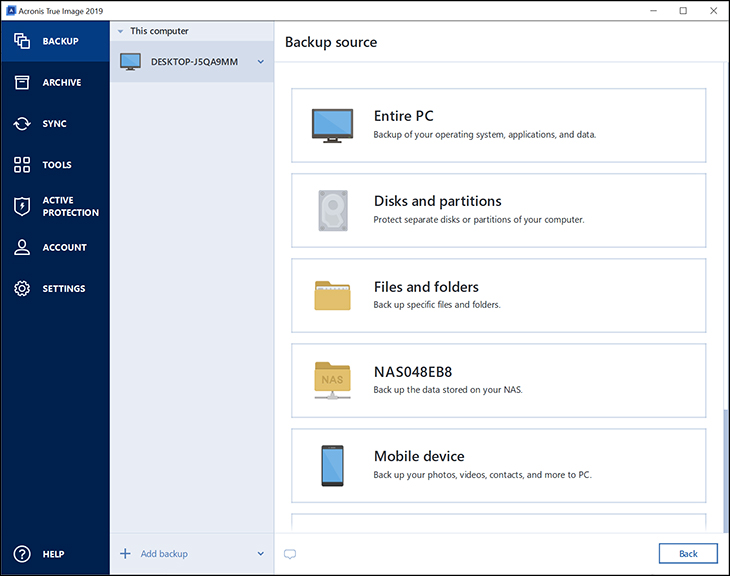
The very first thing you will want to do is go is to the top of the left list of options and select Backup. We say this as you will to backup your system to a ‘.tib’ file. This file is a compressed image of your system as it stands right now. Though honestly, we would not select ‘entire pc’ and rather would opt for the OS only drive. This is done by hitting the second option in the list named ‘Disks and Partitions’ then selecting your C (or OS) drive and hitting next, and then following the prompts. For example, if you want to backup to the cloud pick “Acronis Cloud’ as the backup destination. If you have a NAS attached, select it. If you want to backup to your USB external storage device… pick it. If for whatever reason you want to store the .tib file on the system (never a good idea) hit browse and tell it where to store it.
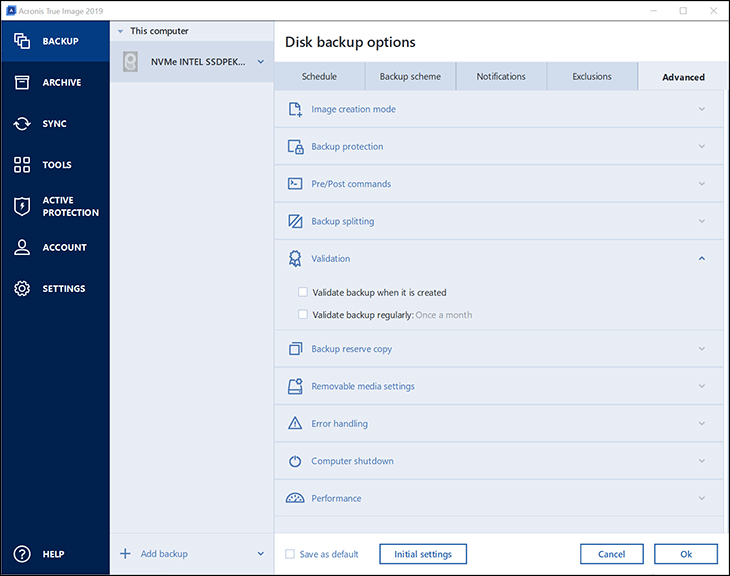
The rest is a very straightforward process but has a lot of fine grain detail you may wish to refine it for your needs. As such before you hit backup click the ‘options’ button first. This will allow you to not only change the type but also the compression, and even the backup scheme you will be creating. For most this means first hitting the ‘advanced’ tab then ‘performance’ (to change the compression, the higher the compression the smaller the file but longer it will take). Then ‘validation’ (and selecting both options to validate it and check it regularly).
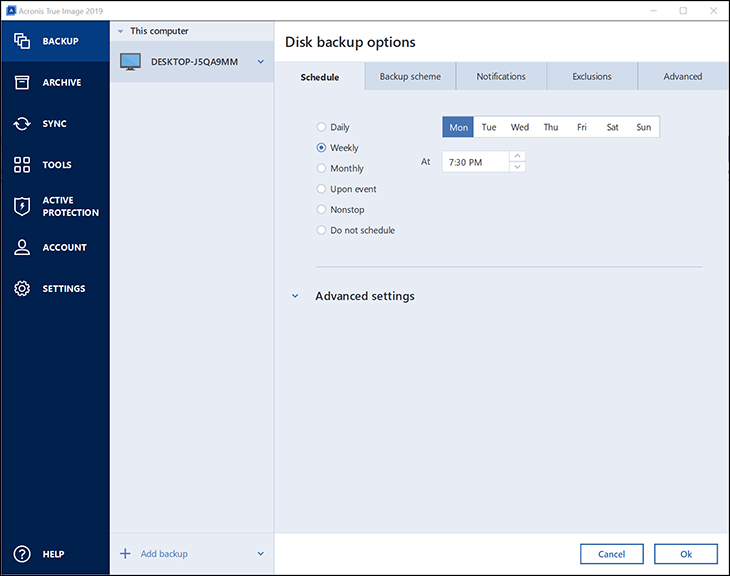
Then hit the ‘Schedule’ tab and set it up for weekly or daily.
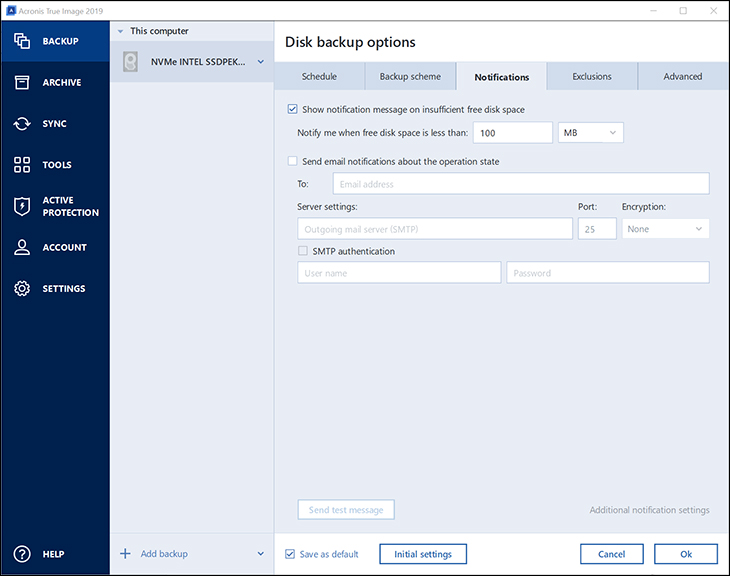
Then ‘Notifications’ tabs and make sure to send warnings if not enough disk space is left. If you want it will even send you an email. Very nice for those who are responsible for more than one system.
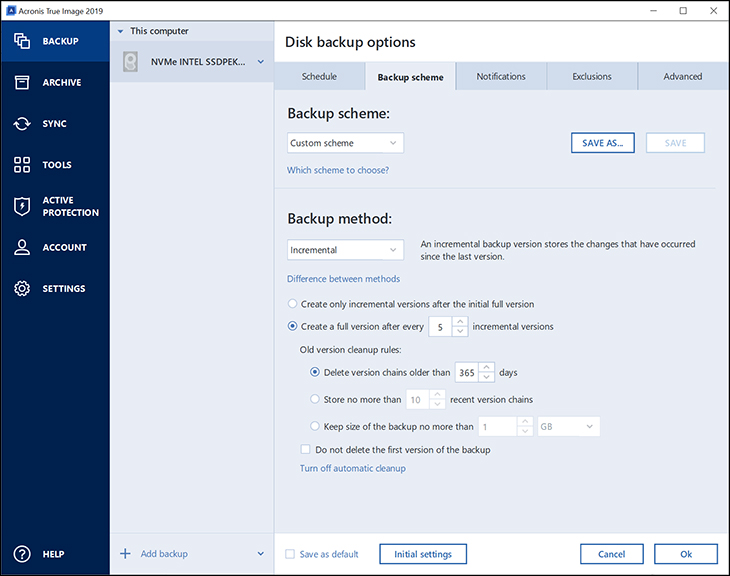
Then hit the ‘Backup scheme’ tab and then select either incremental (the default) or differential. We usually choose incremental with a full creation every 5 runs and delete versions older than 365 days (instead of the 6 month default). This will take up a lot of storage space but will give you a full year’s worth of imaging to choose from if/when things go wrong. It is this fine-grain detail that really separates Acronis from its competitors.
Before hitting OK make sure to click ‘save as default’ so that you do not have to all this tweaking ever again. In testing all the various options not only work but work darn near seamlessly. Unless you have a weaker system (in CPU or storage) your daily routine will not be greatly impacted while it does its thing in the background. You may not even know when it is doing its magic. This is a good thing. This will greatly increase the chances of you actually keeping its schedule running. The only down side is we do recommend a couple TB external storage device to save the data to as the normal compression is a bit larger than what some of the competition use as their default. This is the downside to being ‘invisible’. Of course, if you increase the compression ratio the storage requirements go down… but the demand on your CPU goes up. For the typical 6 or 8 core system you will not notice this increased demand. For the typical laptop… your will. Life is a series of trade-offs. Choose what is best/right/optimal for you and your system.
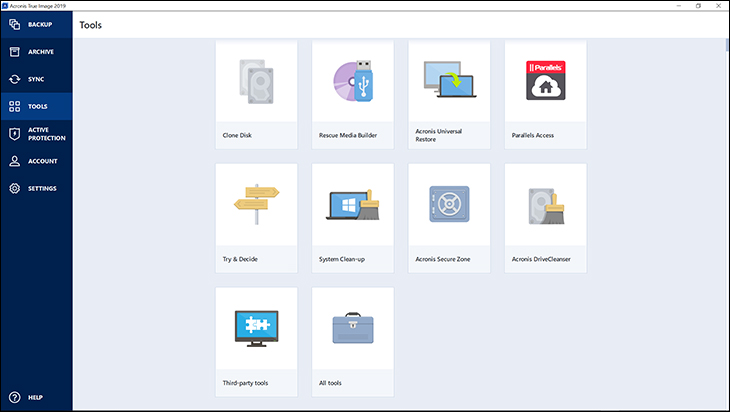
Once this first-time backup is done and validated you can then add in some nice advanced features. The next one you will want to use is under ‘Tools’ and is called ‘Acronis Secure Zone’.
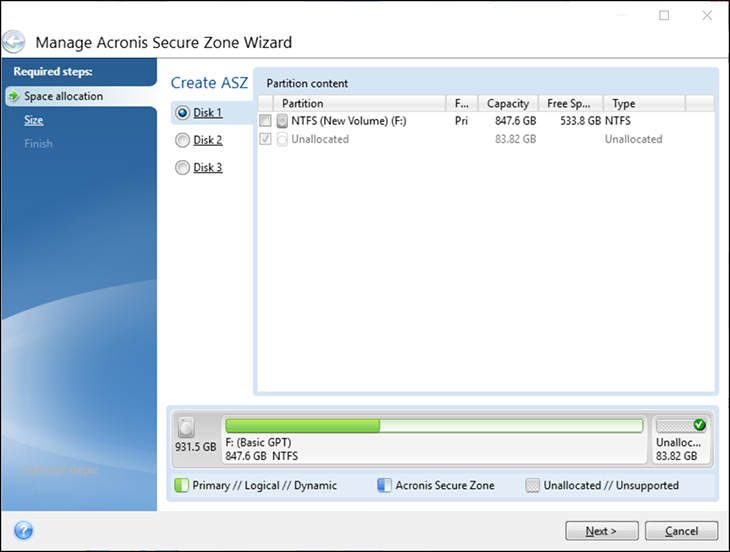
When activated this will add a new extra feature that you can choose during boot up. Basically, if for whatever reason your OS gets nuked so badly you cannot load Windows 10… you run this and can restore your system from a previous image. To imagine when this might happen, think ‘virus’, think ‘ransomware’. Think bad things happened and you are looking at a full ‘nuke and pave’ day of reinstalling the OS and applications.
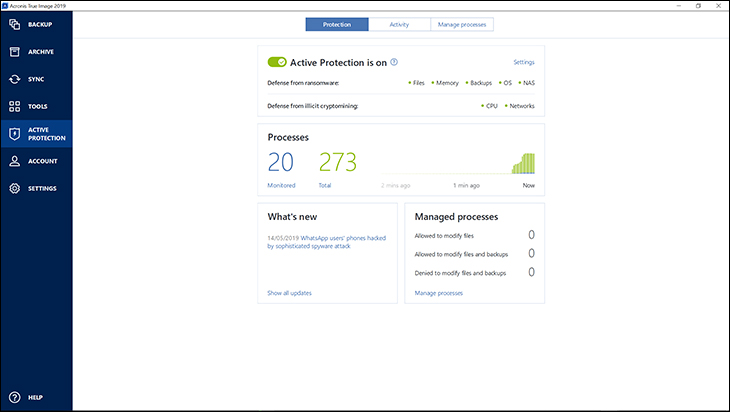
After this, hit the ‘Active Protection’ option and turn this on. This will stop a lot of ransomware from actually getting on to your system (and thus reducing the need for Secure Zone). It is not 100 percent guarantee, but when used in conjunction with a good Anti-Virus does it make less likely for you to get a really nasty cyber-infection. This is a very, very nice feature that Acronis has included for free and makes a great case all on its own for upgrading to the latest 2019 edition of Acronis True Image.
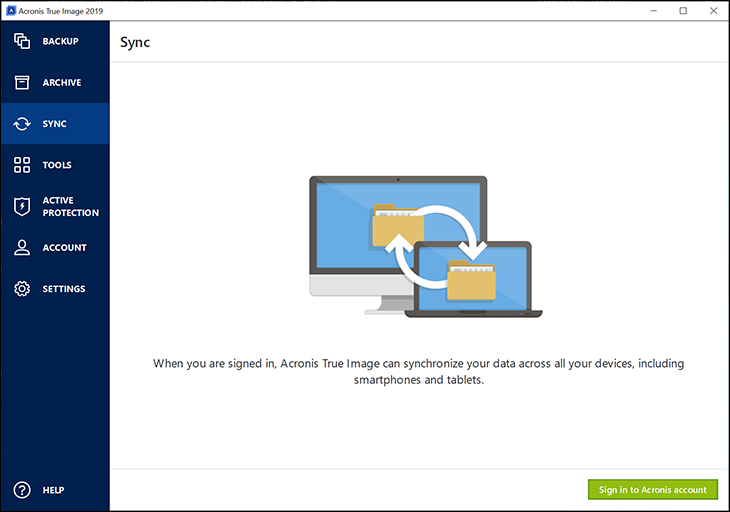
At this point you are good to go. There are a few extra features that you may or may not be interested in. The first is Sync. This allows you to sync files or folders across multiple systems. Think of it as a secure ‘drop box’ cloud storage type deal. It will use up a noticeable amount of bandwidth so if you are on a limited internet package… you may want to skip it and use an old fashioned ‘sneaker net’ with manually transferring the files via a USB storage device.
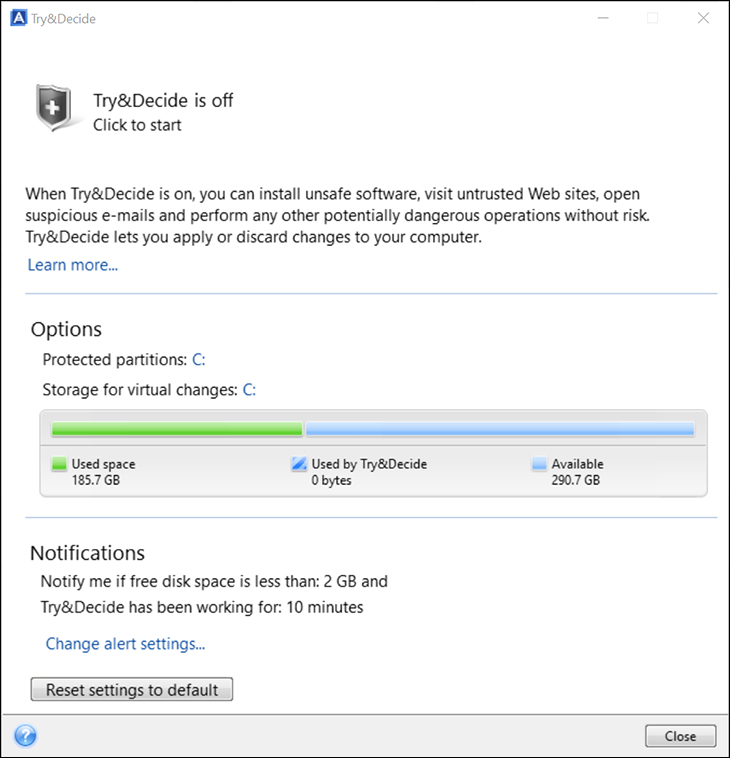
The other very nifty option is ‘Try and Decide’ what this does is take a temporary snap-shot of your system before you install a new program. If the applications is not what you thought it was you can roll back quickly and easily… as if you never installed it in the first place. For the average user this can stop a virus from killing your system. For most though it simply will be a nifty feature that is not used all that often.

The same is true of Parallels Access, which allows you to access your system from your mobile device. We are not a big fan of allowing remote access to our systems but you may love this feature.
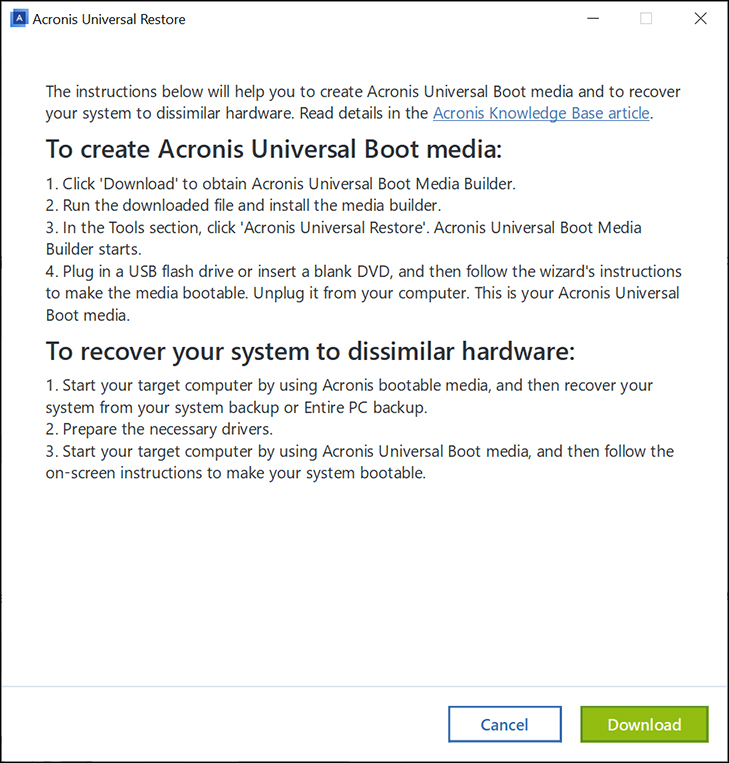
One feature that nearly everyone will want is the Universal Restore option. This bad boy allows you to backup your soon to be old system to your shiny ‘new’ system. It does this by driver injection and in testing it works pretty darn good. It works best when going from Intel to Intel, or AMD to AMD… but it can save you a boatload of time when you upgrade your rig. All you need do is after restoring is run the driver disc that came with your new system and install the latest and greatest drivers. You will however have a working system after using this tool… nine times out of ten. Once again, including all these features means that you get a tailor-made experience and not a ‘one size fits most’.

This actually where things get a bit difficult. Right now, Acronis offer three options. Option 1 is a $49.99 ‘stand-alone’ package that gives you all updates for that specific generation. Since Acronis True Image upgrades every year (or so) this means it costs the exact same as the second option: the ‘advanced one year subscription’. This option allows you to upgrade to the latest version (regardless of what has been released that year) and the cloud storage features. The cloud storage is capped at 250GB. So it is not much of a difference… unless you use Office 365 at which case it will also backup these files for you. The third option includes more security for your cloud storage (via blockchain certification), and ups the cloud to 1TB, but will set you back $99 USD per year. All three include Cyber Protection.
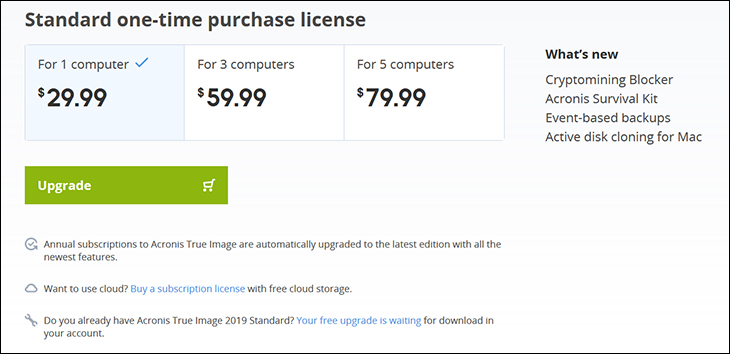
Considering the upgrade cost for the ‘standalone’ option is $30 and we have yet to see Acronis release more than one version in 365 days… the two optimal choices is the standalone or the ‘premium’ version. Skip the middle one. Only you can decide if you need cloud features. For most the 49.99 once and then $30 yearly upgrades are going to be optimal. For the rest the Premium is the better deal… as 250GB is only a few images worth of storage. Either way Acronis True Image 2019 once again earns its reputation for being the ‘gold standard’.
Acronis True Image Site: AcronisTrueImage Homepage
