How to build and configure a homebrew NAS
Over the years we have been asked countless times for recommendations on making a ‘homebrew’ or ‘DIY’ Network Attached Storage system. For many this was because they were dissatisfied with the ‘performance’ NAS-appliances such as those offered by Qnap, ASUStor, or Synology had to offer. For others it was the asking prices those appliances demand. For others still is was their lack of easy expandability – as you cannot (easily) stick a 5th hard drive in a 4bay NAS appliance. Others still were simply because enthusiasts like to tinker and did not want to buy a pre-packaged, pre-built system… after they had built dozens and dozens of computer systems.
The reasons for wanting to make your own NAS really do vary. One common theme though is the ease and sheer luxury of having a secondary backup to push all your data to that is not ‘on the cloud’… and ask anyone involved with the Fappening or countless other data breaches about how secure cloud storage really is.
In this article we are going to go over a sample build. Along the way we will go over typical alternatives and solutions that we did not opt for. As we discuss in this article, it is not the be all and end all. No two scenarios will be the same. You may disagree with our personal opinions. These opinions are shaped by our experience, our requirements and since we do have access to a lot of parts ‘for free’ some of our component selections may not be optimal for you.
Nothing used in our guide though would be parts we would not recommend to others. As such this article will come with a somewhat limited list of alternatives.
As we go through the build we will give you our reasoning why we picked A over B or C, and when B or C may be more optimal for you. We will only talk about serious options. Their benefits and their negatives. Be it software, hardware… or even configuration of the NAS. We will do our level best to show you what questions you should be asking yourself and what would be right for you before you pull the trigger and order any part.
At worst you can consider this a good introduction guide on building a NAS that is easily expandable, and upgradable, using parts we would recommend to you if we were talking in person. It will not be the cheapest but with tweaking to better fit your budget and needs is a good safe place to start. So while some may find our selection… odd, we hope you at least find it worthy of reading. Enjoy, and please feel free to comment in the forum. We will always do our best to give you an honest assessment and honest answer to any question(s) you may have.
NAS vs DAS
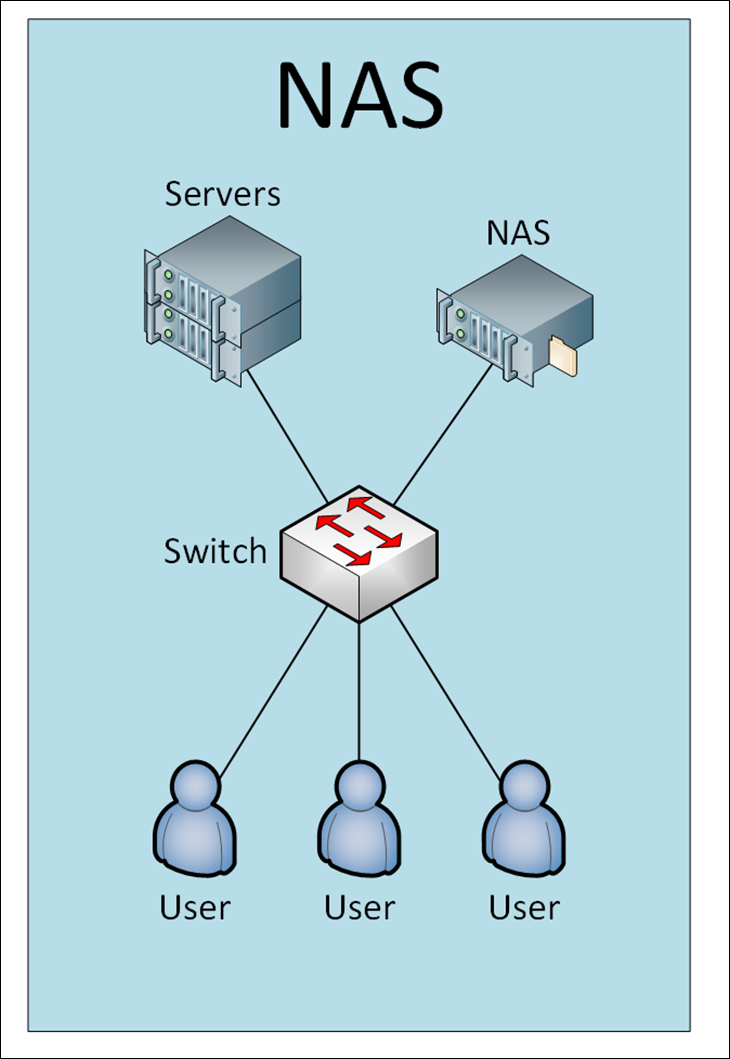
(image courtesy of peacefulnetworks.com)
As the name suggests Network Attached Storage is not directly attached to any computer. It is a computer… a ‘server’ if you will. It a standalone storage device that is network enabled and is meant to be connected (and accessed) via your wired or wireless network. Be it a ‘home network’ (LAN) or Wide Area Network, or even the ‘Internet’. As it is a standalone storage device it is a more complex device than DAS (Direct Attach Storage). One with its own CPU, RAM, storage, power supply, and Operating System. As such a NAS can be connected to and servicing the needs of more than one system at a time. To access a NAS you have to first map the NAS in your computer’s Operating System, but after that it is available any time you want. All that is required is a working network connection and permission to access it.
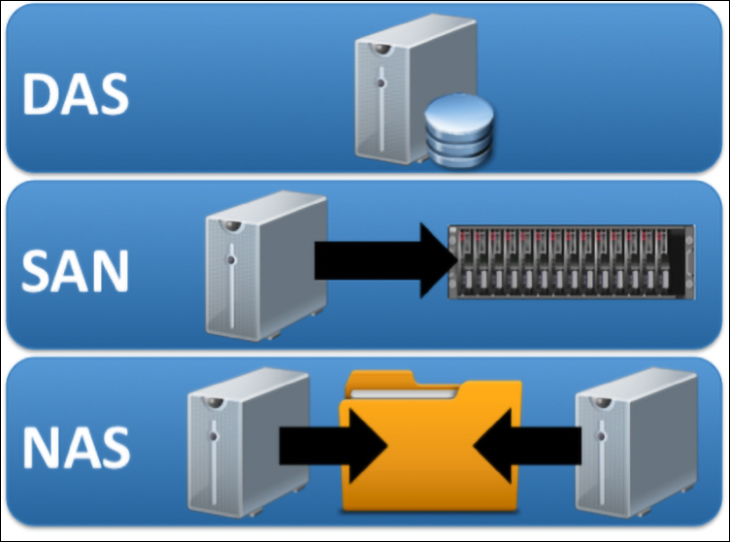
(image courtesy of abdullrhmanfarram.wordpress.com)
Consumer grade Direct Attach Storage is usually much simpler, cheaper, and lower power storage devices. One where you connect it to standalone computing device (usually USB, ThunderBolt, or eSATA) and the standalone device does most of the heavy computational lifting. They are meant to be used on one system at a time and are seen by the host system as just another part of the computer. In simplest terms DAS devices are simple devices that are intended to add secondary storage to one system; whereas a NAS is a standalone system that can add secondary storage to multiple devices at the same time.
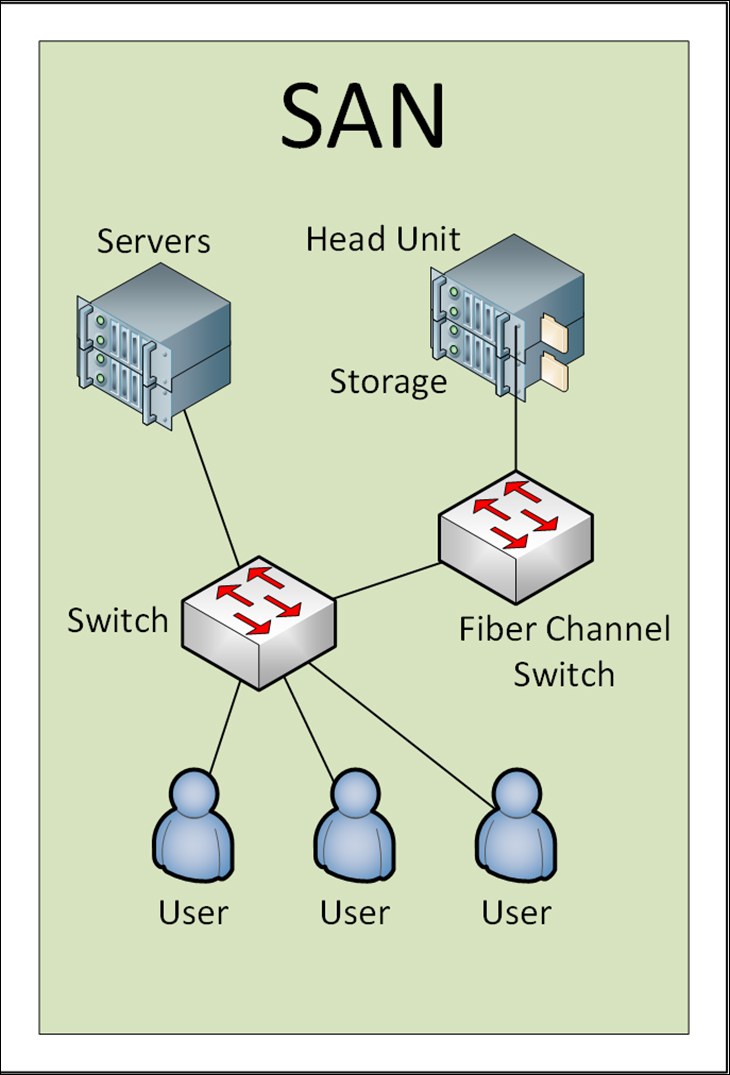
(image courtesy of peacefulnetworks.com)
While not really germane in a discussion on home environment storage, a third option is a SAN. Storage Attached Devices which is high performance network storage that combines some of the benefits of DAS with some of the benefits of NAS. They are usually attached via Fiber but can be via iSCSI and Ethernet. Extremely fast, extremely expensive… and they work at the block level not file level. As such you as a home user can (usually) ignore it.
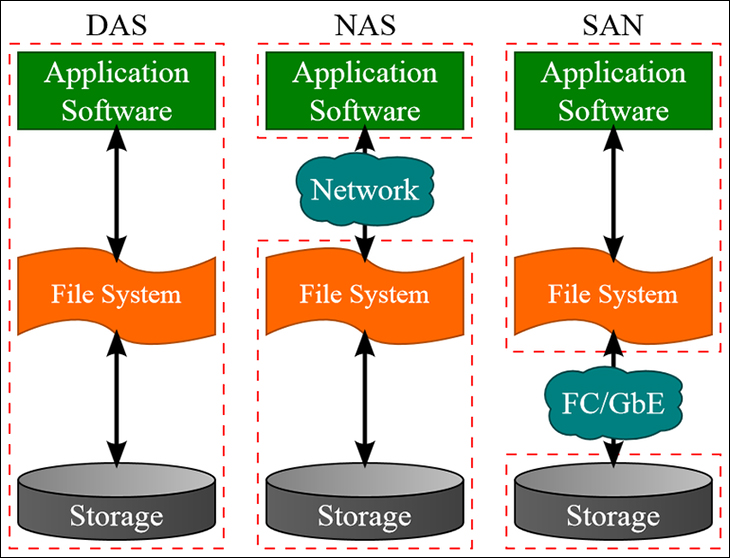
(image courtesy of abdullrhmanfarram.wordpress.com)
So why choose a more expensive NAS over a cheap DAS? It all boils down to ease of use, durability, and ease of access. If you have only one system, or only want to access the data on the drives one at a time, a cheap DAS is hard to beat. If however you want your data to be available all the time or on multiple systems at the same time.. NAS is the only optimal option for home users. While some DAS enclosures offer RAID for added data security… a Redundant Array of Independent/Inexpensive Disks is only part of the equation. Data security starts long before the data even reaches the storage and long after. It requires end to end protection, monitoring, and multiple levels of error correction. Things such as bit-flipping, bit-rot, virus scanning, even drive failure all are mitigated by a proper NAS. It also offers improved physical security from blunt force trauma… something all but the heaviest of DAS devices cannot offer (and we have yet to see an experienced enthusiast who has not bumped or dropped an external storage device which resulted in catastrophic failure – if you are the unicorn… give it a few more years Mr. Murphy will visit you at some point).
Compared to a DAS, once you setup and configure a NAS it is basically hands off. You rarely have to worry about plugging in cables, finding the new drive in your file manager, and can access it on all your systems at the same time. That is a lot to like and with the exception of price not much to dislike. With that said, price should not be a major barrier to entry. As we will go over later in the review a high-performance NAS does not have to be expensive. It can actually cost you less than a good DAS will set you back… as ‘internal’ hard disk drives usually cost less than external storage, the Operating Systems of choice are all free, and you probably already have enough used pc components to make a NAS already.
OS option 1 OMV
Arguably the most important decision one can make is the Operating System a NAS will run on. At this time there are many, many choices to choose from. There is no ‘perfect’ or even ‘best’ choice. All make compromises in one area or another to be a better fit for different usage scenarios and different demographics. As such, if anyone states X is the best NAS Operating system… they are either overly enthusiastic (aka a FanBoi) or trying to sell you something. They all have their own quirks. They all have their own strengths and weaknesses. What works for us may not work for you.
At this time there are basically three major contenders that are all fairly safe choices. Choosing any one of these may not result in a great fit for you and your particular needs… but they are all safe choices. One that will result in a working NAS that is stable, flexible, and ‘just works’.

The first one is OpenMediaVault. ‘OMV’ has an excellent pedigree as it was created by a former FreeNAS developer who felt FreeNAS was not a great match for home users. Starting with a blank slate OpenMediaVault has become an excellent choice for home users… however, until BTFRS becomes ready for primetime, OMV only becomes a great choice when the SnapRaid and MergerFS addons are installed. This combination results in a system that is stable, reliable, low maintenance, has a rather easy learning curve, and offers an incredibly easy upgrade path with excellent data security. These benefits make it our number one choice for home users just getting their feet wet in the NAS world. The downside is the performance it offers is lower than that of some of the other options. This is because it actually does not use a RAID configuration. Instead it uses a RAID like system where one (or multiple) drives are for parity and the rest are not combined into one large virtual drive for load sharing. Instead data is stored on one drive until a manually configured storage capacity is reached, then it starts storing data on the next, etc. etc.
Thus when ‘you’ either push data to the NAS, or access previously stored date on your NAS only the one drive spins up and starts handling the I/O request(s). There are of course edge-cases where some data you want to retrieve is on one drive and the rest is on another, but the general rule of thumb is your performance will be limited to a single drive’s performance. For those who are not interested in using a NAS on anything but a bog standard 1Gbe Network this is almost a non-issue. Only small file performance will suffer – as the typical drive these days can easily push more than the theoretical 125MB/s maximum 1Gbe bus. Put another way the network itself will be the bottleneck, not OMV. Of course, if you do plan on using it on a 2.5/5/10/40/etc Gbit enabled network OMV will quickly become the bottleneck and should be severely discounted in your decision making process.
The upside is if your NAS’ array loses a drive and the parity drives before it can rebuild you can easily restore any and all data on the still working drives… as they are stored in file system that nearly any OS can access. You also do not need to start with empty drives. Instead if you have all your data on various drives, plugging them into your NAS and adding them to the pool will result in them immediately being seen and being accessible.
The biggest benefit though is that since this is not a ‘true’ RAID configuration you can add a single drive to the array at any time. It can even be any capacity… and the NAS ‘Z drive’ capacity will increase by the full amount of the new drive. This is a major selling feature to those just starting out who want a NAS but do not necessarily have the funds to purchase five or ten or twenty drives right away.
The downside is this unusual approach to data security means that parity is no calculated in real time. Instead the OS uses a timer to update the parity data on the dedicated parity drives. This means your data is not always going to be secure. There will be a window of opportunity for Mr. Murphy to rain all over your parade. You can set it to a very short window, but it will not be secure the moment you transfer your files to your NAS. Remember “RAID is not a backup”, always have a backup. So while worrisome for the home user it is not a deal breaker… or at least is not a deal breaker if the NAS is not going to be used to house say unreplaceable documents. For media servers and the like OMV is an excellent choice.
For hardware requirements OMV is also extremely flexible. There are no special requirements. If a given system can run Linux… it can run OMV. This includes upgrades such as LSI HBA controllers, 10Gbit NICs and the like. So everything from mild to wild should be good to go. This flexibility also makes it a good choice for beginners.
Good Fit For:
- Those looking for a simple, easy NAS appliance replacement
- Novice users
- Wanting an easy storage capacity upgrade path with good data security
- Wanting to use low cost, and/or low performance components
- Users who want excellent parts compatibility
Less Than Optimal Fit For:
- Those looking for great performance
- Instant / real-time data parity protection
- Wanting ZFS (as ZFS implementation on Linux is finicky)
OS option 2 FreeNAS/Xigmatek(aka Nas4Free)
We have grouped these two options into one heading… as Xigmatek is a branch of FreeNAS “before the bloat” (aka pre-iXsystems take over). Basically, if you are using lower performance components, prefer a streamlined/stripped down version of FreeNAS… Xigmatek is probably right for you. It was created by the very last OG FreeNAS developer and should not be ignored just because it is not as well known.

In either case FreeNAS is the granddaddy of free NAS operating systems. FreeNAS is based on FreeBSD and as such is incredibly robust, incredibly stable, and its implementation of Open ZFS is pretty much quirk free. The Zettabyte File System has been called the “Billion Dollar Filesystem” as Sun wanted to create a truly next generation filesystem (and volume manager) that was not only flexible but self-healing. The end result is ZFS makes hardware-based RAID controllers a non-starter for a good chunk of cases… and 99.999999 percent of home NAS devices.
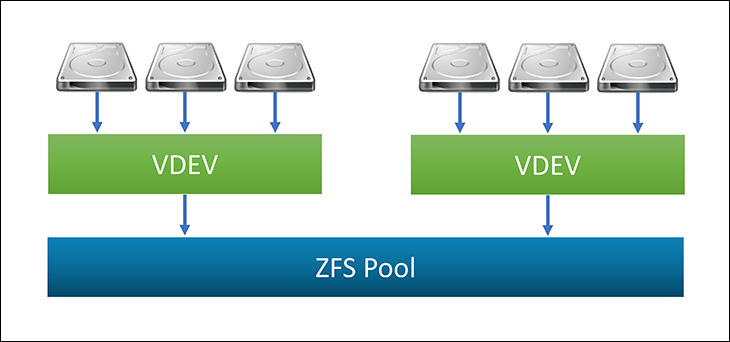
While starting to show its age (if BTFRS ever becomes truly stable it will arguably become the choice for NAS devices) the amount of data security it offers is second to none. Since it is a Copy On Write based system the original data is safe in case of unexpected power loss to the system. Thanks to scrubbing options, bit-rot is a non-issue. Thanks to OCD levels of error correction, data integrity worries are basically moot. Thanks to multiple RAID options (mirroring, RAIDZ, RAIDZ2, RAIDZ3, etc) the flexibility it offers is second to none. Thanks to downright smart SnapShot technology backup and restore of a NAS’ data from an external storage source (or even on the NAS itself) is not only easy, but relatively fast… and fairly painless. Thanks to easy configuration of multiple vdevs (aka a group of drives combined into one virtual device) performance can also be outstanding. So outstanding that a 10Gbe network bus will easily be the bottleneck. Also thanks to multiple vdevs and multiple pools… the sky is nearly the limit when it comes to how many hard drives your NAS can handle. That is a lot to like… and why many a person uses it.

There really only a few downsides to ZFS and FreeNAS. These downsides all stem from the fact that FreeNAS was created with the Enterprise market in mind… and every decision reflects this enterprise focus. The first and most obvious is the learning curve can be daunting. There are so many options and features novice NAS builders and administrators can easily become overwhelmed. There is a veritable ton of guides, videos and forums out there to help you… but unless you feel comfortable with the idea of “your first car being a MAC Truck” it may not be optimal. iXsystems has made strides in making it a less daunting endeavor but FreeNAS still does not hold your hand like more home user orientated OS’ do.
The next issue is parts compatibility. Overall, it does have excellent compatibility in all areas except one. That is NIC’s. You cannot just stick any old 10Gbe NIC in here and expect it to work. This is an Enterprise grade solution so you will not be able to just grab a “Jimmy Joe Bobs Wonder Custom Double Plus Good” 10Gbe NIC and expect it to work. It expects actually good controllers with good drivers. So Intel and Chelsio are your default ‘go-to’ options.
A double-edged sword ‘issue’ is that FreeNAS loves, and we mean loooves, RAM. The more RAM you feed it the happier it will be. Now you do not, regardless of what dunning Dunning–Kruger muppets continue to parrot as gospel all over the ‘net, 1GB of RAM per 1TB of storage. We have used many FreeNAS based builds on 8GB of RAM and even 4GB. The extra RAM simply makes things faster thanks to its Advanced Read Cache (ARC) that is stored in RAM. Remember this is an Enterprise solution that wants to reduce wear on the drives and lower latency as much as it can. So once data is read it gets pushed into the ARC until you reboot (or until it ‘falls off’ and is replaced with other data in the ARC). The larger the RAM capacity the OS has access to… the larger the ARC ‘buffer’ will be.
(image courtesy of ixsystems.com)
The last issue is the one that actually will be a deal-breaker for some home users. That issue of course is increasing capacity. Once you configure a vdev (aka a group of drives) the only way to expand that vdev’s capacity is to swap out the drives for larger drives (one by one, letting resliver finish, and repeating the process for all the others). So if you have say 5 drives in a RAIDZ1 vdev… you cannot add a sixth (at some point this may change… but not today). Instead what you have to do is add another vdev to the pool. In this example, best practices for this means adding a second new vdev of 5 drives in a RAIDZx configuration (we recommend ignoring RaidZ1 and using RaidZ2 or RaidZ3 depending on your performance requirements and comfort level). You can minizine this issue by simply using a bunch of vDev’s consisting of two drives each in a mirror configuration. This costs you 50% raw storage capacity though and if any vdev in the pool dies all data in the pool is toast – not just the data on those two drives. So FreeNAS does take some future planning before setting things up… or you can do what FreeNAS assumes you will do. Nuke the vDev of five drives, create a new one with six and restore from your backup. Remember RAID Is Not A Backup. You are expected to back up your data and not just rely upon RAID to keep it safe.
We do not want scare you away from FreeNAS as its benefits may indeed outweigh the negatives. It is an excellent choice. One that we personally use for our main NAS. It is a rock solid foundation. One that you can rely upon to do its job. One that once it is setup and working… will continue to work for a looong, loooooooong time. It just is not optimal for all people and all scenarios.
Good Fit For:
- Those looking for ZFS
- Those looking for an Enterprise grade solution
- Advanced users
- Those who prioritize security over ease of use
- Those looking for performance
- Those who want Instant / real-time data parity protection
Less Than Optimal Fit For:
- Wanting an easy storage capacity upgrade path
- Novices
Users who want excellent parts compatibility
OS Option 3 unRAID

In the same way that OpenMediaVault is ‘just’ an overlay over a barebones Linuix distro, unRAID is also a (proprietary) Linuix distro that has had a lot of cosmetic and not so cosmetic surgery done to it. OMV is Debian based, unRAID starts out life as a Slackware distro. Neither does justice to what the devs have accomplished… but is a good place to start. It however is only just that – a start. unRAID’s dev team may indeed start with a Slackware foundation but a lot more time and effort has been done to make it an ‘out of the box’ NAS solution compared to OMV. They have done this, just as FreeNAS and its FreeBSD foundation or OMV and its Debian foundation, by creating an additional ‘layer’ which gathers, condenses, and simplifies most of the settings and options into an easily digestible, highly palatable GUI. The end result is a NAS operating system that may be missing a few less used and / or esoteric options but in return not only ‘just works’ but has an incredibly easy and quick learning curve. unRAID really does hold your hand every step of the way… and does so without costing you many advanced features, hardware compatibility or anything else. So much so it can not only run on nearly anything it will also have a bit less overhead while doing it. Making it perfect for recycling older ‘potato grade’ gear into a working NAS.
As to specifics on how it makes your life easier, where OMV is still using as its default MDADM and requires snapRAID and MergerFS plugins to gain its flexibility and durability… unRAID has it ‘out of the box’. In fact, unRAID’s method of parity/data protection is very similar (but not the same) as snapraid but is arguably better in that it happens in real-time. Where FreeNAS and OMV have a complicated GUI with some basic ‘wizards’ for setup, unRAID provides a clear and easy to understand labeled GUI that is loaded with pertinent data without overloading you. Mix in a setup wizard that is basically ID10T proof and unRAID really does take as much pain out of the learning and configuration process as possible. The downsides however are worth going over as like anything else in life… there is no free lunch.
Firstly, snapRAID allows for up to 6 drives for parity duty, unRAID is limited to just two. Where snapRAID (and FreeNAS) make use of checksuming to protect data integrity… unRAID does not. This means no silent error correction and no out of the box bit-rot protection. These two issues may or may not be dealbreakers for you (as the HDD’s themselves have ECC baked right into them, you can use addons which will do a scrub on the data… and the chances of bit rot actually causing irrevocable file damage is minor for the home user to say the least) but there are two more issues that keep unRAID from replacing OMV as our usual suggestion for the first time builder.
The first is your license is tied to a specific USB flash drive. If that drive dies, you need to email the support team and get a new license. This is because unRAID is really meant to be run from a thumbdrive. Yes, the ‘OS’ data is only read on startup and pushed into the RAM (just as with any modern NAS OS), yes there are ton of enterprise grade servers out there with a USB dongle hanging off the back of them. Yes, this is not a huge deal that some make it out to be. The fact remains flash drives die and having to get your license renewed because a stupid flash drive died is crazy. Flashdrives are for installing an OS to a proper storage device… not being the OS drive on an active system.

The other issue is that unRAID is not free. In order to get a NAS OS that is incredibly easy to setup, and so hands off that even a meth addicted monkey could be the NAS admin, you have to be willing to pay for it. $59 (USD) for 6 drives, $79 (USD) for 12, and $129 (USD) for unlimited number of drives is not too bad… and given the fact it is extremely user-friendly many people feel it is worth it. Only you can decide. We personally think that a more optimal place to start is with something free. If OMV or FreeNAS or Xigmatek don’t fulfil all your needs then try unRAID. It will only cost you time doing it in this order.
Optimal For:
- Users looking for as low a hassle factor as possible
- Users wanting real-time parity protection
- Novices
- Users wanting an easy storage upgrade path
Less Than Optimal For:
- Those not wanting to spend money for NAS OS
- Those interested in multiple levels of parity protection
- Those interested in protection against silent errors and bit-rot
Storage

After deciding on what you want a NAS for, and choosing the OS, the next largest decision is the hard drives you plan on using. Based on nearly four decades of real world experience the choice is pretty clear to us: you either choose Seagate… or you choose Seagate. With very few exceptions everyone else is just an ’also ran’. One where phrases like “got a great deal” or “needed a new drive and this was in stock” are the only main modifiers on why it’s not Seagate. Seagate helped create the hard disk drive industry as we know it. They created the modern enterprise hard disk drive industry. They are so good at it that even IBM were unable to compete. Let that sink in. IBM could not out muscle Seagate even when IBM was the 8 bajillion pound gorilla of the server marketplace.
This is no shape nor form a slam against HGST or Western Digital (well they are one and the same now). It just is a statement of fact. Seagate simply have more experience, more technical know-how, and more patents when it comes to making Enterprise grade drives than Western Digital. WD and HGST both make good kit, arguably great kit, but when working for everyone from fortune 50 to NGOs to even various alphabet soup governmental agencies one thing was always the same. You would see a veritable sea of Seagate drives in use with only a smattering of the other guys sprinkled in here and there. This is my experience with what works and caused fewer headaches when dealing with tractor trailer load sized orders.

Now, with that said, do you need Enterprise grade gear when building a home NAS? Nope. It however is one area you should not skimp on… especially when on a cost per GB basis Seagate’s are usually either similarly priced or even less expensive than the competition. For example, their IronWolf and IronWolf Pros are top notch choices for a home NAS and yet usually cost less than a WD RED or WD RED Pro. Their EXOS line is simply, gobsmackingly full of robustness that if you feel the need to step all the way to plaid in the reliability department they too are top notch. The EXOS is actually our favorite and preferred model right now. The one we reach for when building something where reliability and (relative) performance are the only two deciding factors.
The only major edge cases are when it comes to SSD and 10TB drives. Seagate solid state drive options like the IronWolf are indeed top notch but Intel Optane options are better. NAND vs 3DXPoint is not a fair comparison. For ZIL/Slogs or write caching (depending on the NAS OS you are dealing with) Optane wins every time with better durability and lower latency. Just be prepared to pay for the premium that goes along with Optane.
The 10TB class of drives are also an outlier when it comes NAS devices. Specifically, when combining any Seagate 10TB model with an LSI controller and FreeBSD. They just do not seem to play nice in this combination. Some of Seagate 10TB’ers can be firmware upgraded to overcome this issue… but if you are either dead set on buying 10TB (and only 10TB) drives a good HGST enterprise or NAS orientated HHD solution will be a more optimal choice. Those are the two main exceptions. Of course, there is a third. If you already have a bunch of drives and recycling them into NAS storage there is zero need to chuck them in the dustbin. Use them. When they die, as all HDDs eventually will… replace them. Even if they are not NAS or Enterprise orientated models (i.e. do not have TLER) use them. Free is good. Free is what leaves room in a budget for a better case, or more RAM. The only exception to this personal rule of thumb is in regards to SMR drives. Shingle Magnetic Recording drives are slow. They can be slow enough that even a 1Gbe NIC will not be saturated by them.
Optimal and / or decent choices:
- Seagate IronWolf and IronWolf Pro
- Seagate EXOS
- WD Gold
- WD Red / Red Pro
- HGST DC models
- HGST He models
- Free drives!
Less than optimal:
- SMR drives. Just, just don’t.
Case Selection
Choosing a case can be as easy or as complicated as you make it. It really will all depend on a few things. Namely, how many drives you plan on eventually using; the form-factor you are interested in; if you want hot swap hard drive abilities; and redundant hot swap power supply abilities.
As the name suggests ‘hot swap’ allows you to pull and replace a defective piece of gear in the system without any downtime. That is what hot swapping is all about: reducing down time. This is mission critical levels of importance in the enterprise world where time is literally money. For the home user… will 30 minutes of downtime really matter? As such dual/triple/quad redundant hot swap PSUs are really not needed. They may even be contraindicated as they rely upon smaller fans (usually 40mm vs 120/140mm found in typical ‘ATX’ power supplies) and cost more. Put simple redundant PSUs are going to cost you more, and make more noise. More to the point they typically limit your case selection as they require a Power Distribution Unit (there are exceptions such as the FSP ‘Twins’ which look like an ATX power supply… but is in fact dual hot swap PSU + PDU in an ATX looking form-factor). So unless you absolutely know you want/need/desire redundant PSUs… consider it a double edged sword bonus if the case you select makes use of them.

For the most part hot swap HDD abilities is a nice to have feature, but not a must have feature. While it does indeed make things so… so much easier to pull and replace a dead drive with a bit of prep work it is not needed. Especially with the right case. The downside to hot swap drive abilities in a case is twofold. Firstly, is there is a backplane to deal with. A powered backplane. This is another point of failure. With very few exceptions we would not trust consumer grade backplanes. Norco for example is notorious for early deaths. Even companies like SilverStone have had a hit or miss record. We have seen cheap backplanes not only cook themselves but nuke expensive hard drives in the process of dying. So, if you want to do Hot Swap you want Enterprise grade equipment such as those by SuperMicro and the like.
The other thing about backplanes is they impeded air flow. So that means higher noise fans are required to get the proper amount of air flow. If you have never seen a backplane case, to ‘get’ this difference in air flow and static pressure requirements… take the worst case with the worst airflow you have used. Now imagine it filled with a bunch of hard drives. Hard drives you want… no… must keep cool. The only way to do it? Loud fans with high static pressure. That is what hot swap backplanes require.
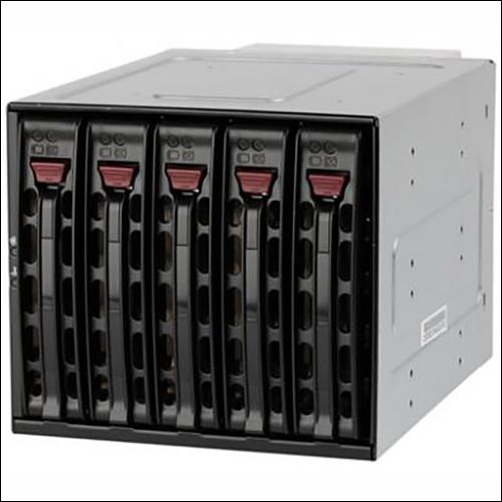
This ‘oh hell no’ opinion on hot swap backplanes is not just limited to cases which come with them, but also aftermarket addons such as 4in3 and 5in3 adapters which convert three or four 5.25bays to a X number of 3.5inch hot swap bays. Thus, the only adapter we would use in our NAS server is the SuperMicro CSE-M35 series. These 5 3.5inch HDD adapters take up only three 5.25 drive bays and can turn even a mundane consumer case into a hot swap machine. They are right at the edge of dimensional specs so with some cases’ drive bays, they can be a bit of a chore to get installed. Firm resistance should be expected but with patience can be installed into any case that meets the 5.25 bay specifications. Be aware they are not cheap. They cost upwards of twice what other companies demand. We think it is money well spent.
Assuming you do not care about hot swap abilities (or just plan on adding it later via M35’s). This leaves the biggest consideration: form-factor. Do you want a small 4 bay mITX case? Do you want a mid or full or mega tower case? Do you want it to be rack mountable?
Rackmountable:
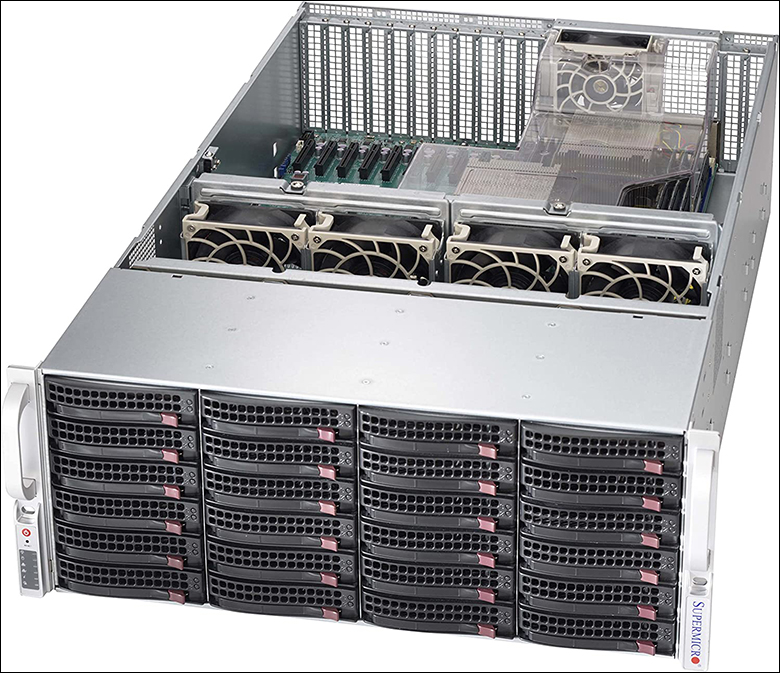
For us a serious NAS belongs in a serious environment so that means rack mountable. The most popular choices are the SuperMicro 826 (2U), 836 (3U), and 846 (4U). New these three cases are expensive. Used? About 2 bills (USD). The same holds true of HP, Dell, and other cases. Just expect more fu….errr funny stuff with regards to proprietary nonsense. This is what SuperMicro is usually recommended. One thing all these true Enterprise grade cases have in common is… they are bloody loud. Later gens are not as bad as older, and if you swap out the PSUs for ‘SQ’ (or at the very least Titanium cert’ed) PSU(s) they are not bad. Still going to be noticeable. Just not sounds like a jet engine loud. The reason they are loud is all are designed around the idea of being filled to capacity with 15K SAS hard drives. Those drives run hot. So cooling them takes a lot of CFM and static pressure to push past the drives and backplane properly. Also, if you do not fill them to capacity you may have to block off the empty drive bays as air movement will take the path of least resistance… and leave the drives to shake n bake in their own heat.
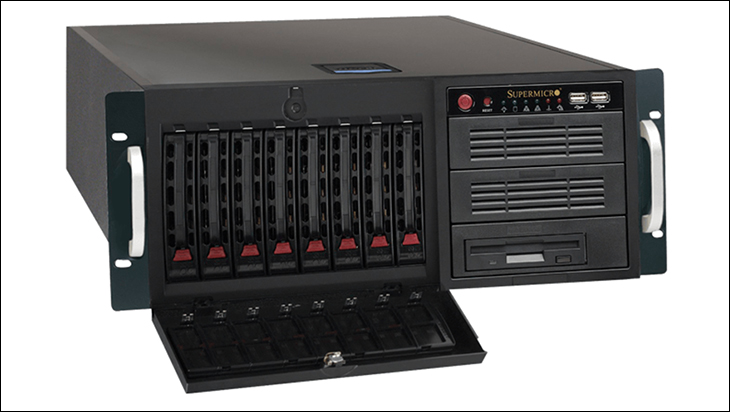
So, for novices who do not know what they are doing we probably would not recommend them as your first case. A better alternative is the SuperMicro 743 (SQ variants) and 747 series (newer Platnium). These are ‘workstation’ cases that can be converted to a rack mountable. The 743 uses rather decent in the noise department 80mm fans and an ATX PSU (just be aware mounting holes for this ATX PSU is not the same as consumer grade ATX PSUs – they are meant to never fail and as such the screws go into the sides of the PSU not the back). So much so that the SQ variant is whisper quiet. You could have this case under your desk and not hear over your existing PC system. Mix in 8 hot swap drives bays with room for 5 more via one M35T adapter… and for most people they are pretty darn tailor-made options. Just be aware that new they go for about 4-500 USD and used ones are hard to find (when you do find them they usually go for about 150-200 USD our about the same as a 846).
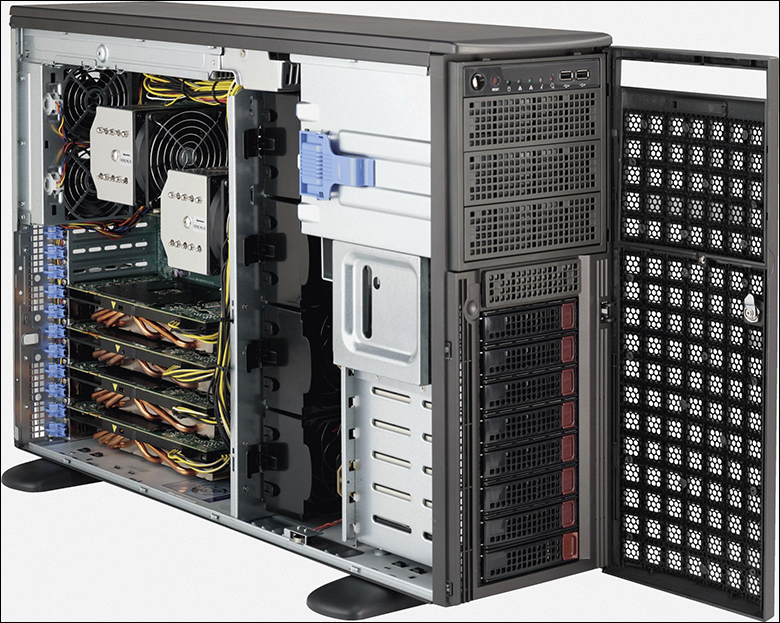
The 747 takes the basic idea of the 743 series and increases the fan size to 92mm, and swaps out the ATX power supply for redundant, hot swap power supplies. New they go for about 8-900 USD. Used… rare as hen’s teeth. This model is also a bit louder than the 743 (27 vs low 30’s dBa) so unless you need, need, need redundant PSU abilities the 743 is a more optimal option.
SilverStone is getting serious about rack mountable cases and do make a very good one. The problem wioth it is twofold. They cost more than a SuperMicro 747 and require a SAS Host Buffer Adapter with SFF ports (think LSI ‘megaraid’ add in card flashed to HBA/ ‘IT’ mode). They are pretty and work well though. I would be proud to own one if it was given to us… we just have a hard time justifying their asking price.
Falling into the meh category is all the consumer grade ‘rack’ or ‘server’ chassis. Rockwell? Norco? No. Just no. They simply are made from too thin of metal to be trusted. If an empty rack chassis does not weight 40-50lbs (or more) it does not get the honor of supporting 5 or 10 K worth of hard drives. Rockwell uses chinesium metal and we have seen cheese… cheese left out in the sun with more rigidity. If you want to use them… get a rack shelf and stick them on the shelf. Do not trust them to hold their own weight on their own. Norc’s are better in this regard but their backplanes are a flaming dumpster fire waiting to happen. Stick with a used server case and go through the hassle of making them lower noise before going for either of these ‘cheap’ manufacture’s case. They are usually not worth the savings.
Optimal For:
- Users with room in their rack
- Users who need a moderate to a lot of HDD capacity
- Users looking for Redundant PSU abilities
Less Than Optimal:
- Users who only need 4 to 6 drive bays
- Users who do not own a rack
mITX:
At the other end of the spectrum is tiny littler mITX cases with room for typically 4 or so hard drives. We love these little guys. Grab an integrated Xeon D mITX motherboard like the SuperMicro X10SDV (Xeon D 1xxx series) or X11SDV (Xeon D 2xxxx series) and you will end up with a tiny NAS that will blow the doors off any Atom processor based NAS out there… and yet will only idle at a few more watts higher while doing it.
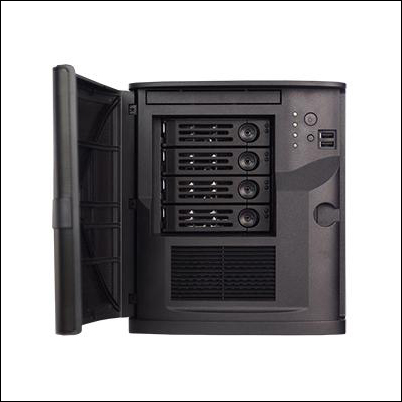
Good cases with hotswap abilities include the Ablecom CS-M50 (what iXsystems use for their FreeNas Mini), Ablecom CS-T80 (it’s what a FreeNAS Mini XL+ uses), SuperMicro SC721 (basically SM branded version of Ablecom… who make a lot of SM cases for SM). This is not an exhaustive list, just ones we have personally used and trust. SilverStone’s DS380 is not on this list as it has serious airflow issues and has been known to have backplane issues.
If you can ‘somehow’ live without hot swap hot drives… you have a ton of options. The Fractal Design Node 304 is a great option. Good cooling, good layout. Just a great small case for NAS duties. Another excellent choice is the BitFenix Phenom. Either are good places to start your journey and can handle 6 hard drives without any major headaches. If you want something a bit more fancy looking the Lian Li Q25 is rather good as well.
Optimal For:
- Users who want a small form-factor build
Less Than Optimal:
- Users looking for best value (as mITX is $$ for what it offers)
- Users needing a lot of drive bays
- Users looking for a high-end NAS
mATX:

This is probably the sweet spot for most people as mATX comes with fewer issues compared to mITX (cost being a big one) and opens up a whole assortment of case options. Honestly there are just too many good ones to mention them all… as just about any consumer grade mid tower case will work. If were to pick just one it would be the Node 804. If the 304 is good… the 804 is better. Excellent internal layout, excellent cooling, and dead easy access to your drives. Great first time NAS builder case.
Optimal For:
- First-time builders interested in the value
- Users needing a motherboard with more than one AIC capabilities
- Users looking for a moderate foot-print
Less Than Optimal For:
- Users needing a lot of hard drive bays
ATX:
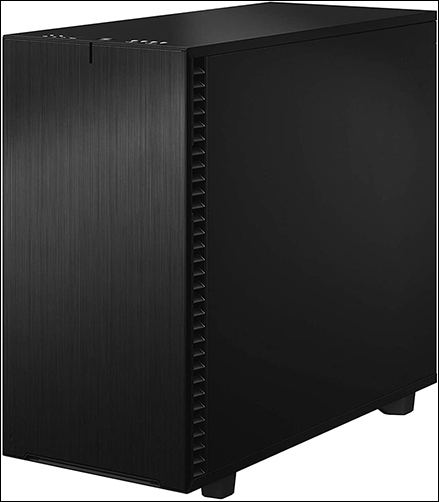
Just about any case will work. We are partial to the SuperMicro 743 and 747s (if you need hot swap and/or redundant PSU) and Fractal Design 7 and 7 XL. The XL can handle a ton of drives. Think 18 or more (you will have to buy extra drive sleds as it only comes with 6 – they are about 8 dollars each). The non-XL can ‘only’ handle 14. This is without messing around with the new fan to HDD adapters Fractal Design released. Honestly though, as long the case has enough hard drive slots for your needs, and if at all possible, comes with 3 5.25 bays for future upgrades, and has good internal airflow… it really is hard to go ‘too wrong’.
Optimal For:
- Power Users
- Those who do not care about foot-print (but do not own a rack)
- Big honking NAS builds
- Those looking to build as cheap as possible
Less Than Optimal For:
- Small form-factor builds
Motherboard Selection
It really depends on the given build, but sometimes it is best to pick the case first and find a motherboard for it… and other times it is best to first start with the motherboard. We usually start with the motherboard. For a file server you do not want, need, or should even desire an ‘overclocking’ or ‘gaming’ motherboard. You should not care about the onboard sound it offers. You should not care if it comes with RGB headers. All you should care about is a few key areas: durability, the NIC(s) it uses, the layout of the components, and maybe if it comes with IPMI (aka iLO, iDRAC, iLOM, RAC… etc it is all the same thing with ‘Intelligent Platform Management Interface’ being the actual standard they use to make their proprietary variant).
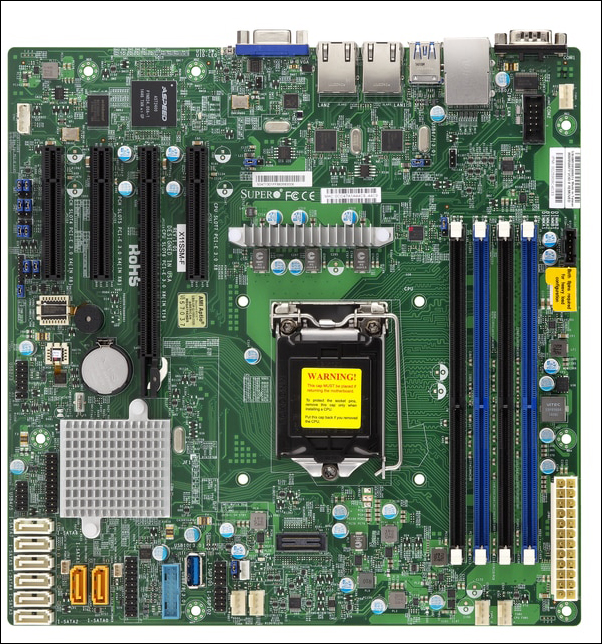
For simpler builds you will also want to pay careful attention to the number of SATA headers… and what they are connected to. For example, if two motherboards meet all your needs but one has 4 SATA ports and the other has 8. The 8 motherboard may save you the cost of a HBA down the road. However, if that second motherboard has 4 via the PCH/SB and the rest are via Marvel or other ‘secondary’ controllers we would be tempted to get the 4 SATA port motherboard. When it comes to integrated SATA controllers it is Intel > AMD > LSI/Broadcom/Avago > everyone else.
To be honest we prefer barebone motherboards with a good PCIe layout over those with integrated SAS/SATA HBAs (e.g Supermicro motherboards that have a “C” in the model name), or integrated 10Gbe NICs (e.g Supermicro motherboards that have a “T” in the model name)… or both. Yes, having these nifty features built right into the motherboard is great and all… but it adds more failure points, they cost more, and generally speaking are harder to cool. Plus, it is way easier to upgrade to a new/better/etc NIC (say from 10Gbe to 40Gbe) when it’s a PCIe card you are talking about. The same is true of HBAs. The exceptions are of course when talking about smaller cases where you do not have room for Add In Card(s).
(image courtesy of wikipedia.org)
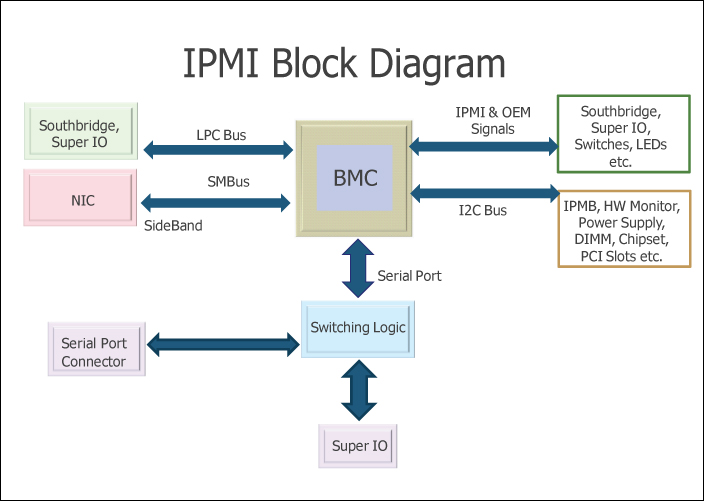
On the other hand… IPMI (Intelligent Platform Management Interface) is worth the added cost (e.g. SuperMicro motherboards with a “F” in the model) as they allow you to do a lot of things without the need of being in front of the computer. It is a great luxury… but for home use it is not a necessity. It just makes life a lot easier.
If you have never used an IPMI equipped motherboard what IPMI is and does is simple. In the most basic terms IPMI is like having a Rasberry Pi integrated right on the motherboard (on good mobo’s they even have their own dedicated NIC so no sharing of IP addresses). A Raspberry Pi that has been configured to let you remotely control the system – up to and including rebooting, powering the system on/off, modifying the BIOS settings… even remotely updating the BIOS. Put another way it is like SSH’ing into a system… but on steroids. Not only can you do everything SSH would allow you to do, it can do a lot more. This is because when you connect via IPMI what you see on your screen is what you would see on the screen if you were sitting in front of the system and had a monitor connected directly to it. Mix in the fact that it has full keyboard and mouse control… and anything you could do when ‘directly attached’ the system you can now do remotely. This includes installing an Operating System remotely. In more technical terms IPMI allows for full Keyboard/Video/Mouse Redirection (KVMR) via ethernet. Think of it is a next generation iKVM… as it is a System Management Bus (SMBUS) interface between a BMC (Baseboard Management Controller – usually an ASPEED AST 2×000 series) and the board Network Interface Controller (NIC).
Is such a feature needed for a NAS that will in your own home? No… but it can save you some money and time. This is because the IPMI controller has its own (2D only) ‘video card’ or ‘iGPU’. Since a NAS is not (usually) a video intensive OS this dedicated video controller is more than enough horsepower to get the job done. This means you do not need a PCIe video card… or even a CPU with iGPU baked in. So, if you are looking at AMD no need for a APU model. For Intel no need for a CPU with an Intel HD Graphics. This opens up a world of possibilities. A world where older Xeons ‘just work’ without any video card installed. A world where you do not need to spend more for a newer Xeon with a “G” in the model name.
From this perspective IPMI motherboards are a great way to not only gain features but save money. The downside though is three-fold. Firstly, this ‘iGPU’ is not powerful. So, if you need video transcoding GPU horsepower… this will not be ‘it’. Even 1080P video transcoding will be beyond its abilities (even if software for it existed in the first place). Get a discrete video card instead of spending money on an IPMI enabled motherboard. The other issue is that the video port for IPMI is going to be limited to a 15-pin VGA connector. No HDMI. No DisplayPort. So if you don’t have a monitor with a VGA port (the ancient ‘blue’ one with three rows of 5 pins)… you are SOL. You can get adapters cheap though.
The last issue will require you to do a bit of homework… as how IPMI is implemented will vary greatly from manufacture to manufacture. Some charge for a ‘key’ to ‘unlock’ this feature, others do not. In this regards SuperMicro is the best as you get all but remote BIOS updating (and couple other advanced features) free of charge – and a key (if you really need it and don’t want to go the pirate route) is only about 30 bucks USD. On the implementation front… workstation motherboards are less optimal compared to ‘server’ motherboards. For example, it is very common on workstation motherboards to have the IPMI out of band BMC controller ‘share’ a single NIC with the actual system. This usually works fine but when it does not you get down right odd and squirrelly issues that randomly crop up. So, get one with a dedicate IPMI NIC.
For new IPMI motherboard manufacturers we like SuperMicro, ASUS and AsRock. Since we are in the Free Democratic Republic of Canuckistan (aka ‘Canada’) a couple good places to buy new include atic.ca and memoryexpress.com. For used… it is hard to beat SuperMicro. You can find deals where the motherboard, cpu, and even an 800 series SM chassis combo will only set you back 3-500 dollars. You can sometimes even get RAM included for free or little extra cost. So deals out there. You just have to look. Good places that we trust (and have used in the past) include theserverstore.com, metservers.com, and unixsurplus.com. There are others. Even (fl)e(a)bay is sometimes choke full of deals. Just remember the old addage “when you lie down with dogs you get up with fleas” when it comes to fleabay… so fleabay should be used as a last resort only.
Regardless of IPMI or not, our rule of thumb is Server > Workstation > consumer. There are a couple exceptions (e.g. ASUS TUF line is just as robust and sometimes more than ‘workstation’ motherboards) but a server motherboard should last a decade or more. If they work for a year, they just work. They just don’t quit. As an added bonus, many a ‘server’ motherboard model will cost less than consumer variants. For example, a SuperMicro X11SCH-F mATX model will only set you back 2-3 bills. This motherboard will not only work with Xeon E-2×000 processors but also 8th and 9th gen consumer Intel processors comes with IPMI, and works with ECC and non-ECC memory. If you are buying new and ‘on the cheap’… a cheap i3 8100 (or 9100) supports ECC (i5/i7/i9 models do not). Since this mobo supports unbuffered ECC, ECC memory is not all that expensive (relatively speaking). That is the kind of deal you can find without paying for dross and ‘features’ that do nothing but increase the asking price.
The only issue with server motherboards is you have to be careful of their form-factor. Standards like SSI EEB can severely limit your case options (it is not ‘e-ATX’… just similar to this non-standard ‘standard’, whereas SSI CEB is the same as ATX from a form-factor POV). Then you get the downright oddball proprietary form-factors like WIO or UIO which are even worse. So if you are a novice… stick to ATX, mATX, and iTX for your own sanity.
Optimal Choices:
- Server motherboard in the right form-factor
- Workstation
- Free board you already have
Less Than Optimal:
- Consumer ‘overclocking’ or ‘gaming’ motherboards (unless free)
- Oddball form-factor mobos
CPU Selection
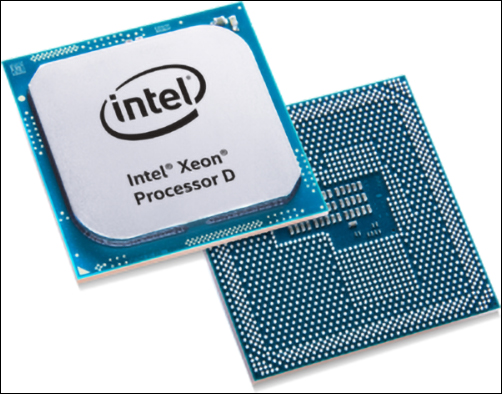
Let us start with what CPU you should choose. The short answer is… as long as it is a dual core or better CPU it probably has more than enough horsepower to be a NAS central processing unit. You do not need an AMD Epyc 2nd gen 64 core monster. You do not need an Intel Xeon Platinum. Many a rig has been built with the equivalent of an i3 or even an i3 (one of the few Intel consumer models with ECC support). With that said we are not fond lovers of the Intel ATOM processors. While better than earlier Intel ‘mobile’ processors that are still used in a veritable ton of NAS ‘appliances’ / ‘prebuilt’ units from QNAP, Snyology, etc. they are still underpowered for parity calculation tasks when dealing with RaidZ2 and RaidZ3. So, while more than ‘good enough’ for Mirroring… our personal ‘entry level’ would be the (or its equivalent) Xeon D 1000 and D 2000 series (with the D 2100s being more powerful than previous 1500 and 1600 series models).
These new Xeon D-2100 series CPUs run cool, quiet and while they may not clock in at 4 or 5Ghz they have a lot of horsepower (about 2-3 times more on a clock per clock basis than even the latest Atom generation). No need for the 16 or even 12 core variants. Four or eight cores is more than enough. For example, the D-2123 (4 core) and D-2141 (8 core) make for a very good NAS foundation… as they offer good CPU performance and come with integrated 10Gbe NICs. Depending on motherboard model some even come with both dual 10Gbe RJ45 (usually called 10GBase-T) and dual 10Gbe SFP+ ports which gives you a ton of future network expandability options. Just be careful on the variant as some Xeon D motherboards do not come with standard ATX motherboard power connectivity. We also prefer the flex-ATX form-factor models as they usually have 12 SATA ports – none of which are via (expensive and somewhat finicky) OCuLink headers.
For home users it is hard to beat either an AMD Ryzen or Intel E3. These are older processors but they offer a lot of bang for your buck. For those looking for a bit more oomph our personal recommendation would be the Intel E-2100 or E-2200 series. There is absolutely zero need for Xeon W… let alone Xeon Bronze/Silver/Gold/Platinum/whatever Intel comes up with next to make more money off Enterprise buyers. If buying used it is hard to beat an Intel Xeon E3 v3/v4… or v5 based system for value. Though with such good deals on to be had on E5 v4 and v5’s they too are excellent choices. Quiet honestly, it is better to spend a bit more on a better motherboard and RAM than it is to waste it on a higher end CPU. Of course, if a newer Xeon ‘drops in to your lap’… use it. There is no such thing as overkill. Only ‘open fire’ and ‘reloading!’. The only downside is a bit more heat production, more power consumption (mostly over-rated unless talking about a couple hundred watts in the difference or used in poor air flow cases), and more restrictions on RAM choices.
Optimal Choices:
- Intel i3 or better
- Xeon D or E series
- AMD Ryzen 4 core or more
Less than optimal:
- Intel and AMD ‘mobile’ CPUs
- ARM processors
- Intel Atom 1000 and 2000 series… just, just don’t.
- Epyc
- Xeon Bronze/Silver/Gold/etc
- Xeon W
RAM Selection
On the RAM front. Let us start by dispelling a common myth. A myth started by a classic example of the Dunning–Kruger effect in action. One who was so arrogant, so ignorant, and so toxic that even ixSystems’ admins finally nuked his ass of the FreeNAS forum and deleted most of his feces-covered rants and ‘opinions’ (which has made the official FreeNAS forum actually novice-friendly). That myth is that ECC RAM is needed for a file server / NAS. It is not. It is best practices. It is not required. 90 percent or more of all NAS appliances you buy do not rely on ECC RAM. They use ‘laptop’ RAM.
You do not need to take our word for it. Here is a decent blog article that goes over ECC.
Should you use ECC? Yes. If your budget allows for it, it is a very, very good idea. It is an added layer of security. It is not required. It is not like driving down the wrong side of the road hoping a bus won’t hit you. It just removes a layer of data security from your NAS. One that rarely is needed (e.g. Google’s own stats show their servers only needed ECC in single digit percentages). For an upcoming media player orientated NAS we did not use it. Our main, and secondary NAS’ do. If you want peace of mind… ECC is worth the extra cost.
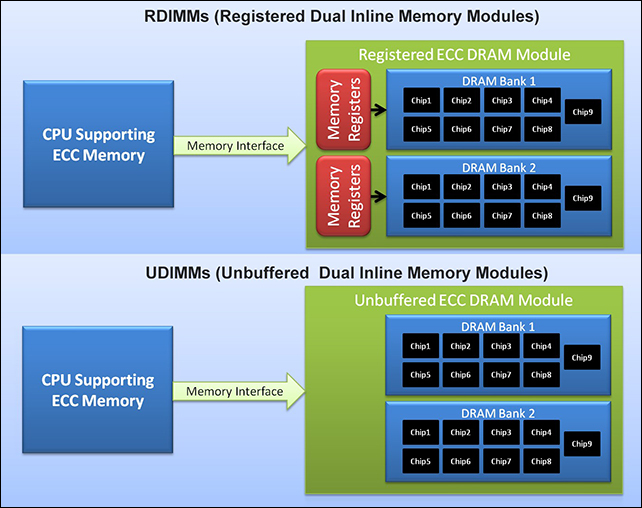
(image courtesy of dangdi.vn)
In either case we do have two recommendations to make. Firstly… use as much RAM as you can afford. 16GB is a good place to start. 32GB is better. Above this amount… depends on the usage scenario. Most home file-servers will rarely run into issues with 32GB of RAM. More is always better, but there is a point of diminishing returns. Furthermore, unless you are opting for AMD Ryzen based systems speed does not matter. Capacity matters a lot more.
Lastly, we recommend Crucial and/or Micron RAM whenever possible. Both are the same company. One is just the ‘consumer facing’ side of the Micron corporation. Crucial’s online handy, dandy recommendation tool works and works well. Feel one hundred percent safe knowing that if you pick your RAM based on the list that pops up for a given motherboard that it will work… as Crucial RAM just works. With the exception of edge cases not really pertinent to this article Crucial and Micron is our top pick. Everyone else is an ‘also ran’ – including Samsung. This assumes you are buying new. If you are recycling a working older rig (i.e. upgrading to a new system and planning on using your old system for your new NAS)… use what you got. If you need more RAM buy more of what you already have. Do not needlessly over complicate things.
Optimal Choices:
- RAM that is proven to work with your motherboard
- Crucial/Micron RAM
Less than optimal:
- Speed over Capacity
CPU Cooler Selection
Let us start by saying you do not. DO. NOT. Need a Noctua D15, an AIO or anything fancy. If your CPU came with a ‘stock’ cooling solution it is probably more than good enough for a typical file server. If you want to get fancy a decent, and yet inexpensive cooler will be overkill… but should only cost you a few dollars and come with no other major issues beyond making sure it fits in your case. An Artic Freezer 7/11/12/33/34, Artic Alpine 12, Scythe, Reeven, Cooler Master… all good choices. We like low profile ‘down draft’ style coolers but this is personal preference only. It really does not matter all that much. Just get one with a good long-life fan and you are good to go (with fan models either TCO or CO in the model for best of the best options).
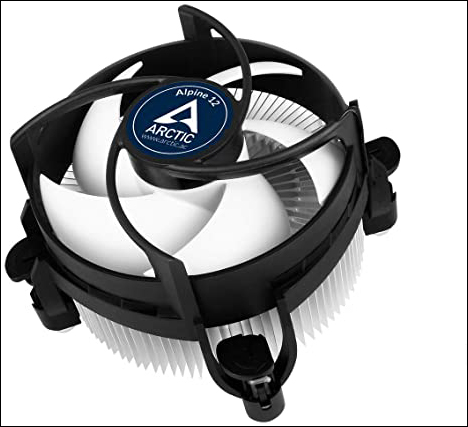
We actually do not recommend AIO or any water-based solution. They will be lower noise but require more maintenance. A good NAS should last 5 to 10 years… or longer. An AIO needs to be replaced every 5 or so. A water loop needs to be drained yearly. An air-based cooler… swap the fan every 5 years and it will last your lifetime (assuming socket compatibility).
Optimal choices:
- Air based cooler that fits your case
Less than optimal choices:
- Water based
Fan selection
Fans actually play very, very critical role in a NAS. They keep the components cool. This may sound like a ‘grass is green, the sky appears blue, and water makes things wet’ statement… but it is one thing many people overlook. Yes, those smexy little mITX cases are pure awesome from a foot-print point of view… but they really do not do a great job at allowing you to keep the NAS cool. Drive selection really does matter as otherwise the lifespan of the HDD(s) can be noticeably shortened. Our rule of thumb is that if you do not have an intake and an exhaust fan… you had better be prepared to deal with noise. A single fan will need to be rather beefy to do it all by itself. Even then it will not do as good a job as two or more fans.
Excluding oddball/exotic cases this means your fans are going to be 120mm. 80mm actually offers better static pressure than 92 or 120mm fans – it is just physics (well fluid dynamics but let’s keep it to small words and not have to pull out a chalk board to explain). Do not be afraid of cases which rely upon ‘smaller’ fans. They can sometimes be better cases for a NAS than 120mm fan equipped cases. This is why Supermicro (like all good ‘server’ case manufactures) use (up to) 80mm and not 120mm fans even in their 4U rackmount cases… and only (up to) 92mm in their workstation cases.

Regardless of the size of fan, you will want to populate every fan port a case offers. Do not be stingy. Populate them all. Pay careful attention to how much fresh air the hard drives are going to get. Yes, everyone and their dog loves to point to the Google case studies which ‘proved’ that hard drives do not need super cooling to get the job done. Sadly, and in classic Dunning-Kruger fashion, few actually understand what that case study was actually saying… but everyone will pontificate on its significance.
So what does it actually say? It says that hard disk drives do not need to run at ambient temperatures… but Google proved that there is a difference in failure rates when comparing above 40 C and below 40C. The difference was not enough to justify the added expense… but that is because it was freakin’ GOOGLE. A server farm, even a small one, usually run tractor-trailer loads of servers crammed full of hard drives… per room. This is a lot of heat that requires air conditioning. AC is costly. Google proved to their own satisfaction that the cost of replacement hard drives was less than the cost of AC. Do you plan on running AC to keep your system cool? No? Then the Google study has very little bearing on your decision-making process.
That is what the study was talking about. Nothing more, nothing less. To be blunt, the only take-away from it is that you want to keep your hard drives below 40 C if you want to minimize the chances of a premature failure. The best way to do that is via fans. Anyone who says otherwise is taking the short bus to work.

It is our not so humble opinion that fans fall into one of three broad categories: cheap dumpster fires, Fluid Dynamic Bearing, and Constant Operation. Sleeve bearings? Just don’t. They may be a few dollars a fan cheaper (or not) than decent FDB based fans but their lifespan means they cost more in the long run than FDB fans. Fans designed for Constant Operation (aka Enterprise environment) are the gold standard. Expect to spend more for a good CO fan than an FDB. Are they worth the extra cost? That depends. The biggest determining factor is what you expect the fan to do. Are you planning on swapping out the buzzsaws in a SuperMicro 800-series chassis? Then you need high static pressure fans that will run for a long, long time. This means CO fans. For typical home use NAS scenarios a good Fluid Dynamic Bearing fan is ‘good enough’ in the performance and price categories.
The fan we usually reach for in our own builds are Artic (previously known as Arctic Cooling). They do not cost an arm and a leg, offer good to very good performance, are not overly loud… and last for years and years. They even make constant operation rated fans. They may not be as good as Noctua’s from a performance (i.e. static pressure) point of view… but in most cases the difference is not worth 2-3 times the price over what Artic asks. Our general recommendation is get their F series for good air flow cases, P for mediocre cases, their ‘CO’ models if you want a bit more piece of mind, and if you need uber performance either get Noctua PPC models or San Ace or Delta or Yate Loon fans… and be prepared to live with their noise levels (with Noctua PPC 3000 being ‘barely tolerable’ and the rest well into the ‘loud’ category).
Optimal choices:
- Arctic P12
- Arctic F12
- Arctic ‘CO’ models
- Noctua PPC industrial fan models
- San Ace
- Yate Loon
- Delta
Less than optimal:
- Sleeve bearing… just,just don’t
- Rifle bearing (mediocre at best)
- Spending a ton on a fan because it is ‘pretty’ or covered in LEDs
Power Supply Selection
This is one area where we see novices constantly cheap out and make bone headed decisions. Do you need a Titanium 1.5KW wonder PSU? No. But you do need a good PSU. Depending on what is most important to you this can mean going for a higher efficiency model… or it could mean opting for a big honking mega-capacity model and living with lower efficiency performance and gaining less noise. So how do you choose a good PSU… and what is a good capacity?
A good power supply is at least Gold rated. Gold is nearly as cheap as Bronze and yet is going to be better. Enough better that the difference in price is not a deciding factor. Many companies make good to great PSUs. Corsairs AX and AXi lines (the former being Seasonic and the latter being made by Flextronics), nearly anything Seasonic branded, SuperMicro (the older Golds are loud, and look for a P in the model name as it comes with PWM fans), IBM, Dell… or basically anything that is meant for the server environment. When dealing with consumer grade PSUs look for the longest warranty period possible and do your homework – JohnnyGuru is one of the few sites we trust in this regard. For home systems that use the ATX form-factor we are partial to Seasonic. Their latest Gold certified PSUs are inexpensive and good quality. For hot swap / redundant we are partial to Supermicro.
In either case a simple way to calculate what size you need is to take the TDP of your CPU in watts, add in 30 for the motherboard and CPU cooler (assuming no integrated 10Gbe or SAS controllers), add up all your fans’ wattage, and then multiple the highest wattage HDD you have by three and then by the number of drives you are planning on using. On startup a hard drive will use upwards of 300 percent more power in a ‘surge’ to overcome friction and inertia. It is very short period but your PSU needs to be able to handle it. If you are using a video card add its TDP into the calculation as well. Same with any PCIe add in cards (HBA, 10Gbe NICs, etc.). Then add in 15 percent for AC to DC loss.

This will give you the minimum you should be using. To use an example, let’s take a typical i5, four 120mm fans, no video card, and 5 Seagate Ironwolf Pros 12TB’ers. The fans are Artic P12’s which each use .20Amps each. Ohm’s Law states that 0.2 amps at 12v is the same as 2.4 watts. For our conservative streak we will call it 3 watts each or 15w total. A i5-9600K has a TDP of 95 watts. Add in 30 watts for wiggle room for the motherboard. Since the IronWolf Pro 12TB is rated at 7.6W typical power draw and (like the reputable company they are Seagate include in the specs) the typical startup draw is 2amps or 24Watts. Which is a little more than our usual rule of thumb of 3x (in this case 22.8watts). If given the data… pick the highest number for your calculations. So 24watts times 5 drives for 120 watts. This is a grand total of 260 watts. With 15 percent loss of efficiency that makes the absolute minimum 300 watts for the PSU.
However, as power supplies age they get less and less efficient. This is usually called “capacitor aging”. It is a real thing… but varies greatly from one PSU to the next. Most ‘pessimistic’ calculations use 30 percent over the typical lifespan of a 24/7/365 “always on” PSU. Rounding up gives us 400watts. This is for the hypothetical NAS right now and does not include future upgrades. Since this hypothetical will be upgraded in the HDD and HBA department. Let’s add in another 3 HDDs and a SuperMicro 3008L HBA. An additional 72 watts for the HDDs, and another 30 watts (worst case scenario) for the HBA. An 8 drive HBA will suck down 10 to 20 watts… but maybe we want to go full shortbus and go for a 16 variant. This brings us up to the 500 watt class PSUs. So unless you are going full r’tard (and never go full r’tard) a 550 watt or 650 watt PSU is all you will need. A Seasonic Focus Plus Gold 650 will set you back less than 1 bill. A cheap PSU will set you back half that. Is fifty dollars really worth risking thousands of dollars in HDDs and literally priceless data? We don’t think so.
If looking at redundant enterprise grade power supplies we would get the biggest you can afford. Yes efficiency will be defenestrated out the nearest window but they will be much lower noise solutions… as long as the fans are PWM capable. Remember you will be dealing with 40mm fans. A unit designed to handle the heat output of 1.2KW will laugh at a piddly 400 or 500 watts. Rule of thumb is keep them under 30 percent load and they will be rather mild mannered in the noise department (assuming PWM fans and not old models which ran loud all the time… regardless of actual load).
Optimal choices:
- Seasonic made Gold or better
- Corsair AX and AXi
- Supermicro
- Server PSUs with PWM fans
Less than optimal
- Bronze rated PSU from reputable companies
- No name PSU… just, just don’t.
HBA Selection
(image courtesy of oracle.com)
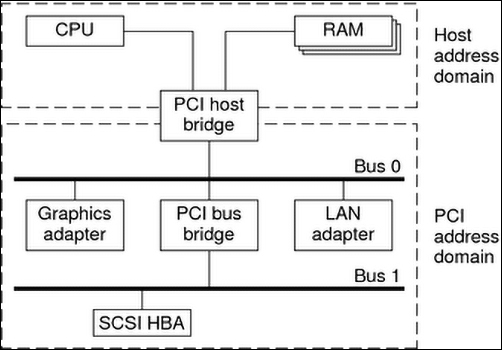
When talking about Host Bus Adapters (HBA) a little bit of background information is needed to ‘get’ what a HBA is. Back in the early, early days of computing the central processor was actually connected directly to the storage devices (and other devices outside the scope of this article… for instance a NIC is a HBA but we do not typically call the network controller a HBA… and rather it is called a NIC). Then came more modern standards which… off loaded this workload to a discrete and separate controller. Since these were secondary controllers that did the heavy lifting for the CPU (and acted as a ‘middle man’) they were called Host Bus Adapters – as they literally talked to the CPU over one bus (eg PCI) but talked to the storage devices over another (eg SATA). In time these secondary controllers were rolled into a larger processing unit that we usually think of: the South Bridge or PCH. Both of which are connected via PCIe lanes to the CPU.
For smaller NAS / file servers the HBA baked right into the motherboard itself is good enough and there is no need for anything else. However, not all SB/PCHs are created equal and some can only accept a few hard disk drives. When the number of drives exceeds the abilities of the motherboards built in HBA… a secondary HBA is needed. One that converts a part of the PCIe bus to a secondary SATA bus.
Many companies make PCIe HBAs. These can be as simple as a single lane PCIe with an onboard Marvel controller (what a lot of QNAP’s use for their ‘backplane’) or rather complex devices that require 8 PCIe 3 lanes and can handle both SATA and SAS devices. A lot of people make the mistake of buying a cheap 4 or 8 SATA PCIe Add In Card and call it ‘good enough’. Do not do this. If you need more drives than what the motherboard can handle there is only one sane choice: LSI/Broadcom/Avago (all the same controller just depends on which company ‘owned’ it at a given time – right now its Broadcom as Avago bought Broadcom and kept the name… for brevity’s sake we are just going to call them LSI). Specifically, the non-MegaRAID branded LSI controllers.
LSI has been making HBAs for a long long time. They just do not call them HBAs. They call them SAS I/O controllers operating in IT mode (IT stands for initiator target and IR is ‘raid mode’ and what makes a MegaRaid a MegaRaid card… and a less than optimal choice for a home NAS unless you crossflash to IT mode). Since there are multiple, multiple generations of LSI branded and 3rd party branded LSI controller cards floating around it is best to look at the actual controller they use. For the most part anything from SAS 2008 chipset on up is more than enough. These older 2008s (eg IBM ServeRAID M1015) can be found for as little as 50 dollars used.
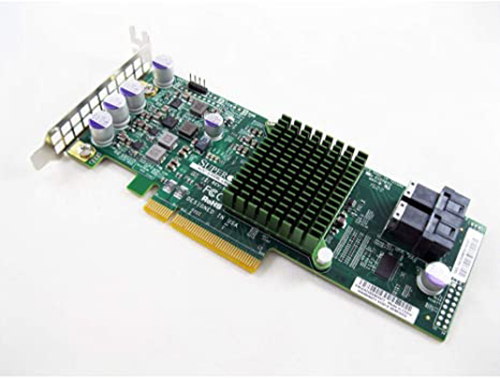
We usually step up a notch to the SAS 3008 as it is newer, handles larger drives a lot better (from a compatibility point of view) and can be found new for about $200. For example, the Supermicro AOC-S3008L-L8E (not L8I which comes with IR mode firmware) is a great choice. It can handle 8 SATA drives and do so without bottlenecks or compatibility issues with mega sized HDDs. If you need more additional drive capacity than 8 more drives… the SAS 3200 controllers (eg AOC-S3216L-L16IT) can handle 16 drives. The downside is the additional performance of the SAS 3200 chipset is not needed and you will spend more than twice the cost of a 3008 HBA for it.
Yes, there are other manufactures of HBA cards. All suffer from either being absolute dumpster fires in quality control department (QNAP’s use of Marvell is a main reason why their ‘backplane’ fails so often) or suffer from driver issues (e.g. Adaptec which are decent for Windows and even Linux but terrible for Unix). If you need more drives do not skimp out. Spend the few extra dollars on a ‘LSI’ card. Even if it is not LSI or Broadcom branded. The controller is really all that matters.
Before we move on there is one downside to LSI HBAs. That is heat. They are almost invariably passively cooled controllers. In a case with excellent air flow (i.e. a true server or workstation case like the 8xx or 74x chassis models by Supermicro) passive will work. In less than optimal airflow cases you will want to stick a fan on them and actively cool them. This can be as simple as screwing a 40mm fan to the heatsink or as complicated as 3D printing an 80mm or 120mm fan adapter. You can never go wrong with overkill. A couple dollar fan and a dollar’s worth of plastic will keep the HBA happier. A happy HBA is a long lived HBA.
Optimal Choices:
- Integrated Intel or AMD controller
- LSI 2008 based
- LSI 3008 based
- LSI 3200 based
Less Than optimal:
- Ancient LSI
- Really new LSI controllers like ‘Tri Mode’ 3400 series
- ‘SATA’ PCIe adapter cards… just don’t.
- Adaptec controllers
NIC Selection
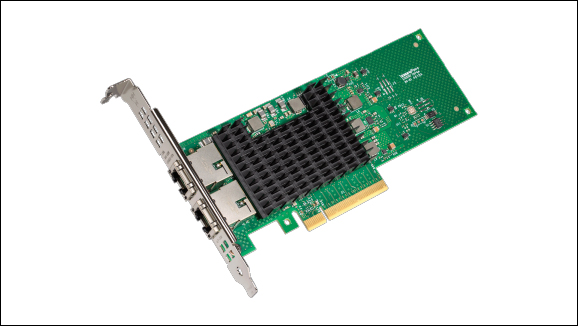
(image courtesy of Intel.com)
When it comes to NICs there are a few brands and models we trust. Let us start with the basic 1Gbe. The most reliable is the Intel i210 series. These just work. A newer variant is the i350. It too ‘just works’… but usually is only an Add In Card option. These are the two that we look for when selecting a motherboard. We prefer motherboards with 2 NICs (or 3 if using IPMI) as you can setup fail-over abilities… but for the home user environment one is ‘good enough’. If you are tempted to do Network Teaming. Don’t unless you know what you are doing. As the name suggest Link Aggregation Grouping introduces noticeable lag. Latency is your enemy from a performance point of view. Unless you know what you are doing and have the network infrastructure to handle it L.A.G. is not needed and usually comes with more negatives than positives. Keep It Simple Stupid should be your motto.
As for Realtek, Marvel and all the others. Just don’t. There savings are usually not worth it. If the motherboard you really, really want only uses these ‘other guys’ NICs… get a Add In Card and disable the onboard in the BIOS. You will thank us later… or maybe not as ignorance of the bullets you dodged is bliss.
There are some oddball 2.5/4/5/etc Gbe NICs out there but honestly, they are hit or miss. If you need more performance than a 1Gbe NIC can offer, go for 10Gbe. When stepping up to 10Gbe there are two options to choose from: RJ45 backwards compatible 10Gbase-T, and SFP+. SFP+ use less power and cause fewer headaches… but are more expensive and a bit of drama lama when it comes to RJ45 adapters. Even though the cost of SFP+ switches is less, and there are more options, for the home user 10Gbase-T is the easier choice. They offer good future proofing without any real headaches when used with older networks.
Right now there are two companies making 10Gbase-T NICs that ‘just work’. They are Intel and Chelsio. The Intel X550-T2 is good kit and not all that expensive. The Chelsio T520-BT and older T420-BT are arguably better (Intel’s 10Gbase-T really max out in the 9Gbe range) but cost a lot more. They are all usually passively cooled… but much like HBA’s we prefer to actively cool them. It is overkill, but a cheap small fan moving a 6CFM or more is good investment. A cool running NIC is a happy NIC. A happy NIC is a long-lived NIC.

For SFP+ the Chelsio T520-SO-CR (for those interested, SO stands for Server Offload.. and offloads some of the work to the CPU) and more expensive (and arguably not worth it for home users) T520-CR are the best options. The Intel X710 series is also decent, but if you are looking to spend this level of money for 10Gbe infrastructure Chelsio is worth the extra cost.
If for whatever reason you need even more performance. The 40Gbe Chelsio T580-LP-CR is about the only option we would choose right now. Intel’s XL710 is decent, and Mellanox can be. Just expect lower performance and/or driver issues (which is a shame as Mellanox makes some good kit… just not great drivers).
If you need even more performance… you are not the right person for this article. 100Gbe is pure awesome but you need to have a good grounding in networking and a ton of money for them.
Optimal Choices:
- Intel 210, 350, X550, X710, XL710
- Chelsio T420, T520, T580
Less than optimal
- Other Intel models
- Everyone else… just don’t.
Example of an inexpensive NAS build
As we said time and time again, and throughout this review, a home file server / ‘NAS’ build does not need to cost you an arm and a leg. In fact, while great for your ego, expensive builds really do not offer all that much more than what a less expensive build can. It really just depends on what you plan on using your new NAS build for… and if ‘good enough’ (but cheap) is actually good enough.
For this build the NAS is going to be our tertiary NAS, with tertiary duties. Basically, this NAS is going to be used as a file server… a file server for audio and visual entertainment. It does not need to do any transcoding as our Home Theatre PCs have more than enough horsepower for 720 and 1080P upscaling to 4K. It does not need uber-protection on the data. It does not need hotswap drive bays, or redundant power supplies. It just needs to work with whatever drives we have kicking around collecting dust.
With the expectation of the case and the case fans (never reuse old fans) we obtained these parts for free. You may think that makes the build’s final cost of under $200 Canadian rather… impossible, but we bet your older system you are using right now is more powerful and when you do upgrade to a new right it will result in a NAS that is even more potent than this example. Worst comes worst you will be looking only at the cost of hard drives.
The build list is as follows:
- Asus Maximus VIII Hero motherboard
- Intel Core i5-6600
- 16GB of Crucial DDR4-2400 RAM (4x4GB)
- Crucial MX300 1TB SSD
- 4 Seagate 4 – 10TB HDDs (various)
- 1 Western Digital Black 6TB
- Corsair AX750 PSU
- 4 120mm Arctic P12 fans
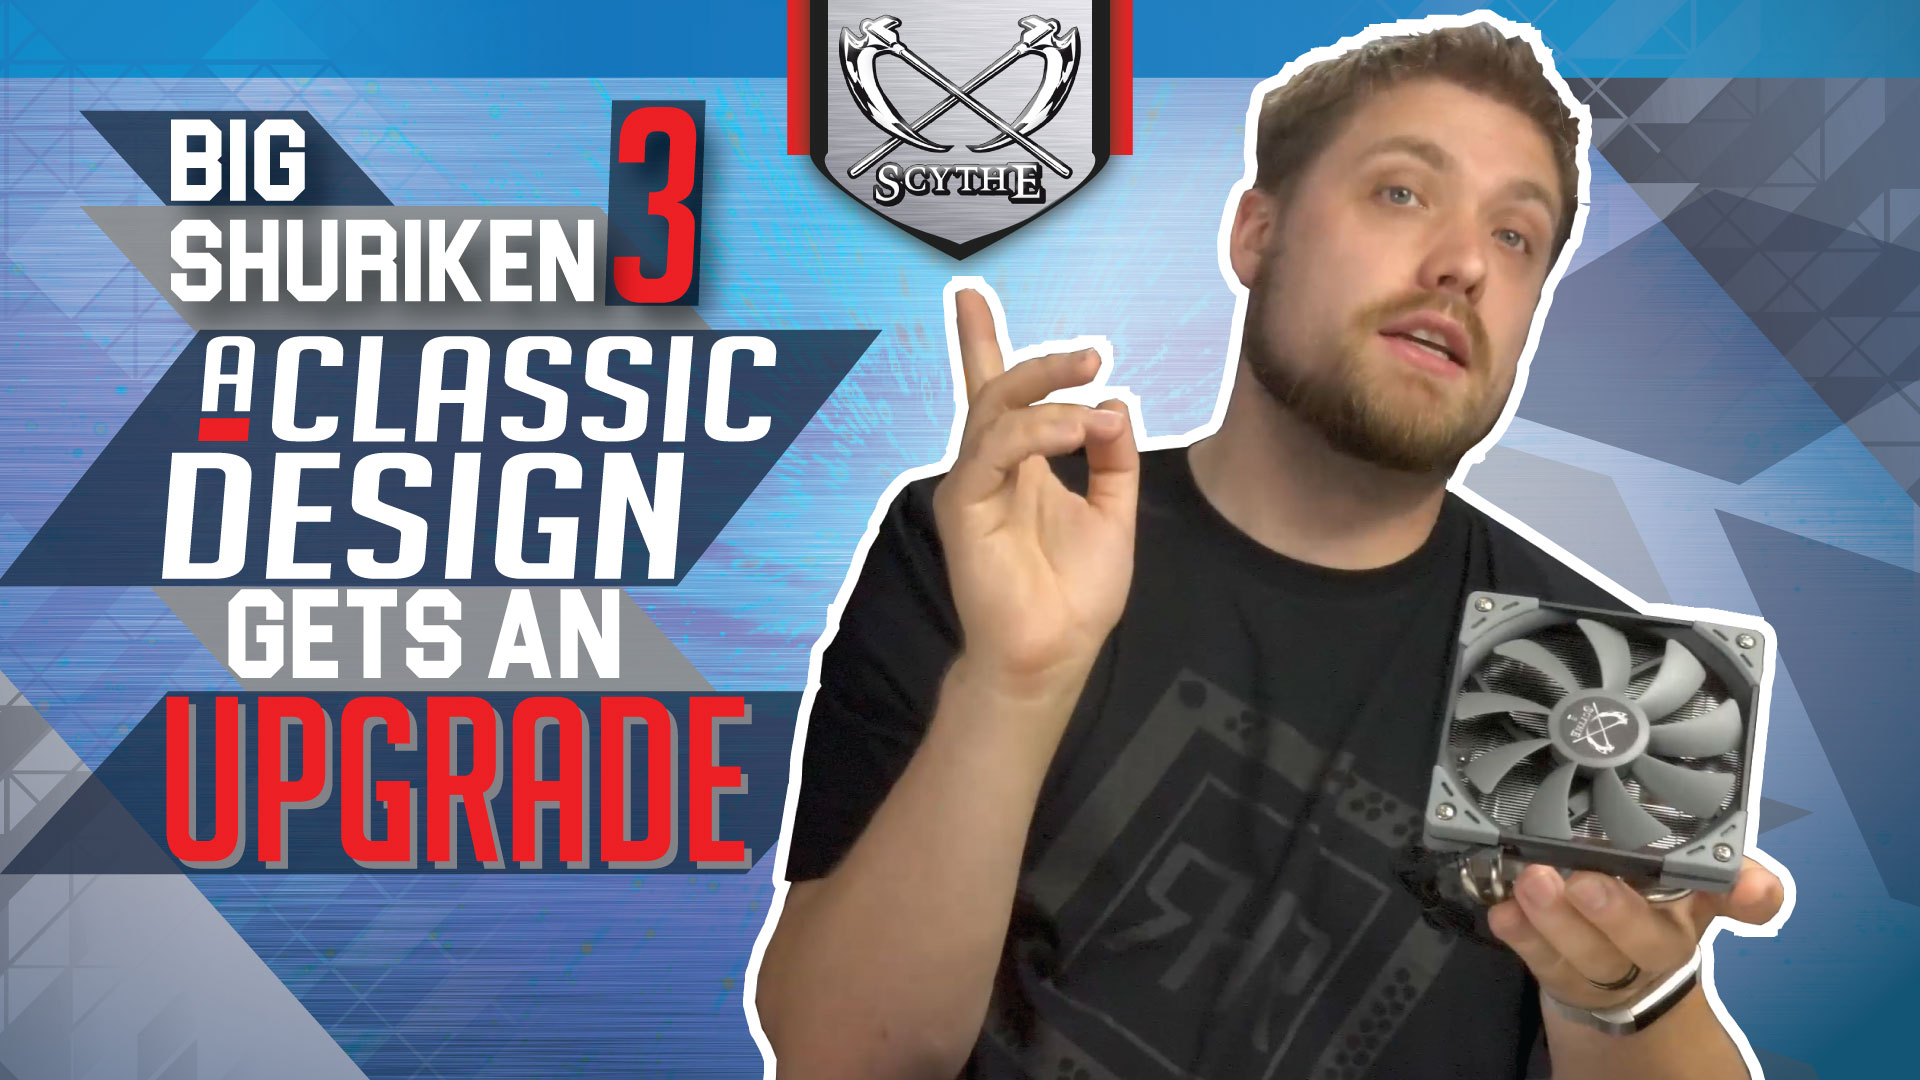
- Scythe Big Shuriken 3 CPU cooling solution (we are partial to downdraft coolers for NAS builds)
- Fractal Design Define R6
- OpenMediaVault 4 with SnapRAID and MergerFA plugins.

So let’s break down why each component was chosen for this build. The motherboard was chosen for two reasons. Firstly… it was free. Secondly it has 8 onboard SATA headers (though we would only use the 6 Intel) and even has a M.2 PCIe x4 lane header. That is more than enough to start with. In time a SuperMicro AOC-S3008L-L8e will be added (with a small fan and 3D printed fan mount). For right now 16TB of capacity is more than enough for our mp3/ogg/flac music collection and epub/mobi ebook collection.
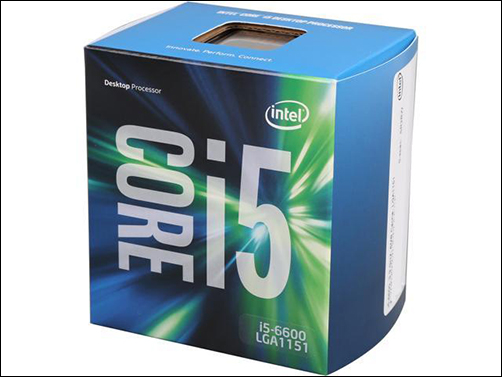
On the CPU side of the equation… the CPU (and motherboard for that matter) was free. The Intel Core i5-6600 is overkill for this system. An i3 would have been more than enough. As it stands the 6600 is basically the same (sans ECC support) as a lower tier Xeon E3-12×5 v5 series processor. Put another way, it offers 4 cores, 4 threads of processing performance that can churn through parity calculations well beyond what is needed. It just will not be a bottleneck for this file-server.
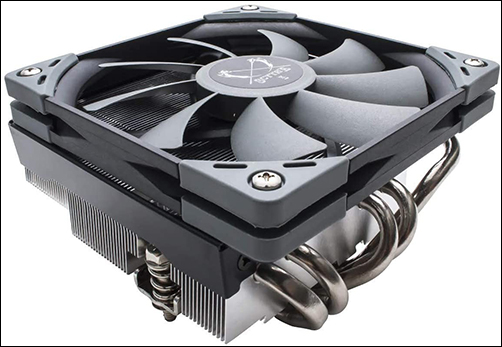
The same is true of the Scythe Big Shuriken 3. It will laugh at the demands of this piddly little 65 watt CPU, but we like downdrafts on consumer grade motherboards (due to their lackluster layout compared to server motherboards) and it will rarely rise above ‘whisper quiet’ noise levels while cooling the CPU. Since it was sitting there in our parts bin… there was no need to pickup an Artic CPU cooler – free is (almost) always best.
Since the number of concurrent users will low, and the need for anything more than a 1Gbe connection is contra-indicated this makes OMV a pretty easy choice. Dual HDDs for parity protection with 3 (right now) drives for data in a super easy to update configuration just makes sense. Since five minutes (or 55 minutes for that matter) of downtime is not a big deal… hot swap bays are also not needed. If they were OMV would not have been chosen for the OS.
Since this NAS will be routinely backed up and we always have a couple spare PSUs laying around… redundant PSUs are also not needed. This means an expensive, or loud, enterprise or workstation case would just be a waste. While we do prefer the new Fractal Design 7 (and 7 XL) for the improvements in hard drive mounting the added expense over a Fractal Design Define R6 would be hard to justify. The R6’s drive mounting works good enough for this number of drives… and if we really need more a SM M35T-TQB (and that SM branded LSI 3008) will easily work and be a simple upgrade.
As this is not a ZFS based configuration 16GB of RAM is also not going to be a bottleneck. They are known good sticks that have been working for years, and will continue to do just that. Since they are ‘good enough’ and were free… why spend money on something that will net not real and tangible performance improvements? The only change would be to opt for ECC RAM, but that would require both a motherboard and CPU change. Thus, the benefits are easily outweighed by the added cost.
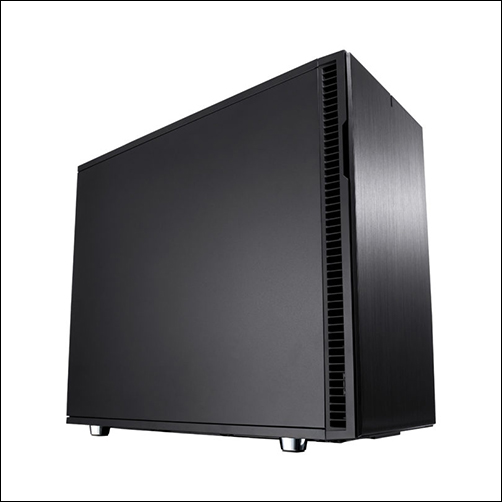
Fractal Design Define 6’s default fans are decent, but as this case is a touch closed / higher static pressure than we are entirely comfortable with the decision to replace them with Arctic P120s was not difficult. Since the Define R6 comes with a decent fan hub… hooking them up to ensure they all run at the same speed is a breeze.
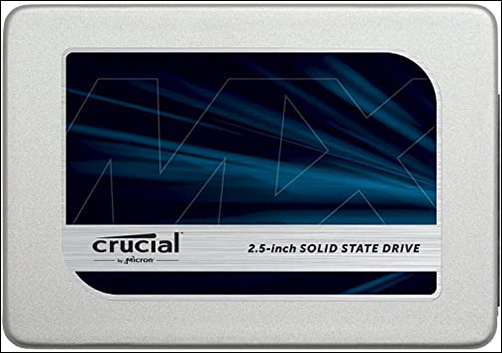
While indeed overkill for a NAS, the MX300 1TB was chosen as it is known good kit and was free. To be honest if it had been a MX300 250GB’er we still would have felt it was overkill. Given the nature of OMV and its boot drive it will most likely outlast us (let alone this build).
Even with future upgrades taken into account the Corsair AX750 is well and truly overkill. It just happened to be the smallest PSU we had in our parts bin. As it is a Seasonic PSU we have zero issues with it and the price was right – free.
When we got the motherboard and CPU… it came with a WD Black 6TB and a Seagate Desktop HDD.15 4TB. Both are ‘good enough’ for this build. Nowhere near as good as Seagate EC 3.5 HDD v4 6TB’s and Seagate Ironwolf Pro 10TB we paired with them, but still fast enough and robust enough for low stress scenarios like this file server will be put under. As they die, and all HDDs eventually die, they will be replaced with IronWolf Pros – which are overkill but that is how we like things in our builds.
Best Practices / Tips n Tricks
Let us start by saying you do have to have some basic experience with building a PC to successfully build a NAS. Basically, as long as you know how to build a system from parts… you can build a NAS. There is very, very few gotchas that are unique to NAS devices.
With that said there are a few best practices. The first one is to yank out all the existing ‘free’ fans that are in the case and replace them with good fans. Depending on your case the included fans may be ‘good enough’ so research what they are and are not… and go from there. While some people like to plug all their fans into the motherboard we do not. Consumer grade motherboards usually have 1amp fan headers. Enterprise to 2-3 amps. We prefer to spend a couple dollars for a 6 or 8 way fan hub… and just plug the one header into the motherboard. This will ensure that all fans are running at (or at least close to) the same speed and are powered by either a MOLEX or SATA power connector directly from your PSU. We prefer MOLEX as it frees up a SATA power cable (never run the fans and HDDs off the same cable) and few other things need MOLEX these days.
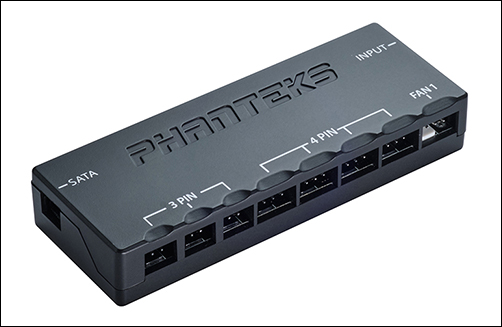
Good examples of these devices are the Phanteks PWHUB-02, SilverStone SST-CPF04, and Thermaltake Commander. There are plenty of others (NZXT, DeepCool, etc etc). When in doubt… ask a ‘miner’ what they use on their rigs and buy that model. Some cases even come with a hub built in. We would not spend extra for this feature, but if your case does… use it! In many builds we do not even bother with the connector from the hub to the motherboard. We simply use the proper speed fans for a given build that meet both our performance and noise requirements. One less cable, and a lot more freedom in where to mount the HUB is win-win in our books.
The next is your hard drives. When installing the HDDSs we strongly recommend labeling them. We use a Dymo LabelManager 160. It is quick, it is easy… and it does not cost all that much. Any networking admin should have one of these in their toolkit / go bag… and any “cable monkey” will have one if they are worth a damn. If you do not, a sharpie will work. What you want to do is stick an easy to read label on each drive with their serial number. Depending on how the drives mount this could mean the front, the back, the sides… or even the bottom (just not on the PCB). If you are using hotswap bays… label the bay with the SN. This will allow you to easily find the dead drive later down the road without having to remove more than one drive to do so.
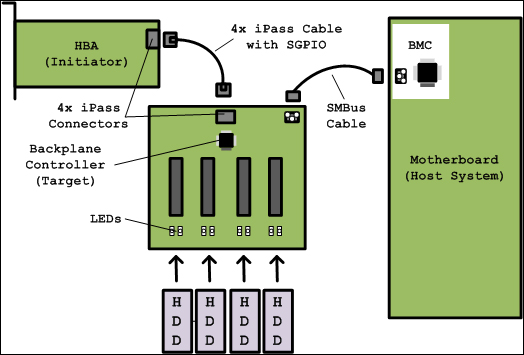
(image courtesy of Wikipedia.org)
If you are using hot swap bays you will also have to make sure you have the proper communications cable plugged into either your motherboard or HBA and the backplane. There are basically two standards used. These are SGPIO and I2C. The proper cable will depend on your backplane. SGPIO is higher end (usually HBA and server motherboards), and I2C is more basic consumer to prosumer grade gear. Either work. If your motherboard has neither… either get a HBA if you want the backplane to be able to tell you which HDD is the problem child or rely upon those labels you already stuck on the drive caddies. With labels it is not that big a deal. So do not think you need a HBA for your ‘TQ’ backplane.
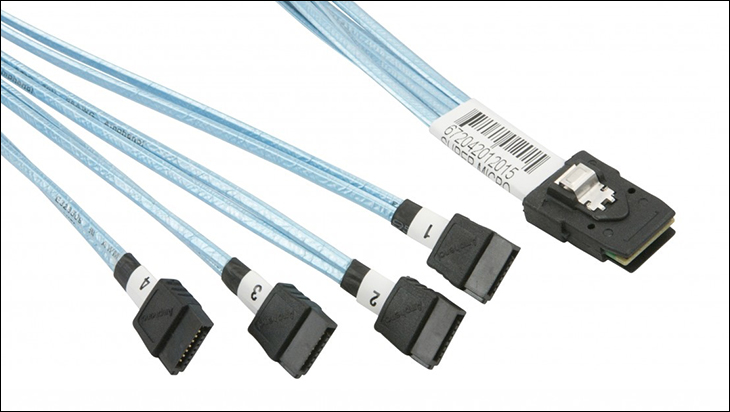
The same is true if your backplane requires a ‘mini-SAS’ cable. These backplanes really are meant to be used with a HBA, but a mini-SAS to 4 SATA reverse break out cable will allow you to plug it into four SATA ports on your motherboard. Remember SAS cables are directional… so you will want a reverse breakout cable. Not the standard ‘forward’ breakout cable. A good cable set your back about 10-20 bucks. LSI, SuperMicro, Dell, IBM, HP branded cables are all known good kit (assuming you can find the proper cable that is). 3Ware are decent, Cable Matters are OK, Norco’s are hit or miss in QA/QC but are usually better than no-name Chinesium cables. Honestly, do not use anything Chinesium in the build. Just don’t. You are building in gremlins for the sake of a few dollars savings.
Also, make sure you are plugging the cables into the right ports as each of the four cables will come with a number between 1 and 4 on it. This last step is not really needed if you are not using I2C or SGPIO communications cables, but if you are… your face will be red if you yank the wrong drive because its bay was blinking when the right bay was one of the other three!
If you are using a hotswap case do not load the drives into their bay yet. If you are not, do not install the SATA power connector. During install you really only want the OS drive to be powered on. Only after you install the NAS operating system should you power down the rig (if not hotswap and/or the OS does not support hot swapping) and plug in the drives. At every step of the way you want to keep the chances of Mr. Murphy and his sister the Fickle Finger of Fate from coming and having a laugh at your expense.
Beyond these, the ones we discussed earlier in this article also apply. Use enough PSU. Use a case that has good airflow (whenever possible) and enough room for HDD expansion later on. Don’t waste money on a high-end CPU. Don’t waste money on a fancy consumer grade motherboard. Don’t forget to budget in future upgrades. Use quality HDDs. Use quality RAM. Use as much RAM as you can afford. Use ECC is you can. If using a 10Gbe NIC or LSI HBA (the only brand you should be using)… actively cool them. When possible get ‘NAS’ hard drives. Preferably Seagate IronWolf / IronWolf Pro / EXOS. For the OS drive… darn near any SSD will do. Don’t waste your money on NVMe or Optane or even large capacity SSDs. 240GB or bigger is plenty (and honestly 120s are big enough). If you do have a motherboard with IPMI capabilities… don’t forget to plug in the Ethernet cable for it (and the NIC you will be using) even before you plug in the PSU – doing otherwise can cause the BCM to throw a hissy fit.
Other than these minor differences… build it like you would any system you have built in the past.
OMV Setup and configuration (pt1)
Before we begin, we do want to make one thing clear. That is, we do not think the default / integrated software options in OMV are bad. Many a person has run it without issue. We just do not think they are optimal. When you then mix in the fact that adding on… more optimal features is only a few extra steps, well that is no hardship to say the least. That is why we are going to step you through how we would setup OMV for use as a NAS in our homes. In fact… that is actually what we are doing here. We simply grabbed screenshots and have transcoded our thought process into complete sentences ((with less hookers, coke(the beverage… get your mind out of the gutter), and swearing).
So with that out of the way let’s dig in. The first thing you will need to do is decide what variant of OMV you want to install. OMV (as we are going to call it for brevity’s sake) is up to version 5. Version 5 is still a work in progress. Volker (the creator of OMV) can claim anything he wants, but it is not fully stable for every system. OMV 4 on the other hand is stable… or at least its known quirks are just that – known. Known with workarounds already in place to help you out. That is pretty much the definition of ‘no brainer’. This was our decision-making thought process… that took all of one second to complete. You may differ in your final result of your analysis.
So with that decision made you then need to head on over to OMV’s official repository at:
https://sourceforge.net/projects/openmediavault/files/
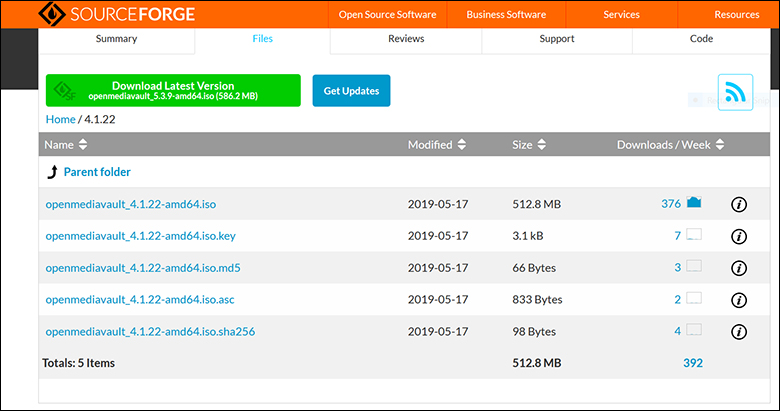
You will be greeted with a rather long list. A long and confusing list. First things first. Ignore “XYZ for Single Board Computers” unless you are running a Pi or similar low energy systems. Instead look for the latest 4.xxx version. At this time that is 4.1.22 (for ISO version, there is a 4.1.35 if you want to go the roll your own version… and it will auto-update to 4.1.35 during install if you have the rig connected to a working network).
Click on that folder.
You will then be greeted with a couple options… all with ‘amd64’ in their name. Do not worry. Even if you have an Intel system you want this file. AMD64 is the old school version of saying 64bit OS (as even Intel now uses what AMD ‘created’). If you are the OCD / paranoid type you can download the crypto keys to verify the ISO file… but honestly if Sores Forge is compromised (again) to the level that… ahem…. 3rd parties can randomly upload infected files… do you really think they will not also be smart enough to fake the keys that go along with the infected files?
Once that is downloaded. Download Rufus:
https://rufus.ie/
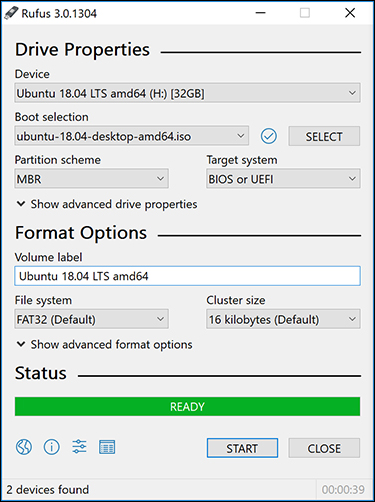
This is a simple little imaging program that will format your USB drive and install the ISO in a proper format.
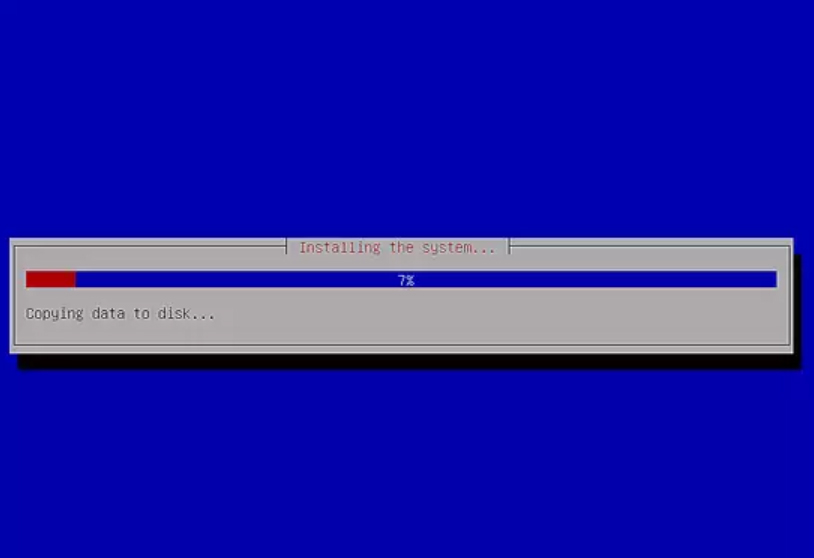
Once that is complete. Build the NAS using the tips and tricks we went over in the previous page. Then plug in the USB drive and follow the onscreen instructions. Install it the SSD you have in the system and not another USB flashdrive you plugged in (which you should not do. USB drives die. SSD die, but not as often). Don’t forget to write down the password you use. This will be for the ‘root’ login you probably will not use all that often… and thus are likely to forget it. That actually is the only confusing part. The default webGUI login remains the same no matter what you set this password to. So default webGUI user is ‘admin’ and the password is ‘openmediavault’. Change this ASAP.
Once the installer is completed and the system is rebooted. Power it down, plug in your drives, yank the USB drive and reboot it again. When it powers up turn off the monitor… and walk away from the NAS. Everything else will be done on a different system via either the webGUI (e.g. chrome or waterfox or opera web browser) or SSH (e.g. Putty) or IPMI.
The first thing you need to do is simple: find the IP addy for the darn thing. Download Angry IP Scanner portable (aka Executable for 64-bit Java) from here:
https://angryip.org/download/#windows
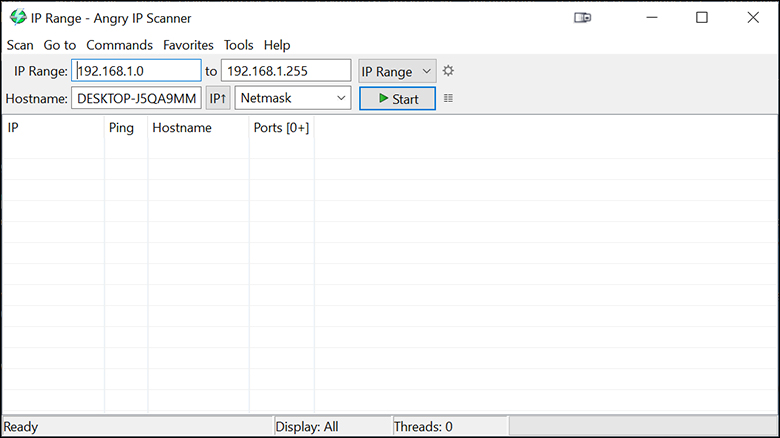
Run it. Type in your home network IP range. In our case that is 192.1.168.1 to 192.1.168.255
Look for the system called ‘OpenMediaVault’ and write down the IP.
We would strongly recommend you then log into your router (or switch… whichever is handling DHCP duties) and lock in that IP to that MAC address. That way in a week or two your NAS will not suddenly stop showing up as it has a new IP addy.
Once that is done type in the non-HTTPS IP address (you can turn HTTPS log in afterwards)… and log into your shiny new NAS.
OMV Setup and configuration (pt2)
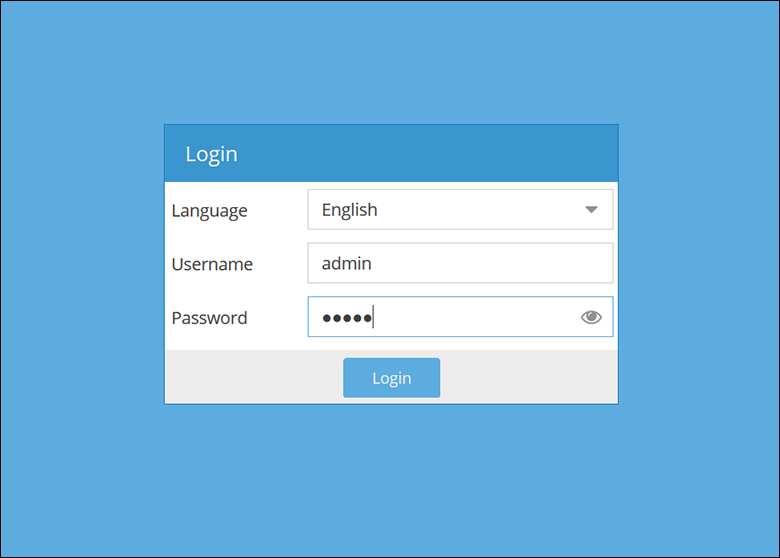
At this point you should have the NAS built, the OS installed, and are now looking at the OMV webGUI. This is usually where first time OMV peeps freak out. So first things first. Don’t panic. Yes, you have a metric ton of options and yes it looks more complicated than your routers interface – which may or may not have been the hardest thing you have worked with to date. So say it with me “Meh. The worst thing that can happen is I waste a few hours and have to start over”. Failure is not a problem. It is actually a good thing. Every time you fail you have the opportunity to learn from that mistake. A mistake you probably will not make twice. That is how we learn. So don’t panic. Look at the coming days as an opportunity for a free education. So with this in mind, I strongly recommend you play with the interface over the next few days and weeks. Right now… lets actually configure a working NAS.
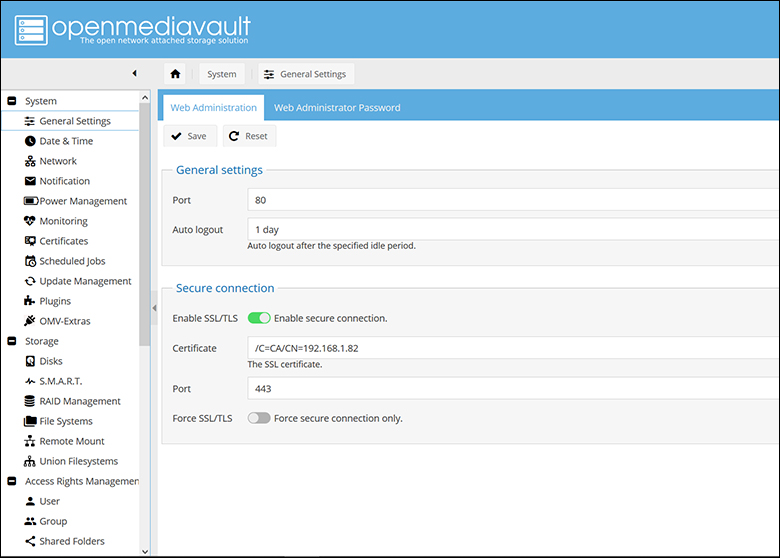
The first thing you will want to do RIGHT THIS SECOND is change the GUI login. To do this, look on the left side of the screen. At the top of the list of options is ‘System’. Underneath it is ‘General Settings’. Click it. On the lion’s share of the page should now be two tabs. Web Administration and Web Administration Password. Since the first tab is active, let’s start there. Change the auto logout time to a more reasonable amount. I usually use 30 minutes.
For the time being ignore the SSL/TLS options. You will need to generate a certificate before you can do that… so let’s skip it for the moment and circle back to it. So next hit ‘save’. When you do this… OMV will ask you to confirm the changes in a big yellow bar across the top. Hit apply. THEN hit yes in the popup. It will nag you like this… Every. Single. Time. You. Make. A. Change. Yes, it is annoying, but it makes it more novice friendly as it is holding your hand and giving you a second and even third chance to not mess up. If you are so inclined you can make a drinking game out of it with your favorite adult beverage. Just make sure to take small sips… otherwise forget “bad hangover”, forget “blacked out, woke up in a new country with a new tattoo and/or wife and/or STD”… this game will kill you. Alcohol poisoning is no joke.
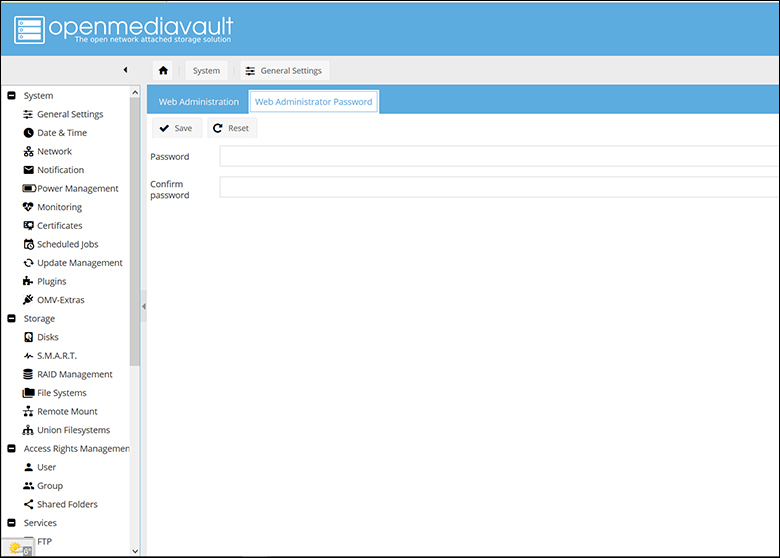
With that done, switch over to the “Web Administrator Password’ tab. Type in a new password. Something easy to remember but hard to guess. I usually use something like D00bieN00bieSc00bie. That is a 19 digit alphanumeric password. One that is easy to remember but bloody difficult to brute force attack. Hit save. Go through the nag screens to actually apply it.
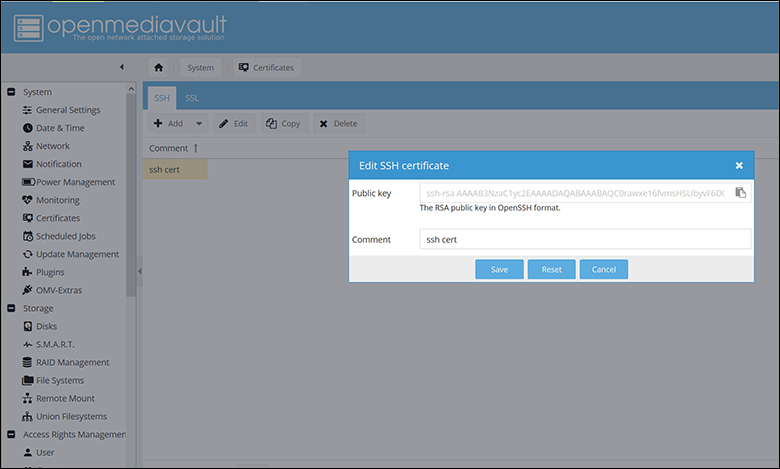
Now on the left-hand side of the screen scroll down a bit to ‘Certificates’ (still under ‘System’ section). Let’s start with a SSH certificate. Click add, add a comment (i.e. give it a name you will understand later like “ssh cert”). Hit save. If you get a nag screen. Jump through the nag screen hoops. Then click SSL tab. Click add. Fill in the country, length of time… and then anything else you want. I use 10 years…as why not?! Hit save. If you get a nag screen. Jump through the nag screen hoops.
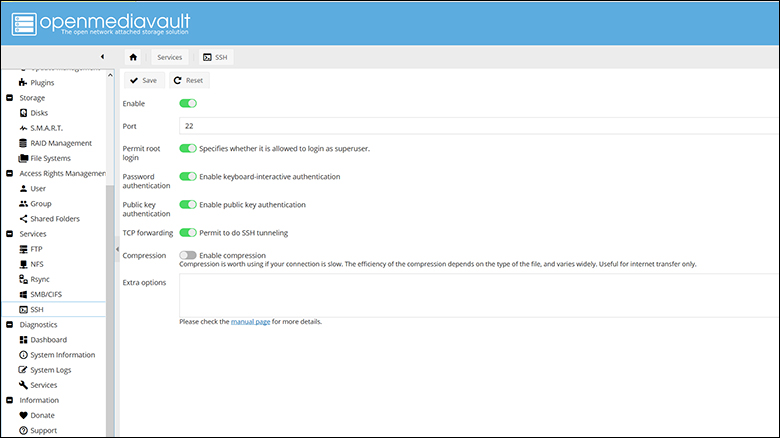
Now go back to the General Settings section on the right hand. Stay on the default Web Admin page. Click the slide button to enable SSL/TLS – it will go from a button with gray background to a button with green. In the Certificate dropdown box you now automagicaly have the SSL cert we just made. Select it. If you want you can set it to only be able to login via HTTPS. This falls into the ‘meh’ category for home users. Enable it if you want. Then click save… and do the nag screen boogie… again.
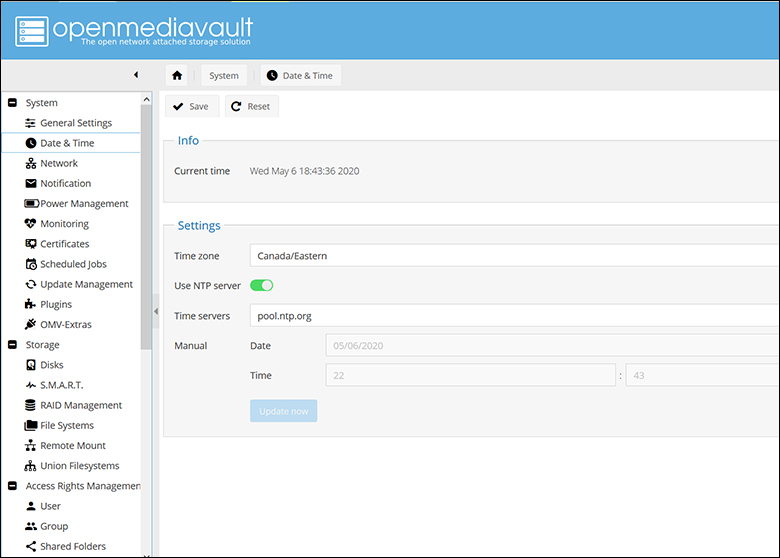
To make sure this all works, before you waste any time, click log out and log back in with the new password. When logged back in, go and setup Date & Time under System. Setup up your time zone and configure a NTP server (click the slider next to “Use NTP Server”). Unless you really want something special…. “pool.ntp.org” is good enough. Do the nag screen boogie.
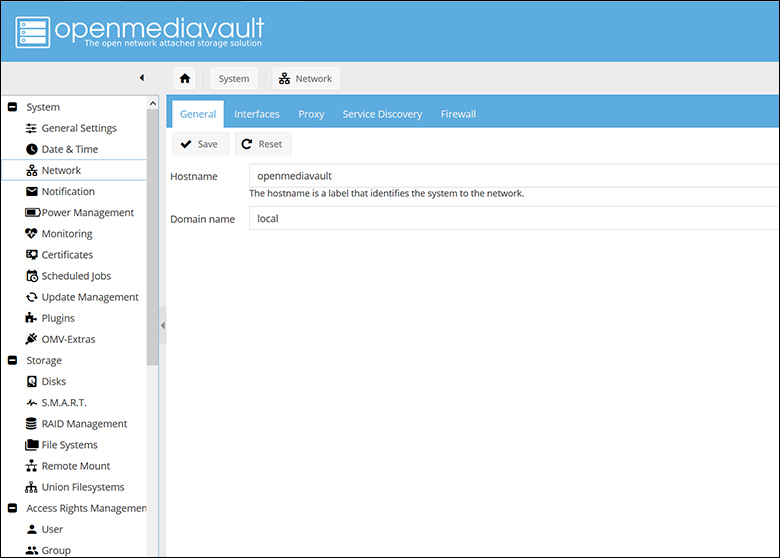
Click the next option down under System. It will be labeled “Network”. This is a simple short step. All you need do is make sure the Hostname is what you want to be displayed is… what you want to be displayed. We usually leave it at Openmediavault… as we know what we are storing on our OMV nas. You probably will want to give it a unite name like… “pr0n storage” or “pirate radio” or “rarrr game storage”… or something else that describes what the NAS will actually spending most of its time doing… and not what you claim it will be doing… or leave it at the default. The choice is yours. The same is true for Domain Name. You should know what your local domain is. If not… leave it at the default. When done… yes… do the nag screen boogie.
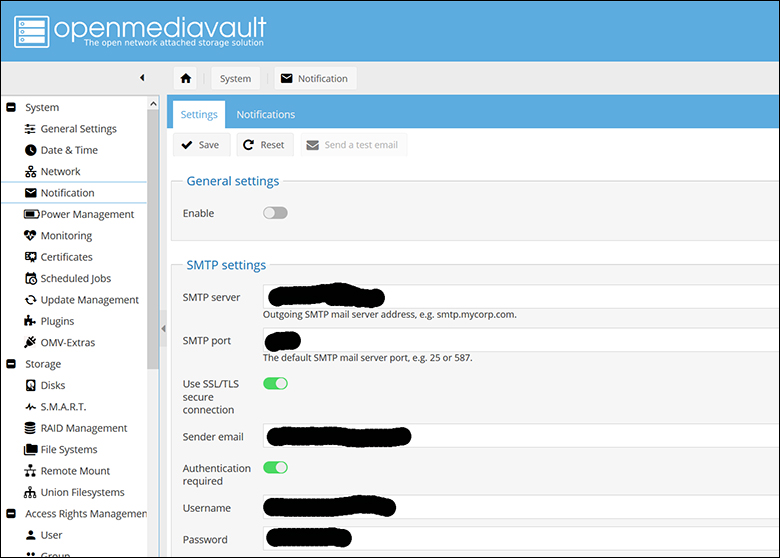
The next thing to configure is notifications. Notifications are very, very important. When things go wrong – like a drive failure… you want it to reach out and yell for help. You do not want to find out only after logging in. We use our own mail server… so our steps are simple. Simple as ‘type in the proper address, the proper ports, use SSL/TLS, type in username and password… and move on’ simple. Things are not so simple if you are using Gmail. Read the documentation here:
https://openmediavault.readthedocs.io/en/latest/administration/general/notifications.html#gmail
then read this more useful guide here:
https://www.networkshinobi.com/openmediavault-email-notifications/
If you have 2FA enabled on your gmail account… maybe think about setting up a throwaway account? If not read this guide here:
https://www.linode.com/docs/email/postfix/configure-postfix-to-send-mail-using-gmail-and-google-apps-on-debian-or-ubuntu/
Then think long and hard about maybe setting up your own email server or at the very least a more user-friendly online email account? It is probably easier and better in the long run that relying upon a ‘YOU are the product’ gmail account. After all, this email address can be just for sending email alerts to your ‘real’ email address.
Once done… you guessed it! Do the nag screen boogie.
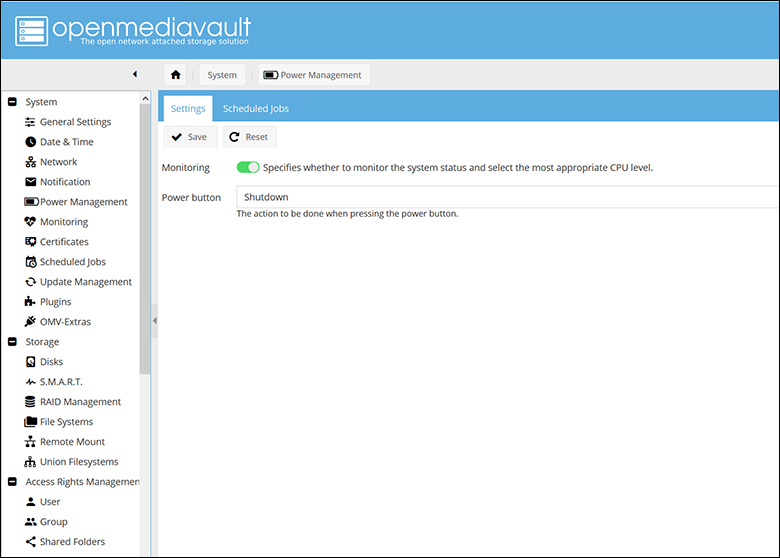
The next option down is “Power Management” and about all we do is configure what the power button does – ‘shutdown’. Do the nag screen boogie and move on.
At this point we usually skip over the other options under the ‘System’ section for now. Since you are probably very, very inebriated we recommend sleeping things off and when you wake up for the next round of your very own drinking game of dooooom starting in on the next round of configuration. If you have not been doing shots like a fratboy on a weekend bender after finals week… continue on the next page right now.
OMV Setup and configuration (pt3)
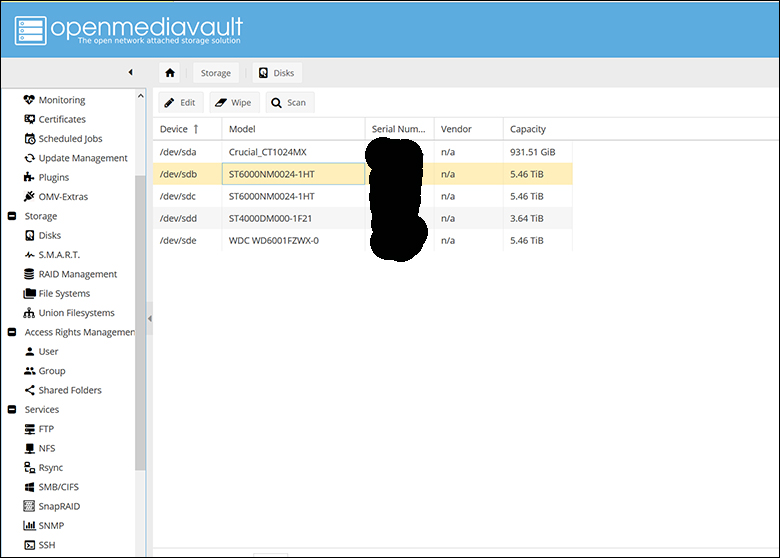
Before doing anything else the next thing we like to do is actually configure the various hard drives we have installed into the system. This basically means formatting them to ext4, giving them a label that clearly tells you what they are going to be doing, and then mounting them. This is going to take a bit of time… as OMV is not overly fast at ‘quick’ formatting hard drives. Think of it more as ‘turtle slow, but quicker than the full option’. On the positive side the “Disks” section under “Storage” will actually tell you the serial numbers of the drives and their device ID. This will save a ton of time later when Mr. Murphy decides to kill a drive on you later.
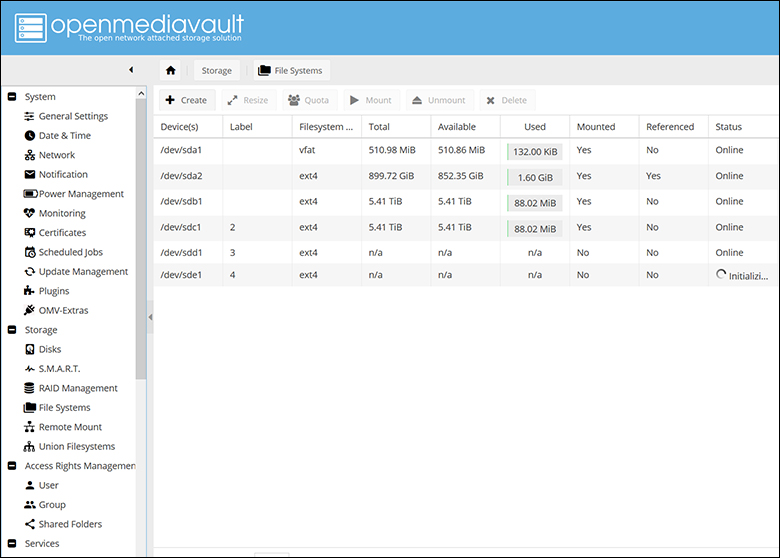
Right now we have four free HDDs installed (the fifth will be installed ASAP – but was purposely left out for a reason during the initial configuration and screencap stages). To add a drive, simply click ‘create’ in the top right corner of the “File Systems” page. Select a disk from the device dropdown list – making sure it is not already in the filesystem list). Give it a name. We like to use Px for parity drives and Dx for data drives (with x being 1 through how many we are using for a given scenario e.g. D1,D2,D3,P1,P2) but as long as it is unique it makes no nevermind. It can even be 1/2/3/4 etc. Make sure the file system is ‘EXT4’. EXT4 is a general-purpose file system that darn near any OS can read. Given the unique nature of OMV with Snap and MergerFS this means if you do lose your parity drives (or just the OS drive) the data on any drives not dead (or even just mostly dead) can be read and copied off. You cannot do that with most other operating systems using typical software RAID’ish configurations. Then hit OK. Do the nag screen boogie… and maybe grab a pizza to go with your beer (remember food helps slow down alcohol absorption… and you will need all the help you can get). It will take about 5-10 minutes per drive.
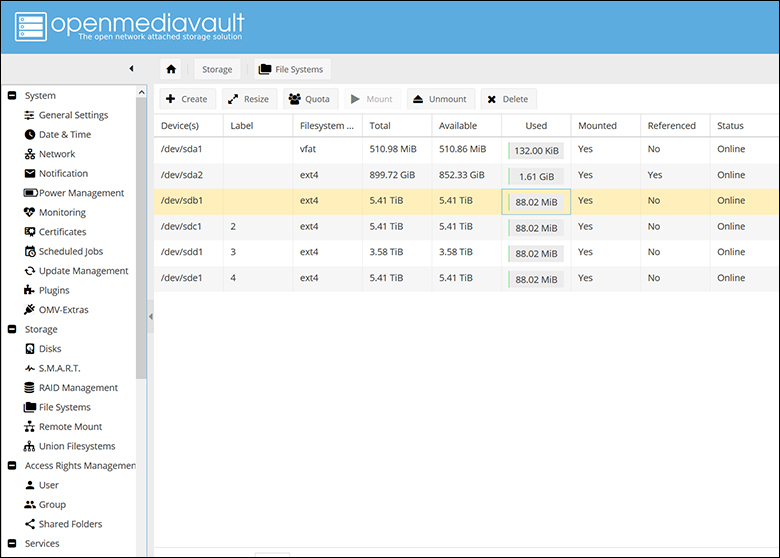
When done, rinse and repeat until all your drives are showing as mounted, online, and with ext4 filesystem. Do not worry if it is showing data as being on the drives (e.g. 88.02MiB in the screenshot). Formatting and overhead takes up a tiny bit of space. If you are in a hurry and want to grab a bite to eat… you can initialize all of them and walk away for 30minutes or more. It will add them, and while not happy about it will do them all. So, you do not really have to do one at a time. It is just ‘best practices’.
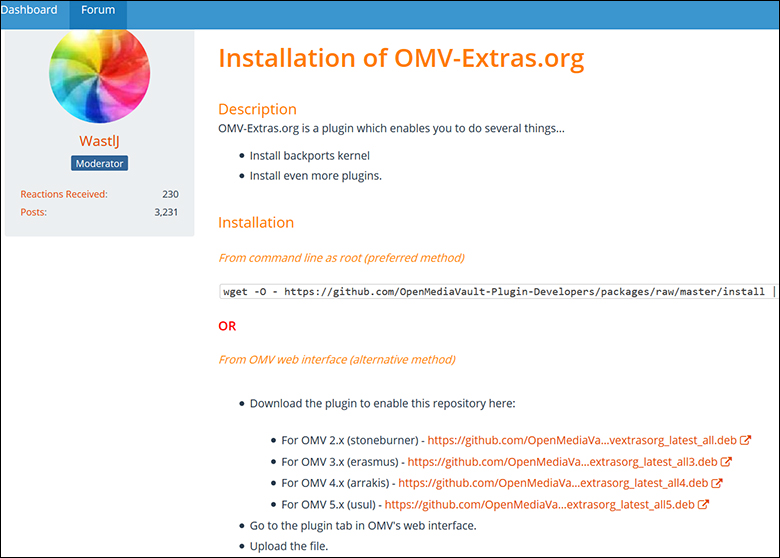
In either case, once all the drives are online head on over to https://forum.openmediavault.org/index.php/Thread/5549-OMV-Extras-org-Plugin/ in a different tab on the computer you are using right now. Under the “Installation” header click on “For OMV 4.x (arrakis)- xyz” (with xyz being the latest for OMV 4). Download it and save it. Once done… remember where you save the file.
Then in the OMV webGUI tab of your browser go to System section and then ‘Plugins’. On that page hit ‘upload’. In the popup window… click browse, select the file and hit OK. This will download the plugins and add OMV Extras to the plugin list… usually at the bottom. It will be labeled something like ‘openmediavault-omvextras.org 4.1.16”. Tick the box and then hit ‘install’ at the top of the page. Do the nag screen boogie.
This is the easiest way to do things if you have zero command line experience. If you do… SSH into the system with root admin privileges and type in “wget -O – https://github.com/OpenMediaVault-Plugin-Developers/packages/raw/master/install | bash” it is a ton easier with less hoops to jump through.
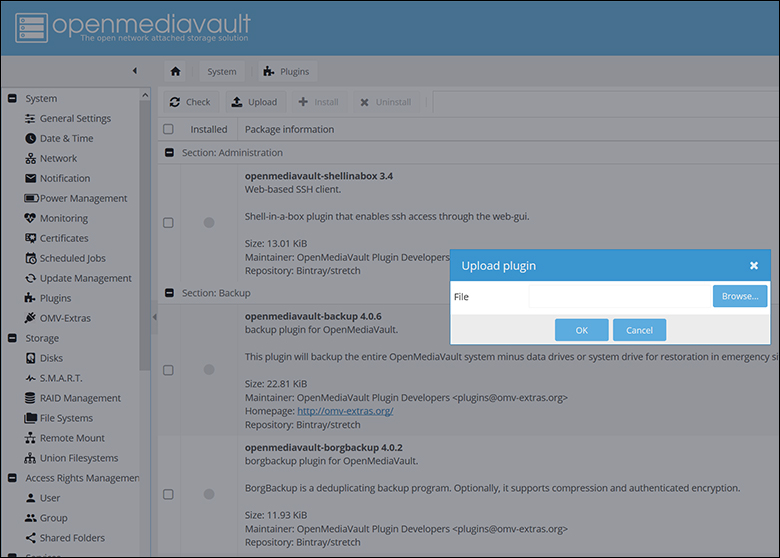
Either way, you then navigate to the newly added System -> OMV-Extras page. Make sure OMV-Extras is enabled. Since we are here, we also turn on ‘Docker CE’ and ‘Sync’. If you want to use Plex instead of Emby you can also turn on Plexmediaserver… but we prefer emby. In either case, this allows the OS to make sure you can install OMV extra’s plugins, makes sure you have the latest and greatest version available (when you click ‘check’ on the plugin page) and can install Docker plugins (aka Jails aka extra addons to make your NAS more than just a file server).
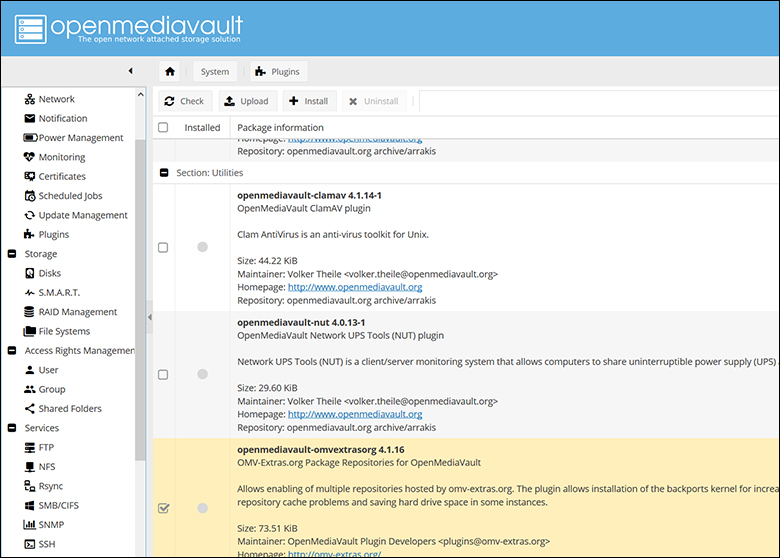
With that done we then navigate back to the Plugins page. Scroll down and install snapraid and then unionfilesystems. They will be labeled something like “openmediavault-snapraid XYZ”. Do the nag screen boogie.
At this point you have the two critical addons needed for more optimal data security. The next two steps can be done in either order. It really is 6 in 1, half dozen in the other type deal. We usually do MergerFS / unionfilesystem first. The mergerFS configuration is under “Storage” (labeled “Union Filesystems” as mergerFS is a variant of the unionFS), and SnapRaid confirmation is under “Services” header.
MergerFS is what combines multiple drives of any capacity into one ‘array’. This array is what you will actually be using to read/write your data to over the network (aka what you point your shares to). SnapRaid… gives you your data redundancy and security via the use of parity drives.
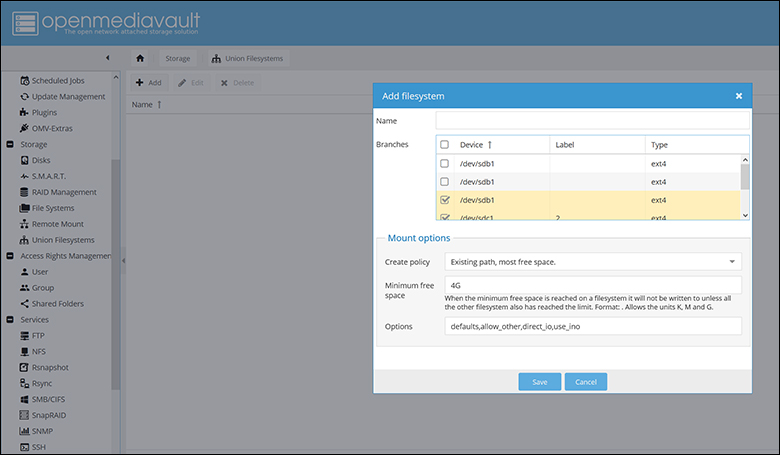
We usually start with MergerFS. To do this scroll down on the side of the webGUI until you can see the ‘Storage’ subsection. Click on Union Filesystems. Towards the top of the page click the ‘add’ button. Select the drives you want to use for data. This is where naming your drives properly comes in handy. For the create policy we usually choose “existing path, most free space” but it really does not matter all that much. Existing path, random is also a good option. It does not matter all that much because the next modifier to set is Minimum Free Space. This setting will over-rule the policy you just set. The default of 4G is just plain short bus dumb. We would recommend setting it to 50percent of your smallest drive. What this would do is tell it to stop using one drive when at 50’ish percent capacity, go to the next fill it to 50 percent, and rinse and repeat. When all are 50 percent then the policy previously set will kick in again. Leave the last option (aptly named ‘Options’) alone. Click OK. Do the nag screen boogie… make sure your Blood Alcohol Content is not high enough that is going to kill you and continue on.
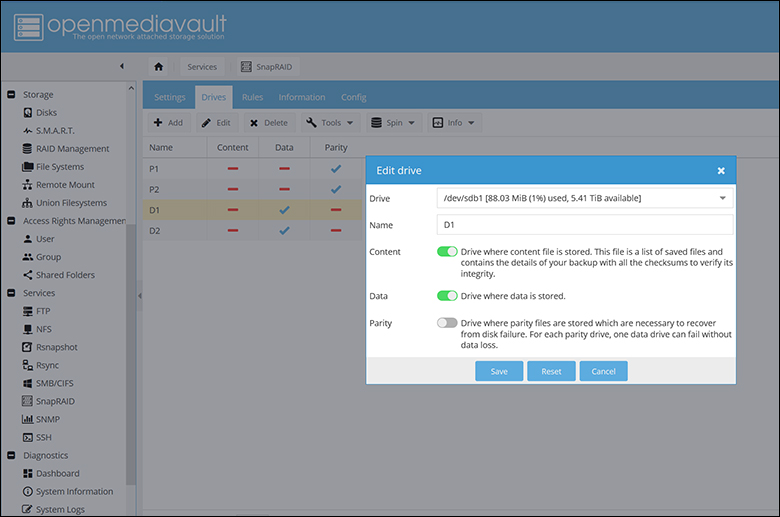
Now you have an array of multiple drives… but no data redundancy or security. So next thing is to scroll down to the Services section on the side of the screen, find SnapRAID and click it. Then click the ‘Drives’ tab near the top of the screen. Then click ‘add’… and add in one drive at a time. Let’s start with our data drives.
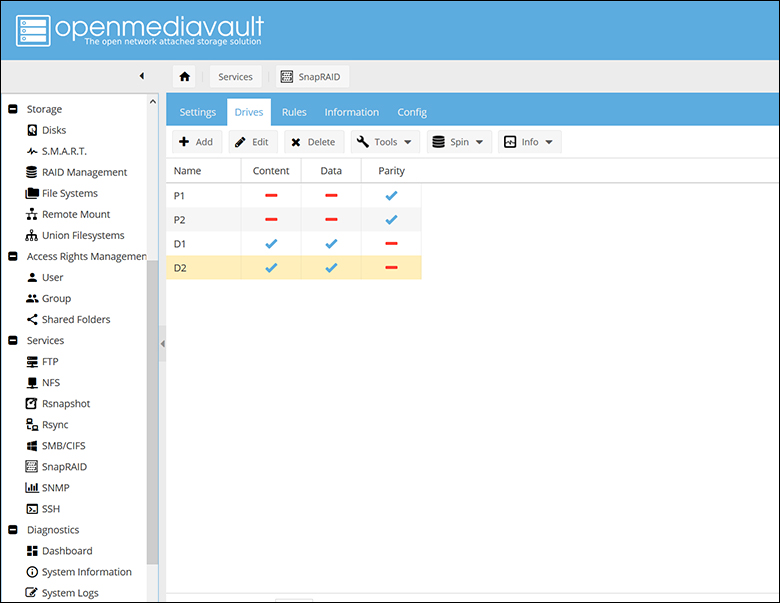
On the Add Drive popup select the first data drive (and once again this is why properly labeling your drives makes your life soooo much easier). Then give it a label. This label will not impact your drives label and is just used in SnapRAID internally. We recommend giving it the same label as the drive’s label… just to reduce confusion later on. Flip the slider on ‘Content’ and ‘Data’ to on (they turn green) but leave ‘Parity’ off. Hit save. Do the nag screen boogie.
Rinse and repeat for the rest of the data drives.
For parity drive(s) you do basically the same but leave ‘Content’ and ‘Data’ off and turn the ‘Parity’ on. The one tricky thing that SnapRAID will not warn you about is that if you want more than single parity (aka N+1, Raid 5, RaidZ1, etc. etc.) you need 3 or more data drives (and don’t even get us started on triple parity requirements). Oh, it will let you make it… as seen in the pictures above… it just will fail on the first sync and every sync thereafter. This is a bug. A bug that should be quashed… and not ‘RTFM’ when brought to the dev’s team attention. This is unfortunate as N+1 parity is barely better than no parity protection. With it you can lose only one drive. The next drive that dies nukes your data. N+2 allows you the luxury of not worrying about another drive dying before resync completes after drive replacement… as a second one can die and it will not take out your data. When possible, we recommend two parity drives (aka N+2, Raid6, RaidZ2, etc. etc.).
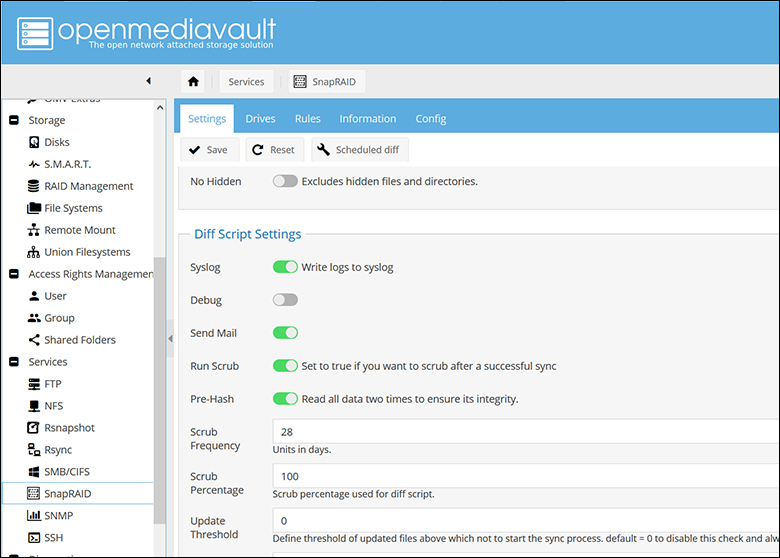
In either case once you have all the drives properly configured in SnapRAID (and assuming you are not unconscious from all the shots you have be doing while following along) you can now click on the ‘Settings’ tab and make a few adjustments. The default of 256KiB for the blocksize is fine. If you know what size data you are mainly using you can tweak it… but meh. Not really needed for a home file server environment… unless you know what you are doing. The same is true of Auto Save (‘0’) and Scrub Percentage (12), and No Hidden being off. For script settings we have Syslong, Send Mail, Run Scrub, and Pre-Hash turned on. We set the Scrub Frequency to 21 days (and quite honestly you can set it to 28 or once per month… your data is not going to get that much more dirty vs the default of 7 days). Leave Update and Delete Threshold to 0. Do the nag screen boogie after you hit save… and if you have been doing shots like a lunatic… go and sleep it off.
OMV Setup and configuration (pt4)
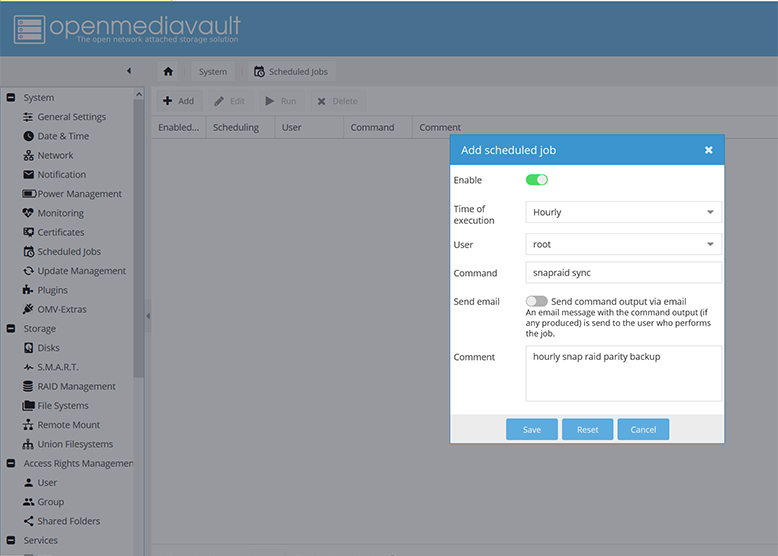
At this point you have a working NAS, an array, and some data security. The next thing to do is improve upon the security and redundancy. So Scroll up to ‘System’ and then ‘Scheduled Jobs’. When there and you have clicked on it, hit ‘add’. In the popup click on enable, then for time of exaction we like to use Hourly. For user we use ‘root’, for comment we state what it is doing so for us ‘hourly snapRAID parity backup’. For the command type in “snapraid sync”. Then hit save… and do the nag screen boogie.
What this does is tell snapRAID to run a sync every hour. You can set this to Daily if you so wish… but any data you push to your new NAS will not be parity protected for upwards of 24hours. Our setting means that if a drive dies… we lose at worst 1 hour’s worth of data. Your Mileage May Vary on what you are comfortable with. Yes sync’ing once per hour will add to overhead and slow things down. It really is not that all that bad. With this rather old i5-6600 system it sync’ed at over 200MB/s and CPU overhead was 13 percent for single parity and under 25 percent for dual parity sync. To put that another way, to sync 1TB of data will take over 83 minutes… but it is only sync’ing updated data. In reality most hours it will be a few seconds and usually only a few minutes to sync. You are not doing a full re-sync every time.
With that done you now have data parity protection (via SnapRAID sync) and bit-rot protection (via SnapRAID srub). What we next need to do is add in some drive monitoring and possibly get some warning before a drive dies. So scroll down to ‘Storage’ header on the right and then click ‘S.M.A.R.T’.

Self-Monitoring, Analysis and Reporting Technology… is really not that ‘smart’ but it is better than nothing. So click enable, then type in 604800 for check interval. This run the S.M.A.R.T test once per week. Make sure power mode is set to ‘never’. Hit save and do the nag screen boogie.
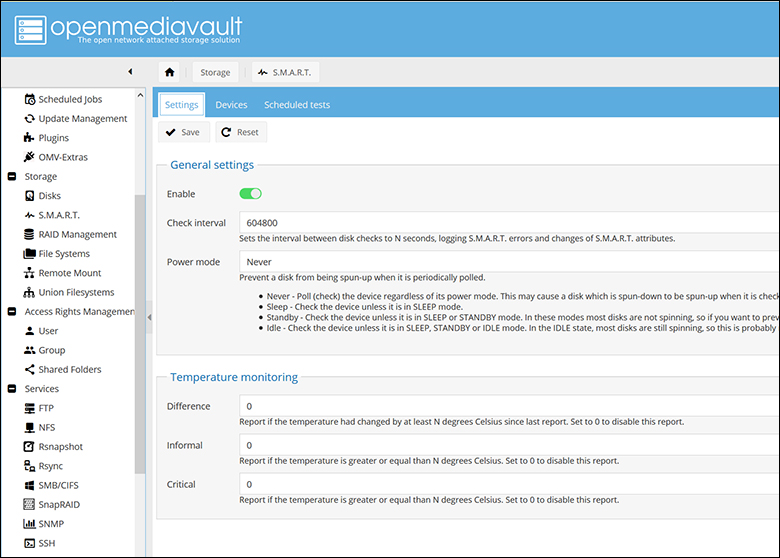
Then click the ‘Devices’ tab… and clicking on each drive one by enabling SMART via ‘edit’ button. Then on the ‘Schedule Tests’ tab hit add, select the first drive, set the type to ‘Short self-test’ and then pick a time. We usually do ‘04’ in the Hour option for the first drive. Then ‘05’ for second… etc. etc. Then in the Day of Week we pick “Monday”. This way the system is only testing one drive per hour, but doing all of them every Monday.
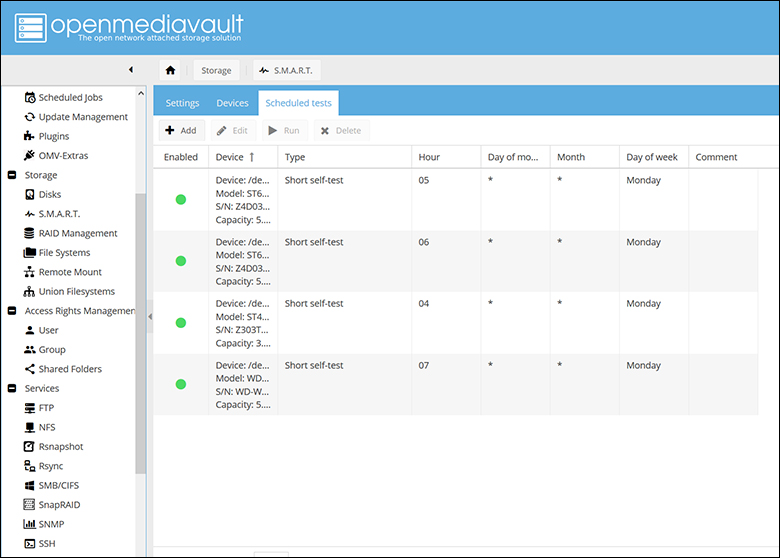
If you have been paying attention… none of the hard drives are going to spin down or ‘go to sleep’. This is because we do not believe in letting the drives sleep. When they sleep they are actually spinning down and going into a very low idle state. Spinning back up not only takes time (time during which the NAS is unresponsive) but this spin up is when the most wear and tear happens. Every time they stop spinning the drive has to exert ~3 times the required energy to get them spinning again. This is why a lot of older drives die after a reboot and why we do not manually configure them to spin down. Advanced drives have multiple lower power states they enter… and for the home environment / novice admin that is ‘good enough’. If this was a business server (where we would not be using OMV) we would be overriding some of the more advanced low power states and leaving them in a higher state. All. The. Time. Depending on the file server we probably would not even let them park their heads. But such things are beyond the scope of this article. For home users… don’t turn on sleep states. Leave everything running 24/7. Your drives will actually last longer this way.
Now that we have done the basic configurations… it is time to actually make this NAS work with other systems on your network!
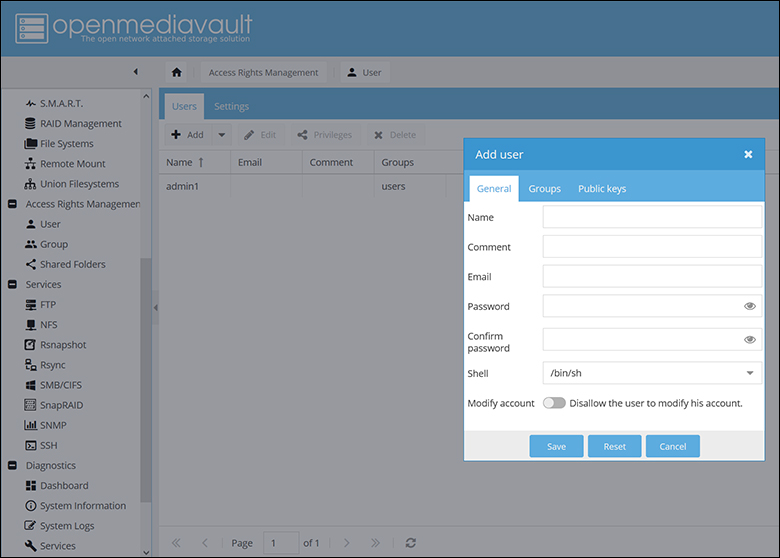
The first thing we like to do is setup a new user. It really is not a great idea to have the admin username and password stored on any system other than the NAS. While not a requirement this really is a best practice to get into the habit of doing. So let’s start there.
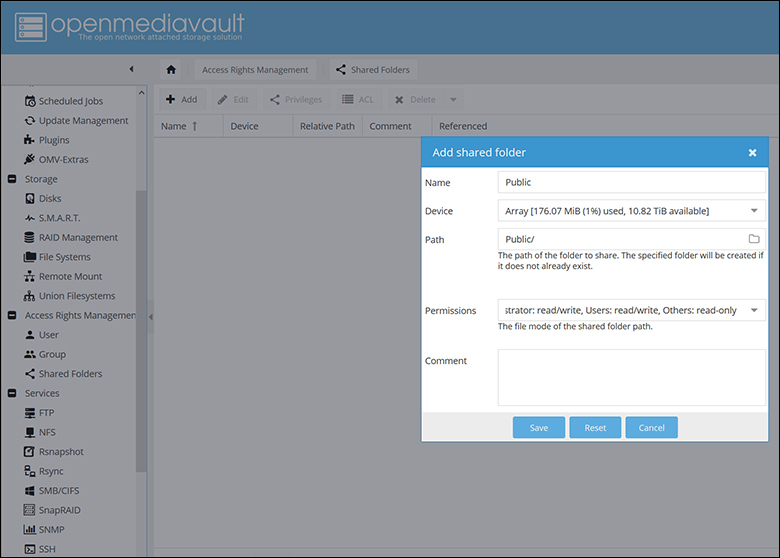
On the side of the screen scroll down to the ‘Access Rights Management’ section, and click on ‘User’. Then click the ‘add’ button. In the popup, fill in the fields. For the name it can be anything you want, but use a good strong, but easy to remember password. The easiest way to do this is to combine three words or a phrase into one password. To make it more robust, separate each of the words with a number. For example “99ProblemsButaWitchAint1” is good. “AUzi4You” or easily guessable like ‘2LetMe1n’ not so good… and for the love of god don’t make the password ‘passw0rd’ or something you would not want someone else typing in. Do the nag screen boogie after hitting save.
Then on the right click ‘Shared Folders’. Click add. In the popup give it a unique name (this will be the username we use later… so don’t use ‘r1mj0b’ or something embarrassing). Something simple like ‘Public’. In the device dropdown menu select the MergerFS array we recently created. For permissions the default of admin:r/w/,users:r/w,others:read is fine. Do the nag screen boogie after hitting save.
Go back to the ‘User’ section, click on the newly created user and click ‘privileges’. If you user does not have r/w privileges for the newly created shared folder… give it by ticking ‘read/write’ box. Do the nag screen boogie after hitting save. Now we have a public folder that will be stored on our array of drives that is easy to backup and access via a new user name and password.
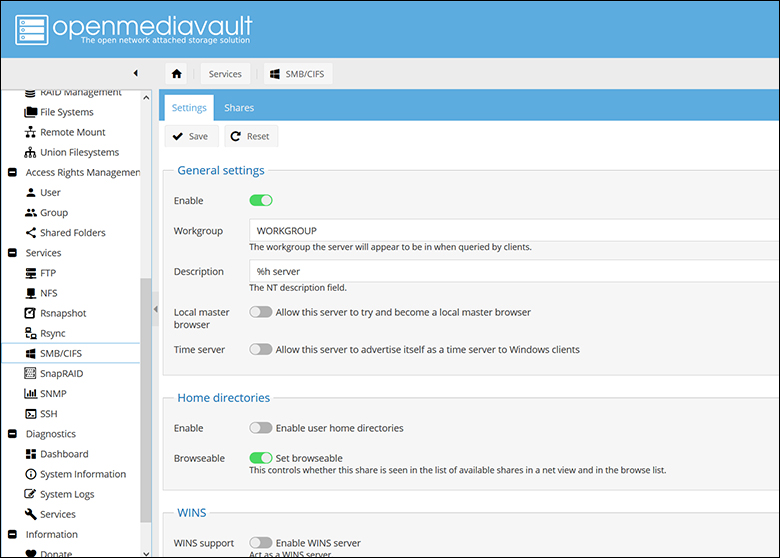
Next, scroll down to the ‘Services’ section and click on ‘SMB/CIFS’. This will allow you to see the newly created shared folder. Tick on ‘enable’ in the general settings, ‘Browsable’ under Home Directories section, and the same for ‘use sendfile’ and ‘asynchronous I/O’ under Advanced. Hit save and take another shot of your favorite adult beverage.
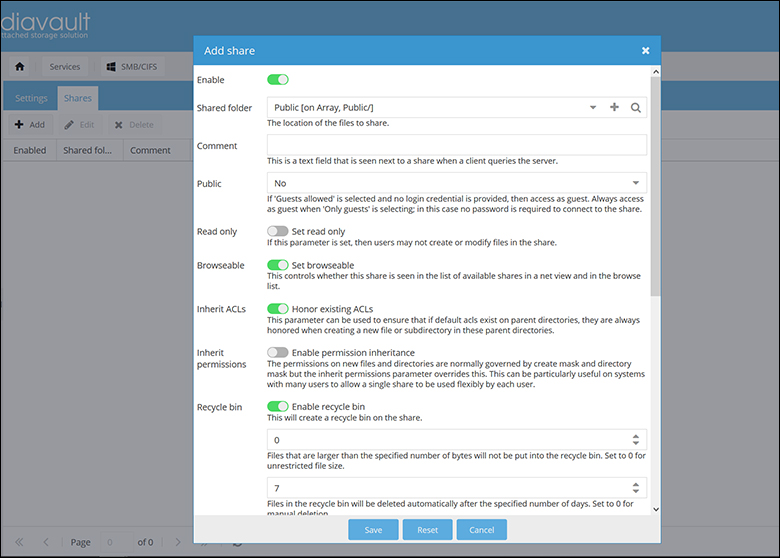
Now click the ‘Shares’ tab at the top of this page, then ‘add’. In the popup click enable to on. In the ‘shared folder’ dropdown pick your shared folder you recently created. The same for Browsable, Inherit ACLs, Inherit permissions, and recycle bin (with 0 in first and 7 in second, to allow every file deleted for 7 days to be recoverable)… but Public set to ‘no’ and the rest to off. This way a person has to log in to access the NAS files but can read or write to it. Hit save… and do the nag screen boogie.
At this point Windows and MAC users can see and access your NAS… but what if you have Linuix users?! That is where NFS comes into play. If you do not have ‘nix users we would recommend not having both SMB/CIFS and NFS enabled. So if you want NFS it is basically the same process with just fewer options. Click ‘NFS’ under Services, click add, select the folder, leave the client blank (unless you know the IP addy of the system that will be using it), set privilege to read/write, leave the options as their default (unless you know exactly what you are doing… in which case you already know how to do this)… and do the nag screen boogie after hitting save.
At this point you have a full function file-server that can be accessed from any system on your home network. All that is left to do is map the network drives on your various systems using the username and password of the user you recently created. At which point… congratulations! Time to enjoy your new NAS by populating it with files. After which we would recommend doing a manual sync if you have set the sycn timer job to 24hours (if set to 1hour like we do… you can skip this). This is done via “Schedule Jobs” option under ‘System’ section by simply clicking on the snapRIAD job we created and then hitting ‘run’.
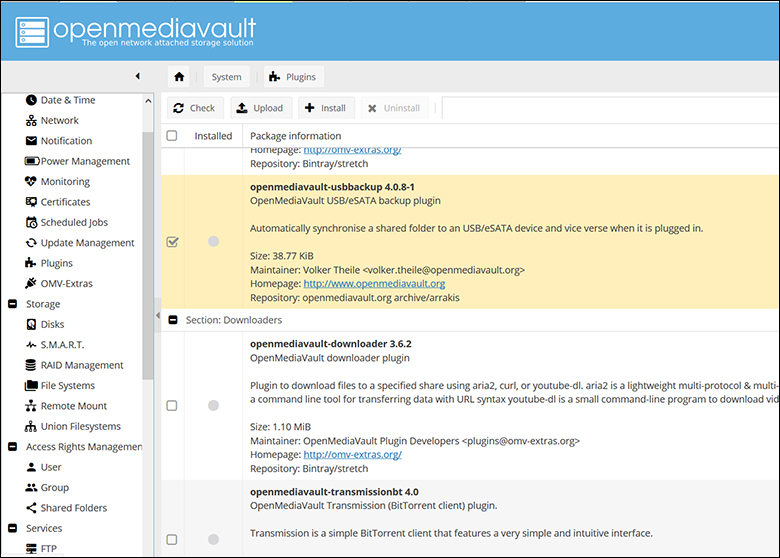
Of course, if you want to make it more than just a fileserver, want even more security or have the option to do so easily in the future there is a few more steps. The first would be to install usbbackup via plugins (usually labeled as openmediavault-usbbackup XYZ), install an AV (like clamAV), plug in a usb drive… and create a schedule for backing up your NAS data to it. Remember RAID Is Not A Backup. Conversely (or additionally if you are paranoid) you can configure sync and backup your files to another NAS (or another system on the network). For most home users the USB external drive option is the easiest and cheapest. These extra steps are all optional.
Either way… we hope you enjoyed our walkthrough. We also hope you did not give yourself cirrhosis of the liver, but did pick up a few things. Even it was just ‘NAS does not have to be hard or complicated’.
