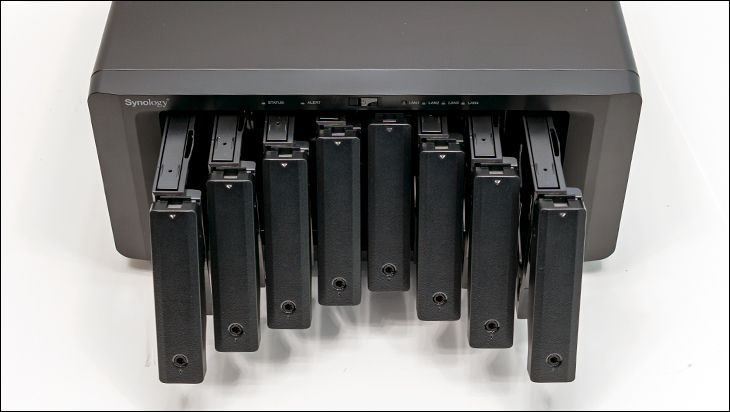
In what is going to become rather obvious, rather fast, the DS1821Plus’ shipping container is best described as a bigger variant of that used for the DS1621Plus. That is not a bad thing. Far from it. This shipping container, just like the smaller DS1621+, is elegant. It is stylish. It does not try and aggressively beat you over the head with colorful pictures or eye-catching colors. Instead, it comes across precisely like what it is: a shipping container that houses a professional’s Network Attached Storage appliance. Nothing more. Nothing less. So, while it may ‘lack’ glossy surface, or slick marketing ‘features’, or any hand holding whatsoever, what it does offer is details and information. Information that you can use to make an informed decision without being swayed by having to do the marketing buzzword bingo. As such… you will (gasp) have to read the box to make sure it is the right model for your needs. That is what Synology expects you to do and what you should do.
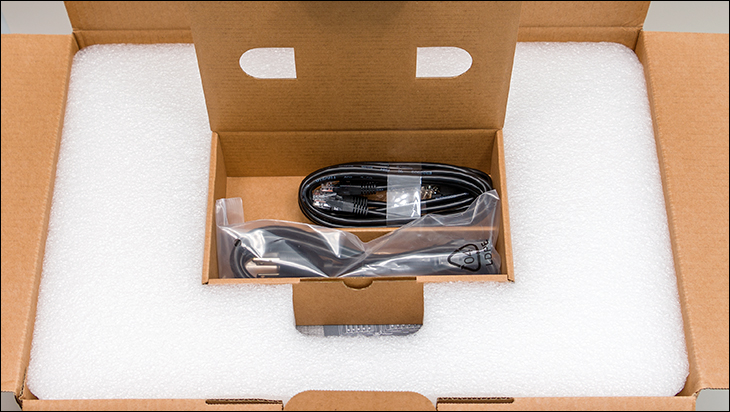
Also like the DS1621Plus, internally this shipping container uses a combination of form-fitting low density foam packaging as well as a carboard ‘sacrifice’ box (which in turn houses the included accessories). This combination means that you can rest assured that no matter what happens during in-transit that this rather larger (for a NAS appliance) will arrive safe and sound. No matter if you ship it across the country, across the ocean, or just across the street it should arrive safe and sound… and if does not you will instantly know it before signing the shipping receipt for it as it will require a catastrophic failure before it allows the DS1821+ to be harmed.

The accessory list is rather decent, but not perfect. In grand total you will get a proper plug for your country. You will get a short infographic setup users guide. You will get a pair of 1GbE Ethernet cables. You will even get a pair of locks for the drive caddies as well as a small bag of screws (to properly mount and secure the HDDs to their hot-swap caddies). This too is exactly what you would expect to find in any DS’Plus series shipping container.
Unfortunately, this is a double-edged sword. On the one hand it is a decent assortment that can get you up and running with even a smidgen of fail-over protection. On the other, Synology once again only gives you two short 1GbE Cat5E cables. Sure, they are shielded / SFT cables, but this is a four 10/100/1000 port equipped device meant for professionals. When was the last time any professional worth their salt used CAT5E as part of their network backbone?! CAT6, or optimally CAT6A, would have been a nice minimum specification. Including two shielded and two unshielded CAT6/CAT6A would have been better, and including four of each flavor would have been better still.
The same is true of not including a manual. Yes, the startup guide will indeed get you up and running but as it is just a few pages it will not, cannot, go over the finer points of the device’s OS. This too is sub-optimal given its professional orientation and its price range. After all this is nearly a $1000 NAS appliance. Not an $800, not a $600, and certainly not a 400 dollar one. Yet all come with the same decent, for $600 price range, accessories. That is not corner rounding. This is corner cutting. Something no professional gets the warm and fuzzies over; and certainly not the way you want to make a good first impression.
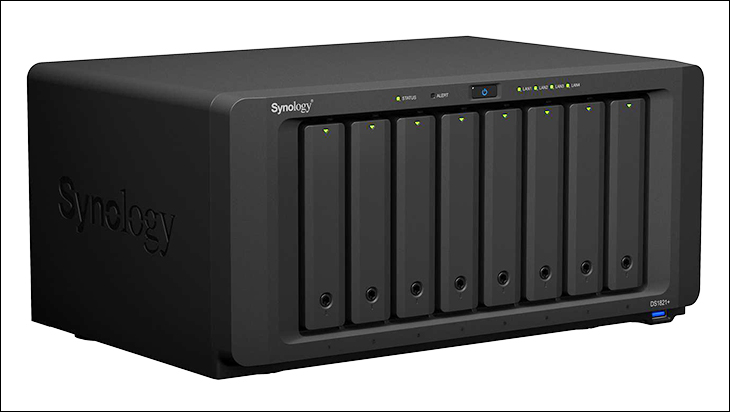
hankfully, the DS1821Plus does that all on its own. So much so that even with poor first impression handicap it is sure to bring a smile to even the most cynical of professional’s hearts, and a warm glow to those that are still the young and shiny of the workforce.
It honestly is a toss up which is sure to please more: the form-factor or the robust feel of it when you pick up and place it on a desk. For us personally it is the form-factor. Yes, it is an eight bay NAS appliance and as such is going to take up a lot more room than the, probable, 4bay that is replacing. It however is not that tall. It is wide, but we have used four-bay NAS appliances that were taller.

Why do we consider a ‘short and fat’ form-factor better than ‘tall and wide’? Simple. The more ‘room’ inside that is not taken up by hard drive bays is more room for hot air to collect and cause hot spots… and more room for dust bunny colonies to develop. Basically, with nearly the entirety of the width being taken up by drive bays you can pretty much be assured that drive 0 is going to be cooled as optimally as drive 8, and drive 3/4/5 will also be a lot closer in temperature to both ends. Temperature consistency via consistent air flow levels is key to a long lived and happy hard drives. This actually is part of the reason why traditional designed rack mounted NAS devices have a similar layout to their drive bays.
Of course, unlike rack-based NAS servers, the hardware components are not directly behind the drive bays. Nor are they in direct line of airflow from the fans. They reside underneath (and if using the PCIe slot to the side) of the drives. This unfortunate lack of depth to ‘desktop’ NAS devices is a carry over from the days of yore when they were based around small form-factor PC cases. Cases where the ITX mobo and PSU would live underneath or above the drive bays. Considering even iXsystems, and their arguably overpriced TrueNas Mini series, does things this way it is hard to get too bent out of shape over anyone else doing it the ‘old way’. After all, while we would not care if the DS1821Plus was as deep as it was wide, most probably would. As such this is our personal bias, and why typically we run rack mounted NAS devices, and you may feel differently. If you feel the same as we do… rack is the only form-factor to buy.
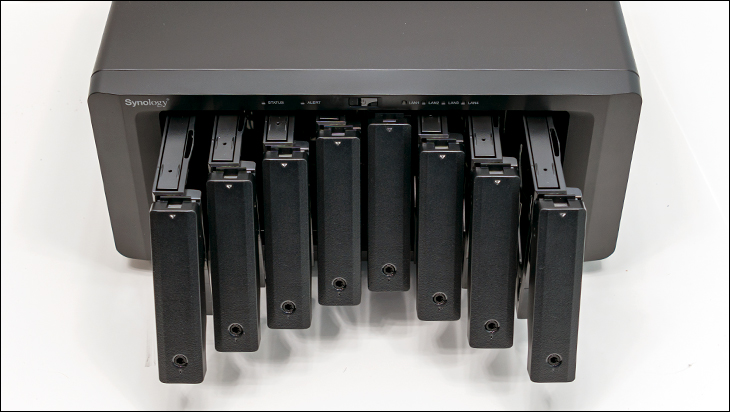
Moving on. Just like the ‘6’ is DS1621Plus stands for six hot swap drive bays, the ‘8’ means there are 8 with the DS1821+. This actually accounts for the difference in dimensions nicely, with basically no wasted space on either unit. To be precise the DS1621+ is 166 x 282 x 243 mm and the DS1821+ is 166 x 343 x 243 mm. It also explains why, with the exception of the drive bay count, both are dead ringers for each. Same lone Type-A USB 3.2 gen 1 (aka USB 5Gbps) port on the front.

Same cluster of information LEDS and power button in the top center of the device.

Same ‘Synology’ branding on each side.

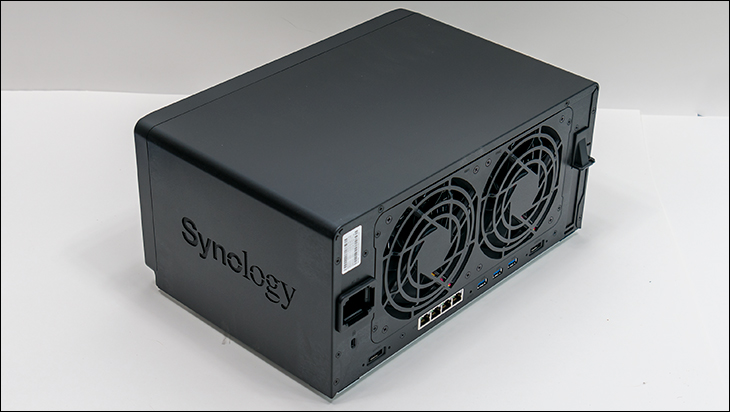
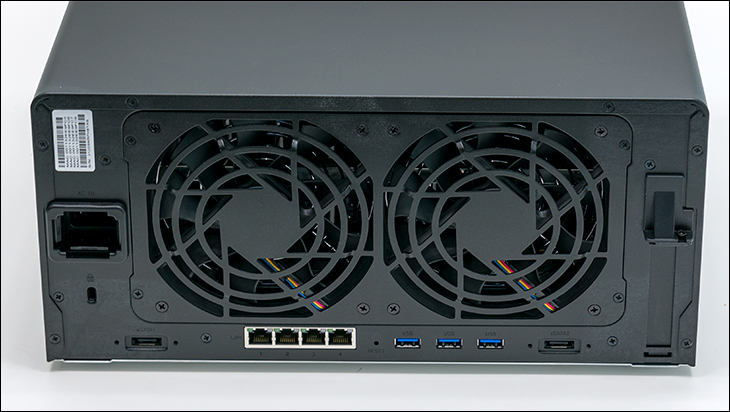
Same puzzling cluster of ports ‘n’ feature on the back like 4x1GbE Ethernet cluster instead of any 2.5GbE (let alone 5 or 10GbE) options. Same pair of USB 3.1 gen 1 ports instead of USB 3.2 gen 2. Same two eSATA ports included. The same the recessed reset button, and recessed 120v power port. Even the same lone PCIe slot cover. All located on the back. All decent, but a bit dated in what they offer compared to some of the competition.

Basically, the only noticeable external difference is the number of drive bays, and size of the fan exhaust ports between the two models and why the DS1821+ can indeed be considered to be the bigger brother of the DS1621+. That last difference is easily explainable as this 8-bay NAS version uses dual 120mm fans instead of dual 92mm fans used in the 6-bay version. To be a bit more precise the DS1821+ uses a pair of Y.S. Tech KM121225LL fans. These ball bearing 120x25mm fans are rated for a maximum RPM of 2000, and move 61.2CFM with 2.35mm of static pressure at that speed. Needless to say, they may give up a bit of static pressure (2.35 vs 3.0), and a smidgen of air movement (61.2 vs 63.7CFM) compared to the DS1621Plus’ fans but they are a lot quieter.
On startup phrases such as ‘nigh and day’ do spring to mind. Where they DS1621+ is noticeable bordering on loud until the fan controller kicks in and tempers their speed, the DS1821+ is still nearly silent. Low noise enough that we would probably would not bother with swapping them out for standard Artic or Noctua 120mm fans. Instead, we would go all the way to Noctua NF-F12 iPPC-2000’s. That would result in even better cooling, but just as much or even more noise as the DS1621+. Such a step really is not needed as in testing all 8 HDDs were within a couple degrees of what six of the same drives ran at in the DS1621+… and they ran cooler with the DS1821+ set to full speed fan profile vs. default profile of the DS1621+. Even then the DS1821+ was not producing nearly as much noise. Those YS Tech 120mm fans really are decent.
With that said, and just as with the DS1621Plus, the ‘low noise’ fan profile should only be used by those who are really, really noise sensitive. Even then we feel the poor tradeoff of increased heat for less noise would warrant moving the DS1821+ to a new location before ever going down that road. So, if you feel the need to mess with the default ‘balanced’ fan profile we strongly recommend only going faster. Never slower. The DS1621+ can kinda-storta get away with the low noise profile, as those smaller fans’ static pressure does not fall off nearly as bad as 120mm fans do, but the DS1821+ does not have that luxury.
Yes, this is “water is wet, the sky is blue” type deal and not just about the fans Synology opted for in either model. Bigger fans have a harder time maintaining optimal static pressure levels compared to smaller fans. This is why 120mm fans are not nearly as popular as 80 or 92mm fans in the enterprise marketplace and one of the tradeoffs you should know and understand about before stepping up from 6-bay NAS appliances to 8-bay NAS appliances. We however do feel that Synology has done a very decent job of balancing cooling performance vs. noise with the DS1821Plus… but would have preferred to have seen three 80mm fans instead of two 120mm fans; or at the very least two faster 120mm fans used. Potentially increased noise levels or not.
Before moving on, we do have to mention one thing that we have gotten questions over. That is nomenclature that Synology uses. Everyone grasps the “plus” means it is part of the plus series. Everyone ‘gets’ that the last two digits means the model year. We do however have to go over why they call it a 14/15/18… and then skip to 24 and yet the 24 is not a 4 bay model and instead is 12. That is actually pretty simple once you understand Synology’s model naming philosophy. Basically, it is not DS-1x-ZZ and DS-2x-ZZ. It is DS-XX-ZZ. Two digits for the year, and two for the total number of drives that can be driven directly by the DS Plus NAS when using the max number of DX517 expansion units.
Since the DSxx21+ models all come with dual eSATA ports they all can handle two of the DX517 expansion units. Each expansion unit come with 5 drive bays. So five, plus five, plus how many internal drive bays a given model comes with. Thus, the DS1420+ (as Synology has not and probably will not refresh their 4-bay DS 2020 model to 2021 and rather will be a 2022 refresh) can handle 14 drives in total. The DS1521+ can handle 15. DS1621+ can handle 16. The DS1821+ can handle 18; and the DS2421+ can handle 24. Before you ask, yes and no. Yes, that means the DS220/DS420/DS620Slim cannot use any DX expansion units (as they lack eSATA and that is why they are not ‘Plus’ models). No, the DS1xZZPlus and DS2xZZPlus models cannot use the bigger DX12 expansion units nor the FX, RX, RXD, etc. expansion models. Those enterprise orientated expansion units require the host NAS device to be using a SAS controller with external port(s), and use higher bandwidth cables (aka “Infiniband” or “10Gbase-CX4” or “external SAS”); whereas these ‘enthusiast’ NAS appliances use eSATA cable(s) to connect to a SATA controller. Not SAS. This is a big reason why we refer to them as NAS appliances not NAS servers. Hope that clears things up for everyone who asked.
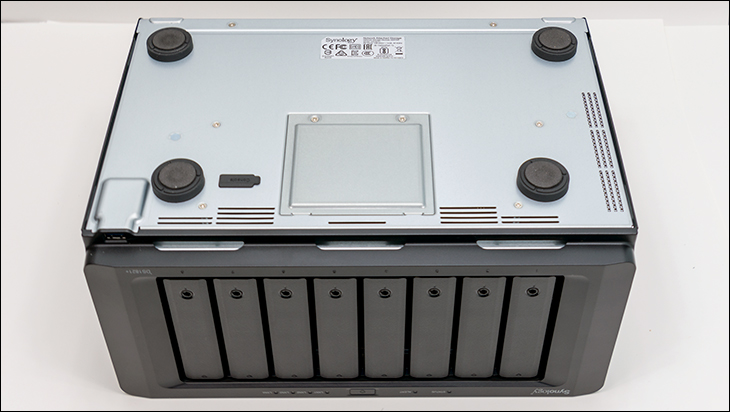
Moving on. Just like the DS1621Plus, the DS1721Plus’s two DIMMS are located on the bottom of the device for easy access. Simply remove to screws, pop off the metal cover and bobs your uncle.

As you can see only one DIMM is populated with RAM. To be specific, it is a Samsung 4GB DDR4-2666 CL19 ECC SODIMM stick of ram… aka Synology “D4ES01-4G”. We will go over upgrade options later in the review, but honestly you will want to install a second stick of RAM just to get better memory performance. As it stands, and just like QNAP’s offerings, having only one of the two memory channels populated can potentially cause bottleneck. No where near as big a bottleneck as running even 8GB on a QNAP with QuTS Hero (aka QNap’s OS using a ZFS filesystem), but 4GB is certainly on the anemic side for an 8 drive array (especially with Btrfs and larger HDDs thrown into the mix). Lower overhead from DSM or not.

The downside to having the DIMMS located on the bottom of the DS1821+ is that it unfortunately means that the two M.2 ports are not externally accessible. Instead, you have to first pull the HDD drive caddies to access the two M.2 ports located inside on the left side. There are pros and cons to this as while they are more difficult to access, they are going to be actively cooled by internal air flow, even better protected and are not all that hard to reach… even if you still can not use heatsink equipped M.2 drives (as there will not be enough room between the 1st drive tray and the M.2 drives’ heatsinks)
Also firmly in the negative column, and before you rush out and buy one or two M.2 drives, there are a few other things to consider first. In this device the unique locking mechanism is easy to use, but means the DS152… err… DS162… err…. DS1821 only works with 80mm drives. Higher capacity, but longer, 110mm drives need not apply, and the same only goes for shorter than 80mm M.2 drives. Both ports also only support NVMe drives. If you stick a SATA M.2 drive in to either, it will not be recognized (yes we tried it). They however will work with newer PCIE 4.0 x4 M.2 drives. Obviously nowhere close to full speed, and thus not worth the extra cost, but it is a nice undocumented bonus.
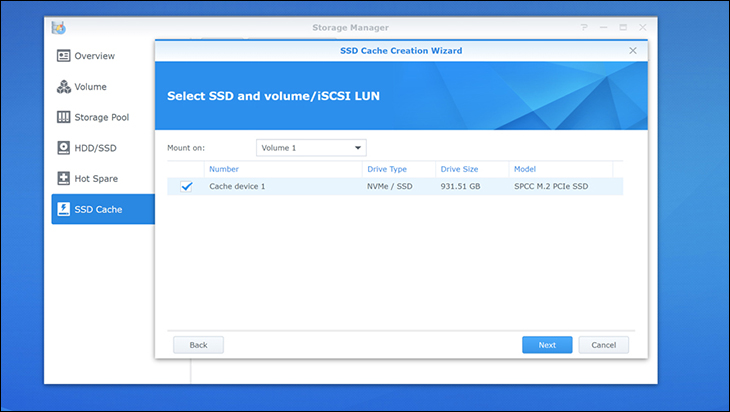
It just is unfortunate that Synology are still resistant to the idea of letting their users use the integrated M.2 ports for more than just caching duties. Especially on a NAS appliance that is focused towards the enthusiast and entry level business markets. They did not. This is not a 8+2 “10 bay” NAS device. It is an 8 bay with two additional dedicated M.2 ports for caching duties. This is unfortunate as such a configuration would have allowed owners the luxury of creating a small, but ultra-fast NAS array for say databases, or VMs and the like, and a larger array for long term storage. When you mix in auto-daily backups to the ‘main array’ into the equation the end result would have added a lot to the DS1821Plus’ appeal. This really is a missed opportunity. One that could have been easily avoidable if Synology just listened to what their customers have been asking for generations of “Plus” models now.
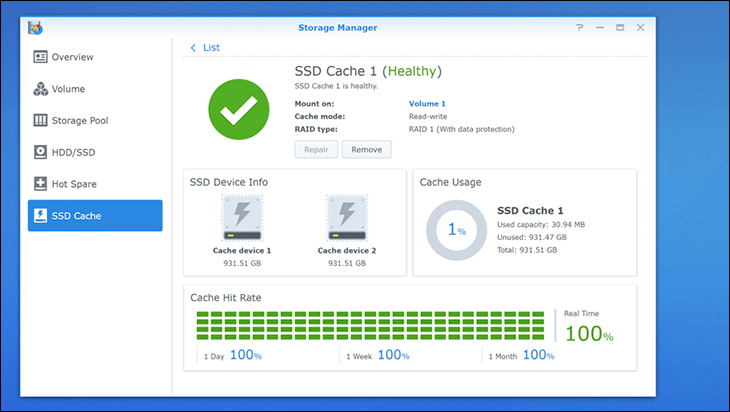
On the positive side this NAS does allow for more than just read caching. As long as you install two NVMe drives you can turn on read and write cache. During the configuration the wizard will guide you through the process but one of the highlights is that both are converted into their own RAID 1 array (please note that if the specific Synology NAS appliances has more than 2 NVMe ports, or 2.5-inch SSD drives installed you get the option of Raid 5 or even Raid 6). It is our humble opinion that even on one 1GbE connections read-write cache may be worth the cost. Especially when dealing with SHR-2 or RAID 6 arrays. While many home users probably will not see a difference, r/w caching can nicely boost performance when dealing with a lot of random r/w operations and the overhead dual parity brings to the table. It just will diddly squat for the home user who wants to stream movies or music or other sequential, low queue depth, tasks. We are also of the firm opinion that, outside of heavily worked NAS scenarios, read-only caching is not worth the expense for the majority of buyers interested in this level of Networking Attached Storage. Those consumers are much better off biting the bullet, spending the noticeably larger chunk of cash… and going all in an Network Attached Storage server. Nothing less than a high TDP, and modern, CPU backstopped by a veritable ton of RAM will cut it.
The last cavate is simple. You are going to eat your NAND alive if you don’t untick the ‘skip sequential’ I/O option. If you do leave the default settings, expect to see monthly NAND life percentages ‘disappear’ as a lot more read/writes will directly hit the RAM cache. It will however nicely boost performance and allow more scenarios to noticeably benefit from caching. If you further want to help extend the lifespan of your drive, do not pick the maximum capacity during the creation stage. Make it smaller. With ‘1TB’ drives we would opt for 750GB as the largest we would go, and probably would go for something in the 250GB to 500GB range. Also, please do not use QLC NAND drives. Optimal choices are enterprise grade drives actually meant for such environments. Those tweaks will reduce the amount it will cache (and how much you can afford), but will extend the life of the drives. IE for the loss of probably not noticeable improvements you M.2 drives may actually last their full warranty period.
As such, our recommendation is if you are thinking about SSD cache and your new NAS appliance think in terms of the cost of two M.2 drives… two enterprise grade M.2 NVMe drives. Then think about it some more. Then start with none and see if the performance is acceptable or not. Then you must understand that r/w cache is not a magic bullet. It will not improve overall performance in all scenarios. Just in certain scenarios. Scenarios that may not be part of what your NAS will encounter often enough to justify the added expense.
