Before we being, we do need to make a few things crystal clear. Firstly, is even though this is a rather massive (in both size and weight) CPU cooler it actually is a rather easy cooler to install. It never will be as easy as an All In One water based CPU cooler, nor as easy as the ultra-thin CPU cooling solutions such as the Noctua ‘S’ series, but it is rather easy with almost no major issues that require careful consideration before purchase.
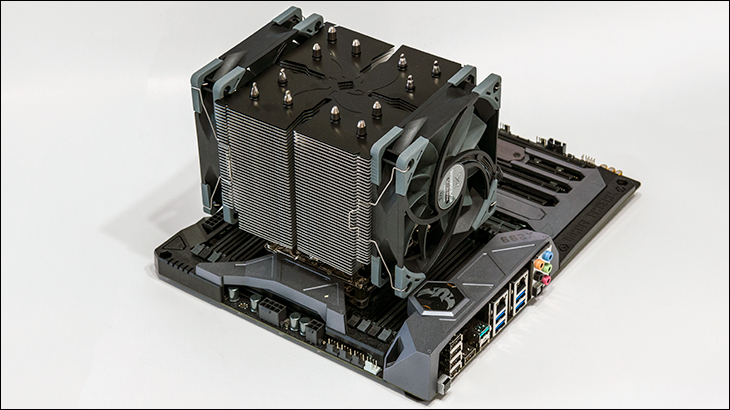
The reason this CPU cooling is so gosh darn easy is two-fold. Firstly, it uses the exact same mounting hardware as what the Mugen 5 Rev.B uses. This should come as no surprise as Scythe did spend a lot of time and effort on their “Hyper Precision Mounting System II” and it shows. This however is only half the reason. The other is that it is extremely well designed. The combination of unique ‘dual tower’ configuration with massive ‘RAM cutouts’ on both sides of the Ninja 5 result is a setup that is basically hassle free when it comes to RAM selection. At worst you will simply have to mount a fan (or two) higher on the heatsink. That basically is it.
With that taken care of, on to what we found.
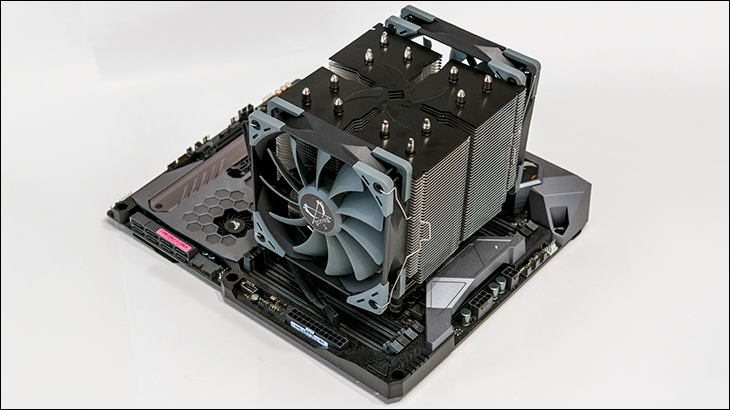
Much like the Mugen 5 Rev.B the Ninja 5 can be mounted to nearly any modern CPU socket. In fact, this cooling solution even supports old socket types such as the ancient Intel socket 775. As such, for the most part, it is a pretty safe bet to consider the Ninja 5 is compatible with your motherboard.
Just like the Mugen 5 Rev.B there are two minor sticking point to that declaration. The first is AMD ThreadRipper users are… well… SOL. This cooler does not come with the mounting hardware for those massive CPUs. We don’t think this is that big a deal as ThreadRipper owners really should use a CPU cooling solution that was designed with it in mind. Not one that was built with smaller sockets that can also – in a pinch – ‘work’ with AMD monster ThreadRipper CPU’s.
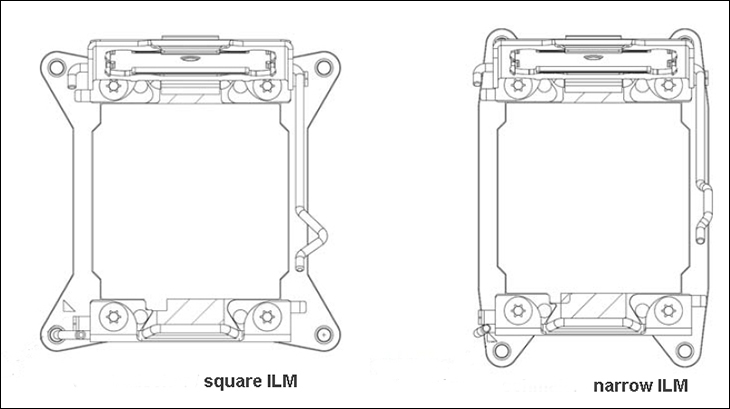
The other is for Intel HEDT users. It will work with most of these motherboards. It however will not work with all as there is two form-factors for the HEDT socket… or more precisely the socket itself is the same but the ILM (Integrated Loading Mechanism) that holds the CPU in place comes in two different flavors. The most first is the traditional ‘square’ ILM which is 80x80mm. This is the most common consumer form-factor for the ILM. However, there is actually a second one – the aptly named ‘narrow’ – which is 56x94mm. This is primarily found on ‘server’ and/or some ‘workstation’ motherboards – the most common motherboard manufacture who offers the narrow ILM style is Supermicro. If you do not know which type your motherboard uses… it is safe to assume that it is square, however with just a quick look you can tell (i.e. does it look like a square or a rectangle). The Ninja 5 only supports the square style… so be warned. Make sure before you purchase.
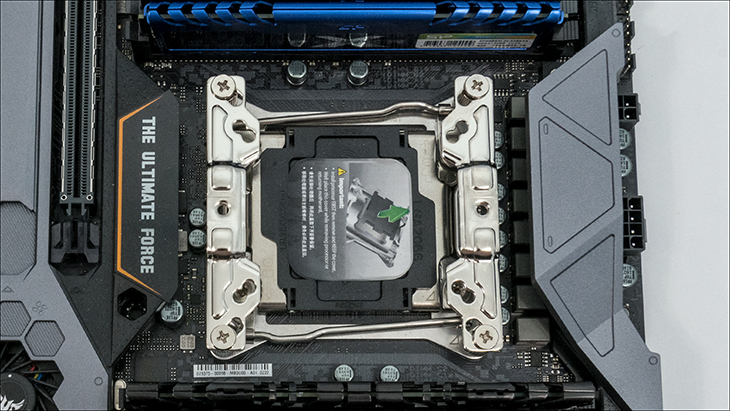
Moving on. As there is so many socket types supported you will have to read the instructions to see precisely which parts of the H.P.M.S. II you will need to use for your motherboard. For example, AMD users will have to use their motherboards stock AMD metal backplate. If your AMD motherboard has pushpins instead of screws you are going to have a bad day… as the Ninja 5’s hardware will not work with it. Thankfully, the pushpin style is rather rare so it is not that concerning of an issue.
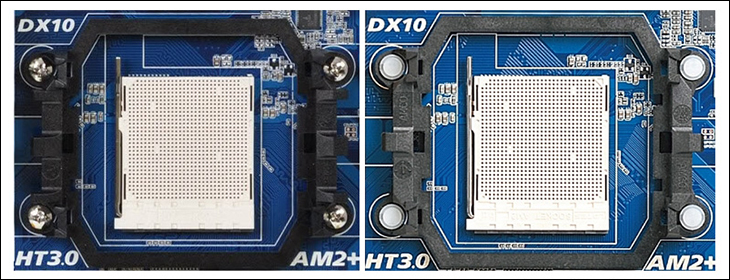
If you want to be 100 percent confident before buying simply look at your motherboards mounting bracket. Do you see ‘screw heads’ like in the left side of the image above? Then you are good to go. If you see plastic heads (like the right side in the image above) you are not. Intel HEDT owners will also be making use of the motherboard’s included backplate. We know of no Intel HEDT motherboard that does not come with this backplate and as such it is basically a moot issue.
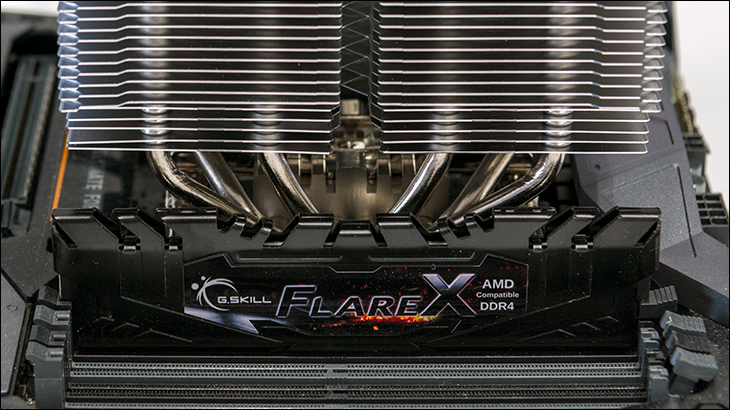
Where both faces of the Ninja 5 are the exact same you really do not need to worry much about ‘overhang’… it’s a given. This is because you will want to mount the cooler so it has a ‘front to back’ orientation as it is big and not all cases will have enough top edge clearance for it to go in a ‘top to bottom’ orientation. But as mentioned previously the ‘face’ sides of the Ninja 5 have massive cutouts that mean even though they will overhang a DIMM or four, RAM compatibility is still excellent.
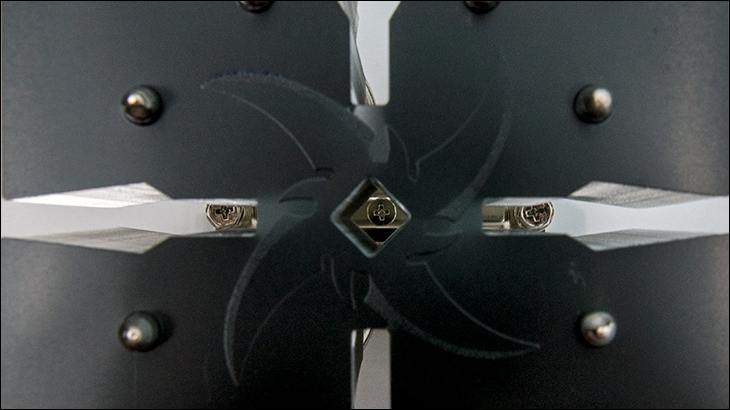
Actually mounting the Scythe Ninja 5 to the motherboard can be a bit tricky as it is so large that you will not clearly see its attached mounting brackets. So guiding the two screws into their proper spot is more a case of using feel and not sight.
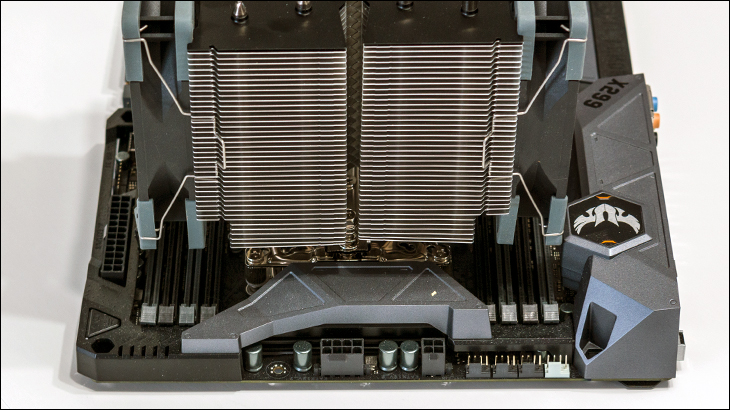
This is less than optimal and unless you have done it a few times you may be better off removing your motherboard from your case. If you do so you can bend down and view the socket, the brackets and the bolts from the side. From this angle, you can easily guide the Ninja 5 into place. If not, what you want to do is get it close and then slowly twist it. The captured bolts will ‘bump’ their holes in the two mounting brackets and when this happens you know you are close to being ready to go.

Also, as both screws are hidden from view the handy dandy included screwdriver is going to be your friend. Stick it down the height of the fin array and by feel you will know when you have engaged the Philips cut-out in the top of each bolt. Once again if you have removed the motherboard this becomes a snap… as you can see (and guide) the screwdriver into engaging the bolts. This too is a lot easier when you are not going by feel and rather by sight! Either way, we would do a one turn per bolt so as to keep uneven mounting pressure to a minimum. Thankfully the bolts cannot be over-tightened. Instead they can only go so far before being physically stopped. So concerns over too much mounting pressure are moot.

Overall that is about it. All that would be left to do is mount both fans, use the included dual header 4-pin fan adapter cable… and you are good to go. The only caveat is the fan mounting brackets are wire and attach to the outside edge. This means they are meant to be used only on 25mm thick 120mm fans. If you have an oddball fan that is thicker than the typical 120mm fan you may have to make your own wire brackets (speaking from experience most wire coat hangers are too thick but thinner wire can be ‘found’ in most homes and repurposed).

