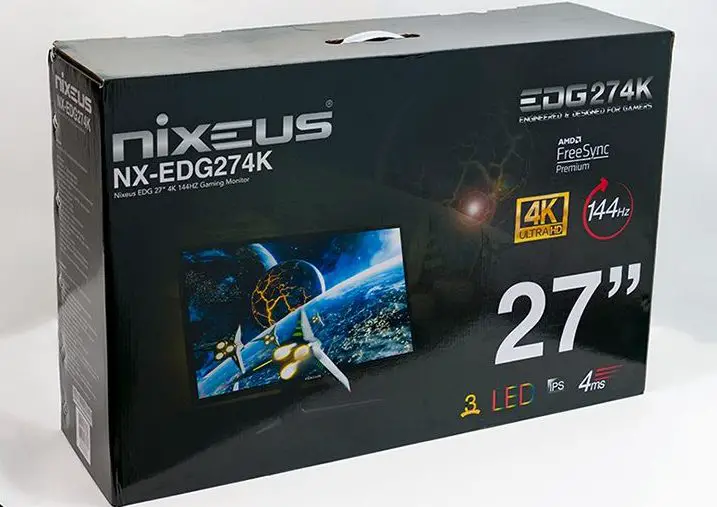
The Nixeus NX-EDG474K shipping container may be smaller than the NX-EDG34S’ we reviewed previously but that is about all that has changed. Much like the reuse of their winning hardware formula Nixeus firmly believes in the old adage of “if it ain’t broke don’t fix it”. The front showcases the actual monitor housed inside and gives a quick round down of its features nicely. The back and sides are liberally covered in details, and generally speaking this box is attractive and eye catching in an understated and conservative manner. This is refreshing as typical ‘PC gaming’ monitors try and speak to the inner child via over the top color schemes and bold statements in garish fonts. Instead of that this box lets its specs talk for it. Just the way it should be. No one buys a monitor because it uses a colorful box. They buy it for its features.
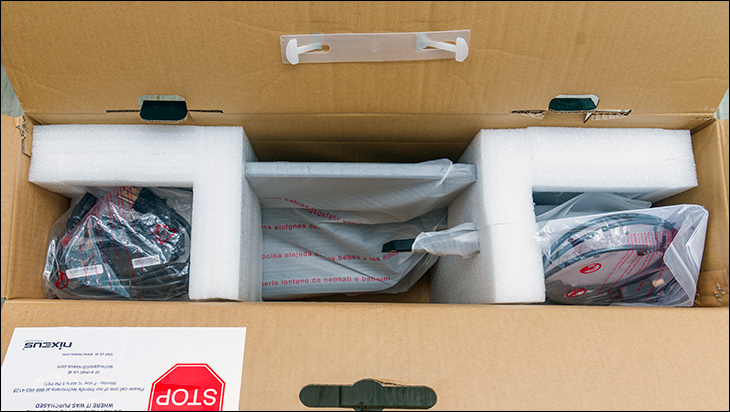
Also like the NX-EDG34S, the internal protection configuration is top notch. Copious amounts of form-fitting Styrofoam fully enclose the monitor and its accessories. This combination not only keeps the contents safe while in transit but keeps random bumps and bangs from driving… say the monitor’s detached base into the panel. Yes, we have seen this happen. It is never a good feeling to open up your shiny new toy and see it broken. As such we would have zero issue shipping this monitor across town, across the country, or even around the world… as even the most ham fisted of warehouse employees probably will not kill it while it is in their ‘tender loving care’.

The included accessories are also classic Nixeus. That is to say all the bases are nicely covered but do not be surprised by the lack of goo-gaws and other MSRP inflating dross. In grand total you will get a nice, easy to understand installation pamphlet, a good DisplayPort 1.4 cable, and a power wall wart. The last is not a bad idea as it is easier to replace an external power supply than an internal one. It just will make tidying up your desk a tad more difficult. Not included is any HDMI cables. This is acceptable as this is a 144Hz 4K monitor… and even HDMI 2.1 will not cut it. The typical HDMI 2.0b port found on most GPUs maxes out at 60Hz @ 4K, and 2.1 only boosts this to 120Hz. So you will want to use DisplayPort. Period. If you do not have a free DP 1.4 port on your video card and want to use this monitor properly… either rearrange your existing monitor configuration or buy a newer video card.

Let’s get this out of the way for those who do not know. ‘4K’ does not refer to the number of vertical lines of pixels on the screen. Yes, with 1080P it meant 1080 vertical lines of pixels (1920×1080). With 1440P it meant 1440 (2560×1440). With 4K… it means it was a marketing gimmick. ‘4K’ is actually 3840 x 2160 (or ‘2160P’)… and is precisely 4 times the number of total pixels on the screen compared to 1080P monitors (8.2944 million vs. 2.0736 million). They came about the ‘4K’ moniker by roughly translating the horizontal line count instead of vertical … and still had to fudge the numbers.
It still is a very, very nice boost but it is not 4000 vertical pixels. It is 2160 pixels. We will not see 4000P / ‘real’ 4K monitors any time soon. In fact, the next real standard (as ‘5K’ and ‘6K’ are very niche standards) of “8K” is actually going to jump over 4000P and go to 4320P. 8K will be precisely 16 times greater number of pixels than 1080P at 7680 x 4320… and completely fubar their new naming scheme as it will be called ‘8K’ not ‘16K’. This is what happens when you let the marketing division come up with a standards name and not the engineers who used to be responsible for it.
To be fair, this actually does make (some) sense when you think about it. With ‘4K’ resolution a single 1080P pixel now consists of a perfect 2×2 grid of four pixels. 4000P would not result in a perfect grid. This makes compatibility with earlier programs and 1080P content a lot easier… and considering how hard 2160P is to use in games we do not honestly want to even think about how much GPU horsepower will be required for getting useable frame rate levels at ‘8K’…. as 4K’s 8,294,400 pixels is hard enough to power to 60FPS and 8K’s 33,177,600 is just mind boggling.
Next up is ‘Over Drive’ (aka Overdrive… which is patented by Positive Technologies) that the NX-EDG274K uses. Over Drive is older method of reducing perceived motion blur / sharpening objects… aka ‘ghosting’ in fast paced content. How it does this is different than say Ultra Low Motion Blur (ULMB) technology. Instead of quickly pulsing the backlight like in ULMB tech, and as the name suggests, it ‘over drives’ the pixel switching frequency of the panel. It does this by pushing more voltage to the pixels to force them to change their state faster than the AU Optronics rates them for. In other words, ‘over drive’ is similar to overclocking a CPU or GPU. I.E. You are pushing more voltage to get it to perform faster.
Why would you want to push the pixels harder and faster to speed up their change from one color to another? In a nutshell a lot of motion artifacts are simply the result of the pixels around an image changing their color slower than the refresh rate requires. For example, say you have a red race car on a black background. In one image the car is a certain group of pixels – that are various state of shades of red, the boarder around it is various color states… and the rest are black (i.e. those pixels are in a closed state). The next refresh the car moves, so the pixels have to quickly change from displaying one color to another. If the change is too much for some of the pixels to complete the color they get stuck at until the next refresh is what you see… and you get a ‘ghost’ image. Pushing more voltage forces the transition of the pixel faster. Push enough voltage and the proper color change can actually finish before the refresh cycle is complete.
The upside to this method is you do not get any flickering and those susceptible to epilepsy are safe with OD tech. The downside is twofold. Firstly, you are pushing more voltage and the lifespan of the monitor can be reduced. Much like with overclocking of a CPU this difference may not be noticeable if you routinely replace the monitor before the pixels die. However, if you are too aggressive with OD you fry the pixels before the monitor is replaced and end up with a stuck pixel (or cluster) that are going to stay whatever color they last were set to. Basically, the more voltage pushed the sooner they die. So, the longer you keep a monitor for… the less OD you should use.
The other issue is if you push too much voltage you get over drive artifacts / reverse ghosting…. aka pixel overshoot. This happens when the voltage is so high that it overshoots the final color change it was aiming for and has to then change back to the final ‘proper’ color. Depending on much of an overshoot you may or may notice it getting it wrong. After all… if it is a slightly different shade of say red in a cluster of lighter/darker red pixels you may not see it. If it hits white in a cluster of red… you will notice it. This is why tuning OD is so darn difficult as the leading edge of the image change vs the trailing edge can be made up of radically different colors requiring radically different amounts of voltage to hit their proper final color change.
To further complicate things the amount of voltage needed does also vary based upon on how fast the panel has to refresh. At say 60Hz the pixels can be downright lazy in changing as they have 1/60th of a second (16.67ms). At 144 they have to be snappy and change in 1/144th of a second (6.9ms). If your monitor and game is locked at a given refresh… you set the OD and you are good to go. However, with Variable Refresh Rate tech a given real-world refresh rate can change on a dime. This is why NVIDIA’s G-Sync tech comes with variable or ‘adaptive’ over drive abilities baked right in to the standard. Variable/adaptive OD means that as the refresh rate changes so too does the voltage automatically applied to the pixel’s change. End result? Lowered chance of corona / OD image artifacts in the real world.
AMD’s FreeSync standard does not require variable OD. Some monitor manufactures do include variable OD on some of their FreeSync certified models. For example, Nixeus’ NX-EDG27v2 and NX-EDG27S v2 come with variable OD. They are already cult classics. Sadly, they are cult classics because most less expensive monitors do not include variable /adaptive Over Drive. You get barebones, one size fits all, manual OD level configuration. The EDG274K does include variable OD. You can set the OD settings in the On Screen Display to whatever you want and while it will kinda-sorta respect this setting… it will consider it more of a ‘guideline’ rather than a hard and fast rule. It will use algorithms to decide what the proper OD voltage should be, not what you set it to.
This is fan-freakin-tastic. With a bit of patience, you can dial it in and then the adaptive OD abilities will kick in and make it ‘Just Work’ regardless of the actual real-world refresh rate. This will not only saves you a ton of time, but a ton of aggravation with the end result. Furthermore, you will get near perfect image artifact reduction for all scenarios with just a bit of work up front. Simply pick the easiest to hit 144Hz game you use (or better still set the resolution to 1080P in an older game engine) and dial it in for that game. Then further refine it via hardest, most GPU intensive you play. At worst a couple hours work, at best zero effort needed… it just depends on how OCD you are (i.e. are you a ‘meh, that is good enough’ type or a ‘toilet trained with a shotgun’ type). In testing, the variable OD may not be the best we have seen (and why we say ‘near perfect’) but it is rather decent bordering on very good. It usually gets it right and once we did dial in the OD settings in the On Screen Display it was the rare time it got it so wrong as to be noticeably wrong. For us (and our eyes) that meant lowering from the default setting of 63 to 58.
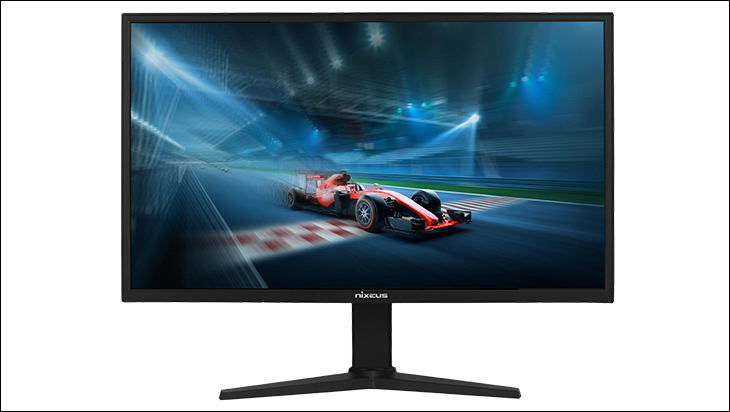
To make it crystal clear how big a deal this one feature is, this is how we would dial in non-adaptive non-variable Over Drive based monitor. First, we would start with the low teens (if possible and if not we pick ‘low’) on the OD setting as a starting point… as we will take regular ghosting over any corona issues any day of the week. If we notice ‘glow’ around certain ‘things’ displayed on the panel during game play… we turn it down. If we do not notice any glowing or halos or other wonky artifacts but notice a bit of ghosting… we turn it up. Rinse and repeat and you got your OD for that game. Rinse and repeat for other games that are more and then less GPU intensive. Over time we find the sweet spot. To help speed this process we pick an easy to drive to 144Hz game, a darn near impossible to hit 144 with our gpu, and one that can do it but not always and not in every part of a game. Write down the OD for each after a gaming marathon for each game… and pick a happy medium that is not great for any of the three games but results in a setting with a wide spectrum of tolerable results. It will still take a weekend to do… but that beats weeks of trial and error with a lot less long-term frustration.
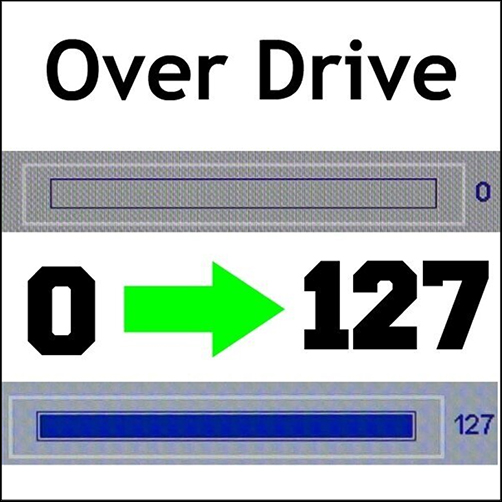
All that versus a couple minutes/hours of gaming to refine the variable OD settings. Yes, that is a massive difference in time and effort needed. Better still while it is not ‘perfect’ vs ‘mediocre’ it is ‘near(ish) perfect’ vs ‘mediocrity’ that took a fraction of the time to get a better end result. With that said the use of variable Over Drive instead of ULMB tech is how Nixeus was able to help keep their lowered asking price. Once again, this monitor may be part of their EDG line but it is more ‘jack of all trades’ model rather than a ‘hard core gaming’ monitor. On the positive side they do give a lot more precision to OD than typical. Most give ‘off, low, medium, high’ gears (with fancier names), some give a scale of 0-100. Nixeus does 0 to 127 (or a total of 128 unique OD settings).
Just be aware that ‘zero’ setting with FreeSync on does not mean it is off. It will over-ride your setting if the algorithms feel it is necessary to do so and apply a bit more voltage even when set to ‘0’. Probably not enough to prematurely ‘kill’ the monitor but we do wish it did respect our wishes and did not think it knows better than us when it comes to a feature being On or Off. Change the actual OD setting on the fly… sure, go for it. Over-rule turning a feature off? No. That is sub-optimal. Respect your owners wishes Nixeus.

Moving on. Usually with inexpensive monitors you get Adaptive-Sync compatibility. Which is a fancy way of saying it supports the latest DP VESA standard. Nothing more, nothing less. Typically, some go above this and offer the barebones AMD FreeSync standard’s compatibility. These days this first / entry level FreeSync compatibility certification is called ‘FreeSync’ and is basically the same as the original FreeSync standard. Nixeus goes a step further and has certified this monitor to the FreeSync Premium standard.
FreeSync Premium is a brand-new ‘mid-tier’ version of FreeSync… which falls somewhere between the OG FreeSync and the OG FreeSync 2 HDR standards. Basically, in addition to Tear-free, Low Flicker, and Low Latency guarantees that the bog standard ‘new’ FreeSync standard requires, FreeSync Premium adds in Low Latency in Standard Dynamic Range (SDR) content, a minimum of 120Hz refresh rate with 1080P content and Low Framerate Compensation. LFC is a big deal. Not perfect, but when dealing with a 4K monitor with a VRR range that only kicks in at 48Hz or above… it’s a big deal. We probably would not want to routinely game on a 4K monitor without LFC unless we had multiple uber-high end GPUs in the system. Even then LFC would be sorely missed in some games. FreeSync Premium Pro then (amongst other things) goes and adds in lower latency requirements with High Dynamic Range (HDR) content via having games tone map directly to the display, and the monitor must have 400 or more nits of brightness output.
Quite honestly ‘HDR’ on 8bit panels is pure marketing spin, and so too is ‘HDR400’ (AKA HDR with 400nits standard). For average joe and jane six-pack the 350nits this monitor can do when HDR is off (or 400 when it is on) is more than just good enough. Seriously, outside of some niche scenarios no one will care one whit about 350 vs 400… and those that do will find them both to be suboptimal and will be looking at 10-bit, 1K nit capable monitors. In other words, for the average consumer FreeSync Premium is the ‘sweet spot’ you want your monitor to hit.
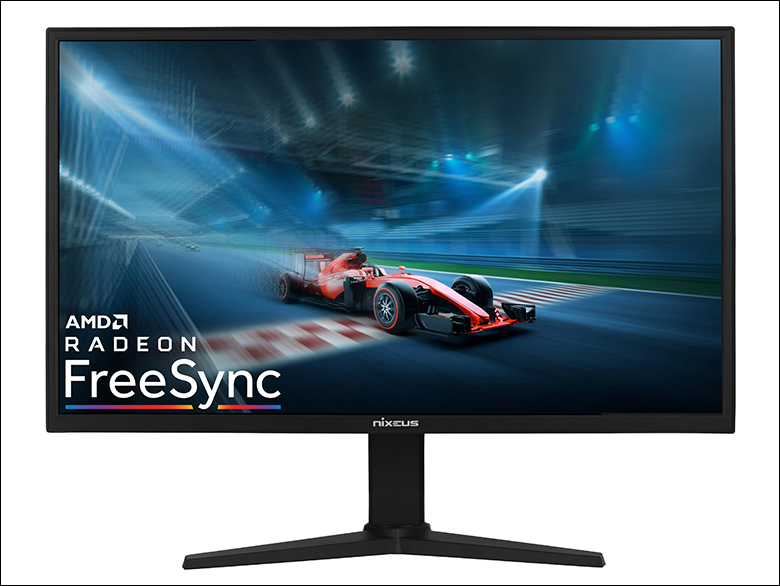
Of course, as this is using an AU Optronics panel. The NX-EDG274K does not just support 120Hz in 1080P resolution but supports 144Hz at 4K resolution. There are a few caveats with this specification. Firstly, to do 144Hz at 4K resolution over a single DP cable requires DSC. Display Stream Compression does add in a bit of latency to gaming, and not every GPU supports it. In the gaming section we will go over it in a bit more detail but for most people 120Hz is about as good as you are going to see right now with 4K resolution settings and only 1080P gaming will get 144Hz.
The next is this is an AHVA based panel (not be confused with ‘VA’ panels… even if it does have VA in its acronym). AUO’s Advanced Hyper Viewing-Angle panel technology is kinda-sorta like LG’s In-Plane Switching technology but is arguably better and worse in a few ways. It is better in that it is (typically) faster at switching pixel states and thus (potentially) offers higher refresh rates that what the average LG IPS panel can do. It is worse in that it typically does not have the color reproduction abilities of ‘true’ IPS tech. Since this is an 8-bit panel, and not 10-bit… the latter is really is a non-issue for the average buyer. You still get full Adobe sRGB coverage but do not get ‘wide color gamut’ Adobe RGB coverage like with a good high end ‘IPS’ panel.
(image courtesy of Wikipedia.com)
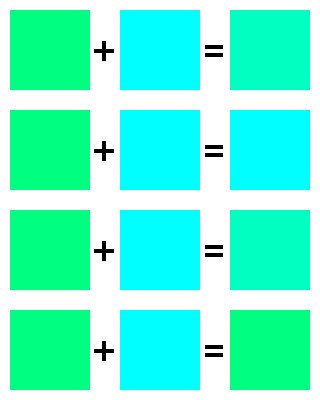
Basically, this monitor is an 8-bit / 16.7 million color capable panel that does not use FRC (frame rate control) to trick your eyes (or OS) into ‘seeing’ (or creating) a billion different color shades. With FRC the pixels quickly change from one color state to another to appear to be a third color (aka ‘Temporal Dithering’). FRC and gaming is typically a sub-optimal combination compared to true 8bit or true 10bit panel options as two frames are needed to ‘paint’ a single 10-bit image… and why no game engine uses an 10bit color pallet unless you tell it use one via turning HDR on. Also, FRC is only a (very) close approximation of the ‘true’ color it is trying for and different people may see the ‘third’ color slightly differently than others (depending on viewing angle, AG coating, how they see certain colors… if they wear glasses with certain light spectrum blocking coatings, if they only sacrificed a chicken and not a goat to the Gods of Color, etc. etc.). This tech came about way back when LCD’s could only do 6-bit color and the industry needed a quick’n’dirty way of giving faux 8-bit output that was not a flaming dumpster fire.
So, for professionals who need true 1 billion colors no 8-bit panel will make the grade – this includes all 8+2FRC ’10-bit’ panels out there. For average owners who have the typical 8+2FRC monitor… use 8-bit color depth settings in the OS, turn HDR and all that marketing nonsense off in the OS and in the monitor’s OSD… and call it a day. This is why NX-EDG274K not being a ’10-bit’ FRC monitor is not a bad thing. From our point of view it actually is a good thing.
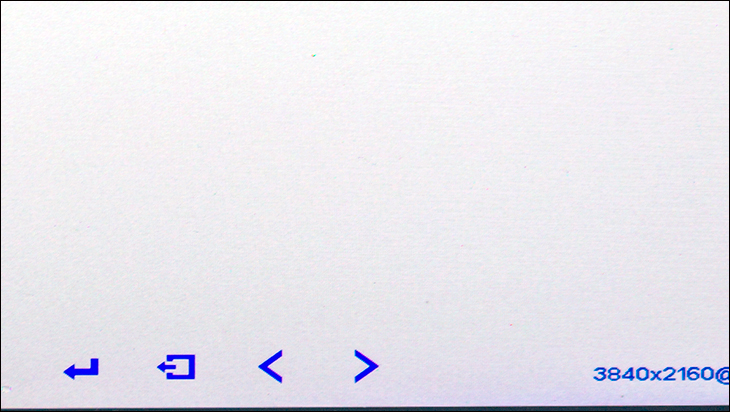
Speaking of the On-Screen Display, Nixeus has done a very good job… and yet made a few errors that may be corrected via a (needed) firmware update. Basically, you get multiple physical buttons that are nicely sized, and very tactile for navigating / controlling the OSD. Sadly, as ours was an engineering sample, the buttons are not mapped to what the OSD shows them to be.
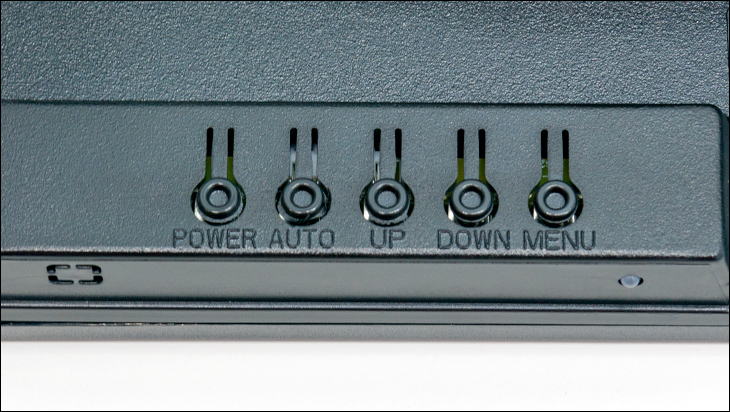
The OSD shows the leftmost being enter, the next back (or up a level), and the next two being up and down. In reality… the first is enter, the next two are U/D, and the fourth is to go back up a level. Yes, this will frustrate you until you start ignoring the OSD input command hints. This is less than optimal.
On the positive side you get access to potentially more than the standard R/G/B color correction abilities. Instead you get Red, Yellow, Green, Cyan, Blue, and Magenta… and get both saturation and hue abilities as well as RGB or Y,U,V modes. This gives a grand total of twelve possible color tweaking abilities (depending on mode) versus the standard three.
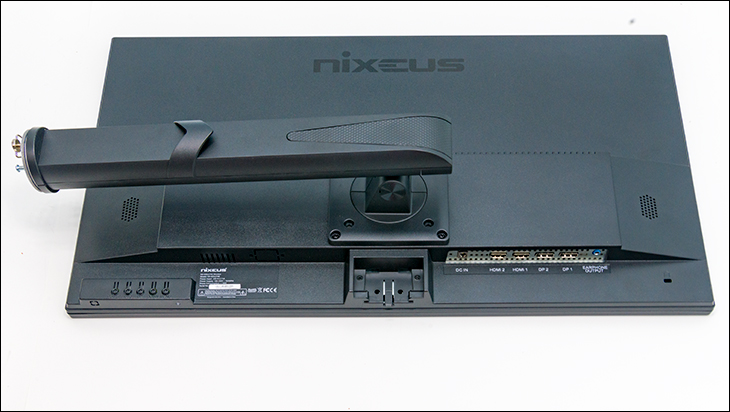
Where this is not a 10-bit monitor meant for National Geographic employees it should come as no surprise that this is not an overly thick (let alone ‘beefy’) looking monitor. It is meant for the average consumer and comes with relatively decent dimensions. At this time Nixeus does not list the dimensions… so we thought we do it for them.
 \
\
The left, right and top of the bezel are an average of 12.395mm thick (according to our micrometer) and the bottom is ~15.799mm. While the sides are a smidgen thicker than we would like (we prefer sub 10mm) for multi-monitor configurations this is well within the realm of reasonable by modern standards.
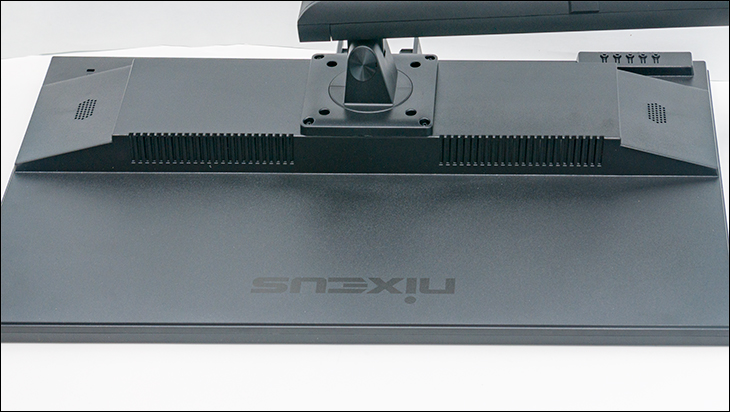
The reason the bottom bezel is not that much thicker than the other sides is because the OSD and Power buttons are all located on the back (lower right side – as seen from the front). They do not glow (but there is a blue power indicator LED), so you will have to ‘blindly’ find them to use them. This really is not a hardship. We actually prefer this location versus the typical back right edge of the monitor, and it is only the bottom edge configuration that we consider more optimal. It will only take you a few tries to ‘know’ where they are and once you get used to this location you will probably come to prefer it too (especially if you have 2 or 3 monitors grouped bezel to bezel on your desk). Either way, we doubt anyone will honestly disqualify the EDG274K from consideration over it.
The majority of the panel is ‘flat’ with an average thickness of ~16.942mm. It is thin because this is a LED backlit based monitor… just do not expect Full-array local dimming (FALD). This is most likely a Direct LED full array configuration with a small chance of it being edge-lit. The lack of (for example) 384 groups of LEDs in a true FALD configuration is how Nixeus was able to keep the price below 1K. To be blunt, if this was a 10-bit uber wide gamut monitor with 1000 nits specs we would be disappointed. With 8-bit and 350/400 nits it really does not matter that much on a 27-inch screen. Good consistency is good consistency regardless of how it goes about it.
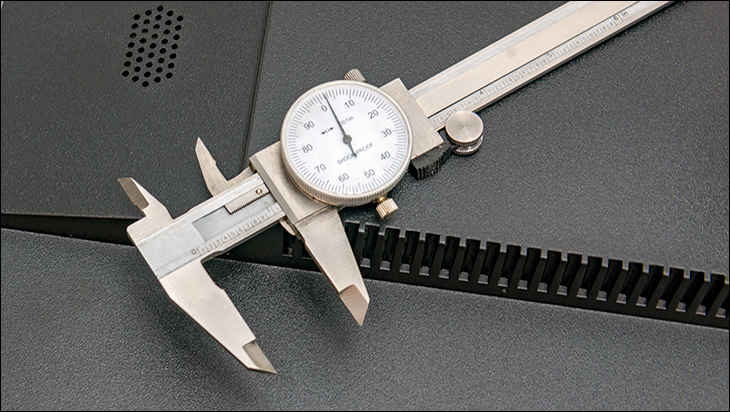
Moving on. The lower back of the monitor is where all the electronics are housed. By moving the PSU to outside the monitor’s housing Nixeus was able to keep this section rather petite as well. Since it is more curved in nature here are the two main specifications for it. At the edge of the monitor this section is ~23.165mm thick and this goes up to ~44.933mm (27.991 + the panel’s 16.942). The height of this section is ~117.831mm. These are all very decent, bordering on very good dimensions for a typical 27-inch monitor. Nixeus simply did not invest the time nor effort nor money to shave every millimeter they could and sculpt the monitor into a work of art. It looks like a monitor. It is utilitarian with a bit of flair, but will never be confused with a work of art. This is another way in which Nixeus was able to keep their costs down.
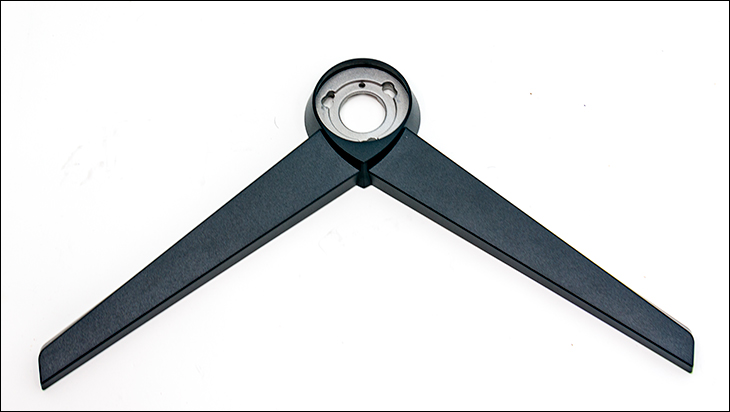
The last area where corners were arguably rounded is the stand. Before go over them we do need to make things clear. It is a good stand. It offers swivel, tilt, landscape to portrait mode, as well as 5 inches of height adjustment. Better still, from a foot print point of view, it does not take up a whole lot of real-estate.
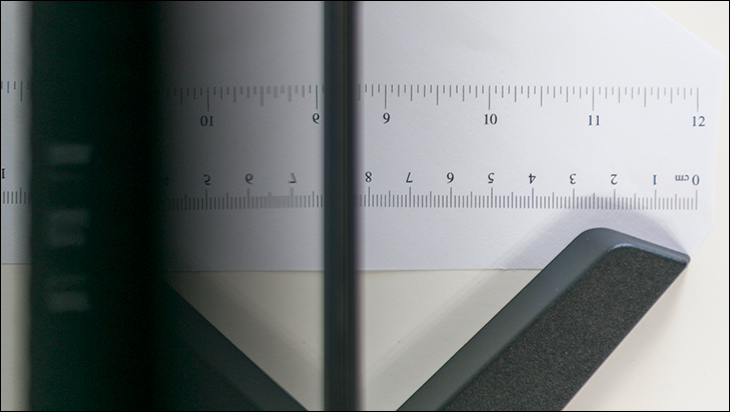
To be precise the two feet only stick out in front of monitor by about 8.5cm and the stand’s arm is only about 11cm behind the monitor. The only issues we have with this stand is the fact it is a bit sticky when it comes to height adjustment (it does take a bit of effort to get it moving), and that it is a bit shaky. Make no mistake this stand does an excellent job of keeping the monitor stable, even when bumped, but even minor bumps can make the monitor itself wiggle from side to side and front to back. This is because there is a bit of slop built in to stand attachment point to allow for easier tilt adjustment as well as easier conversion from portrait to landscape mode… it just does not instill a great level of confidence the first time you see it wiggle like jello. Of course, if you want to use your own stand or stick in a multimonitor configuration… it does use a standard 100x100mm VESA mounting bracket. Overall this stand, while more than adequate, is the last way in which Nixeus were able to keep costs low without cutting significant features. Taken as a whole Nixeus has done their typical great job of prioritizing what is actually important to people and rounding a few curves on things that most will not care enough about to be disappointed.
