This brings us to the real star of the show. The panel and its internals. Of the two areas it is hard to choose which is more impressive. On the one hand this monitor is a sub-1ms response (Photon to Render) monitor that boasts a peppy 165Hz refresh rate and is AMD FreeSync Premium certified.
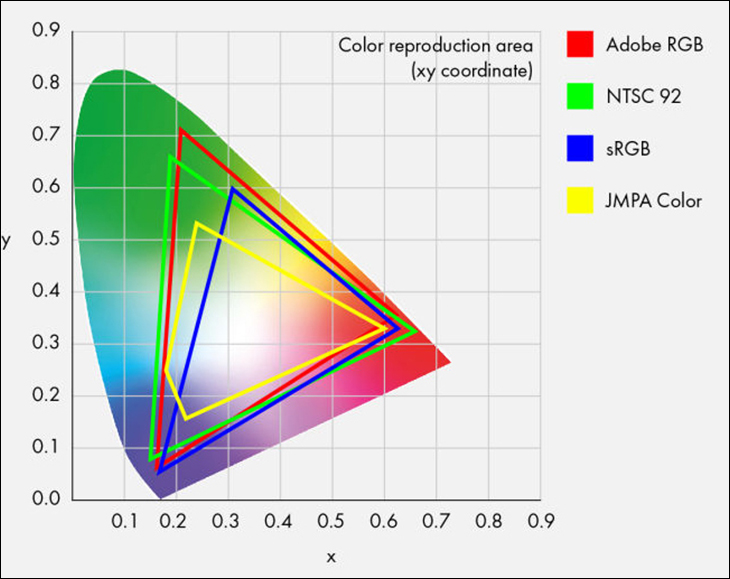
On the other, the panel is not only noticeably faster it is much more capable of doing what a panel’s actual main job is: displaying colors. While the V2 was no slouch in this department (thanks in no small part to using a very good IPS/AHVA 8-bit AU Optronics panel)… there is no comparison between 105’ish percent sRGB coverage and a whopping 98% DCI-P3 coverage. In a nutshell… 98percent DCI-P3 is about the same as to a bit better than 130-135 percent sRGB coverage – or a whopping 95’ish Adobe RGB color gamut coverage.
(Image courtesy of MSI)
We say ‘ish’ as comparing a-RGB to the DCI-P3 standard is much like comparing an apple to an orange and getting ‘pizza’ as the answer. One was designed with LCD monitors in mind (RGB) and the other was mainly focused on updating cinema standards… to an actual standard. So, before we move on let’s go over exactly what 98% DCI-P3 coverage means.
Firstly. This newer standard (ratified in 2010 to be precise) came about because Digital Cinema Initiatives (DCI) organization wanted to make an actual standard that could replace NTSC. One that was optimized for their needs. IE stop using the borrowed / stopgap / never intended for long term use REC 709 standard which is nothing but ‘sRGB’ with a fancy label. At this time basically all broadcast television and a good chunk of digital download movies use 709/sRGB (though Blu-ray HDR10 is quickly becoming the de-facto standard). Since professionals use either Adobe RGB or DCI-P3 monitors… getting colors to look correct was a PITA. Still better than the days of “Never The Same Color” NTSC ‘standard’ (which no two broadcaster could agree on)… but still not optimal.
Thus DCI-P3 was created. This is where things get tricky. This standard does not use the same Red/Green/Blue priorities as adobe RGB standard. Where Adobe RGB favors cyan and green colors, DCI-P3 favors more reds and yellows. Thus, more reds and yellows can be displayed on a DCI-P3 monitor vs. on an Adobe RGB monitor… but that Adobe RGB capable monitor can display more greens and cyan. Why the change? Because a ton of photographers shoot pictures… with a ton of green and / or blues in them. Whereas movies typically have more blood and gore (we are only slightly joking here). Different industries… different needs.
Moving on. Right now, 98 percent of DCI-P3 color gamut is about as good as it gets outside of some rather expensive (and niche) 10bit monitors. Basically, typical white-LED and even GB-r (aka Green Blue -red) diodes cannot go as deep into the red spectrum as the DCI standard calls for, so in order to bring DCI-P3 to the masses a new diode was needed… or at least new coatings.
(image courtesy of displayninja.com)
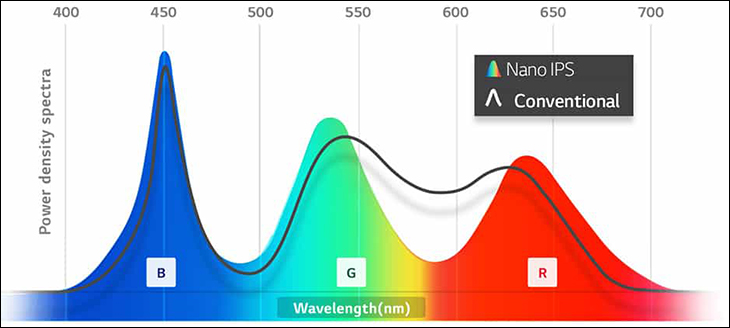
Right now, there are basically three ways of ‘easily’ getting to high 90’s DCI coverage. All are using a variant of KSF ‘red phosphor’ coatings to get that extra red. The first is how Samsung does it. They use a blue LED covered in KSF with an extra filter added in behind the panel (aka ‘Quantum Dot’). AU Optical uses a slightly modified KSF coated ‘white’ LED with a different filter added in. LG uses a K2SiF6 doped with Mn4 coating over GB-r LEDs (aka ‘Nano IPS’). Samsung’s is arguably the ‘best’ with good green and excellent blue and red color reproduction… but at the expense of total DCI coverage. LG’s gives excellent red and blue peaks but weaker green… and AU Optical is somewhere in between (their best right now is about 95% DCI-P3 coverage). None are perfect. All are a compromise as they are all basically early gen technology. Since Nixeus is using a variant of LG’s LM270WQA panel, the new EDG27X gets excellent coverage with a “Samsung tax” added in. Unfortunately, KSF tech does have one major drawback… heightened red phosphor decay.

(image courtesy of blurbusters.com)
Much like the days of yore when a photon ‘gun’ was fired at a cathode tube to excite the R/G/B pixels, these new KSF coated diodes do not (relatively) change from ON to OFF ‘instantly’. Instead, the red in the coating can glow for a bit longer than ‘white’ LEDs. This can cause ghosts and / or color artifacts to appear if you start ‘strobing’ the backlight to (ironically) reduce artifacts being noticed by the user.
To overcome this issue a couple things can be done. The easiest is not use strobing. Which Nixeus did (and thus no ‘ULMB’ in the specifications). This of course can lead to more artifacts from ‘slow’ pixel changes. The easy solution to this problem is to use “over drive” (aka Overdrive… which is patented by Positive Technologies). As the name suggests this ‘over drives’ the pixel switching frequency of the panel via increasing the voltage pushed to said pixels. This in turn forces them to change their state faster. Basically, it is the same as overclocking your CPU – just for your monitor’s pixels. Yes, it can (at extreme settings) shorten the lifespan of the monitor but unless you plan on using it for multiple decades it is not overly concerning. The EDG27X’s default of 24 is pretty much not going to shorten the lifespan enough to matter… but by the same token we would be hesitant to go over 60 percent. Even such a seemingly moderate setting may impact lifespan, and a setting of 100 will certainly shorten it.
Why would you want to do this? In a nutshell a lot of motion artifacts are simply the result of the pixels around an image changing their color slower than the refresh rate requires. The higher the refresh rate the more likely these artifacts are going to occur. For example, say you have a red race car on a black background. In one image the car is a certain group of pixels – that are various state of shades of red, the boarder around it is various color states… and the rest are black (i.e. those pixels are in a closed state). The next refresh the car moves, so the pixels have to quickly change from displaying one color to another. At 60Hz the pixels typically have plenty of time to change their state. At 165Hz? Not so much. So, if the change is too much or the time slice is too small for some of the pixels to complete the color change… they get stuck at a given “in-between” color until the next refresh can complete the pixel state change. In the meantime, you get a ‘ghost’ image in the new screen image. Thus, pushing more voltage forces the transition of the pixel to happen faster. Push enough voltage and the proper color change can finish before the refresh cycle is complete at even 165Hz.

With that said… Over Drive is not a one size fits all solution. Different refresh rates need different amounts of voltages applied to the pixels. If you use one ‘over drive’ voltage setting for all scenarios you can end up with “over drive artifacts” aka reverse ghosting…. aaka pixel overshoot. This happens when the voltage is so high that it overshoots the final color change it was aiming for and then has to change back to the final ‘proper’ color. If there is not enough time to complete the correction… you get odd-looking color ‘halos’ or worse. For many these types of artifacts are more noticeable than the problem Over Drive was trying to solve in the first place.
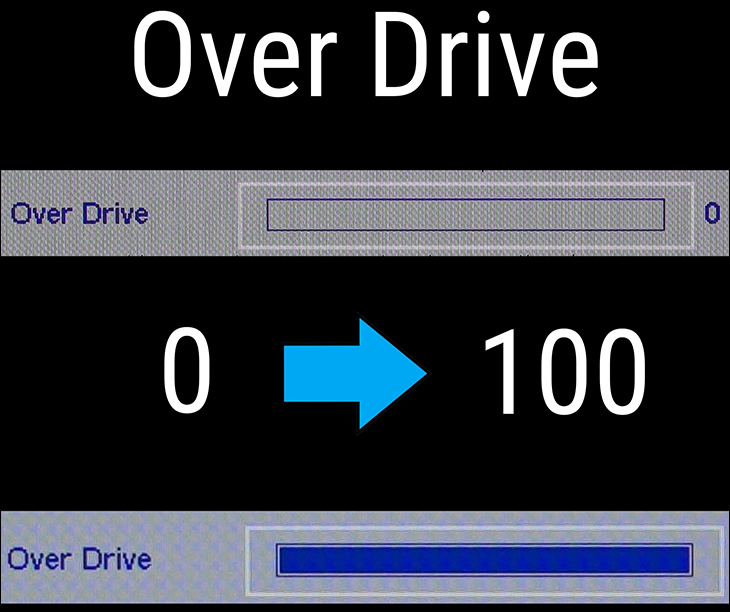
To overcome that issue the easiest solution is to allow the end user to dial in / adjust the ‘overdrive’ settings so that they do not notice any oddities occurring. This is called variable overdrive or adaptive overdrive. As the name suggests it allows the end user to set, via the OSD, a ‘guideline’ or baseline voltage that should be applied. It however is not a hard and fast amount. Instead, the hardware will then use algorithms to decide what the proper OD voltage should be based upon your input (i.e you are giving it a range it should try to use for voltages). This level of fine tuning is what all monitor’s that use Over Drive should offer. Sadly, since it is not part of AMD’s FreeSync standard many do not go the extra mile and include it.
Nixeus did go the extra, extra, extra mile for their buyers and did do all the above properly (albeit in the case OverDrive they ‘only’ give you a range of 0 to 100 and not 0 to 127 like with the EDG274K. Some will find the lesser fine grain control easier to understand as it directly translates to a single percentage change per single digit change). The end results do speak for themselves. This combination of no backlight strobing with end user adjustable Over Drive means, after you dial things in, that unless you are actively looking for artifacts or using a high-speed camera the use of KSF LEDs is almost a nothing burger from an artifact point of view. Images really are crisp and buttery smooth. Certainly not as crisp or smooth on a 200+Hz w-LED monitor, but still better than the EDG27v2 and plenty of others 27-inch monitors that cost more than the EDG27X.
Moving on. Even though this monitor does cover a rather wide color gamut it is not a true 10bit panel. It is an 8-bit / 16.7 million color capable panel. So, while it technically can do wide color gamut, it will have to use FRC (frame rate control) to go above the 16.8M color pallet. FRC is suboptimal as it the pixels quickly change from one color state to another to appear to be a third color (aka ‘Temporal Dithering’). So… for professionals who need true 10bit color depth, buy a true 10bit panel. For the average user it really does not matter all that much.
Overall, a lot has indeed changed in a single generation. Mostly for the better. Arguably enough to make justifying the extra cost of the EDG27X over the EDG27v2 relatively easy. Color us impressed.
Panel Performance (Uniformity and Response rate)
Review note
As is our standard operating procedure all testing was carried out at 120 cd/m2 unless otherwise noted.
Uniformity
Optimally a panel should show perfect uniformity across the entirety of its screen real-estate. We have yet to see one exhibit perfection. Instead we consider 15% (i.e. plus or minus 7.5 percent) or lower to be extremely good, and 15 to 24 percent to be ‘good enough’. Anything above this does not meet our absolute minimum standards and will be considered a failure. For this test we do not use 120 nit setting and instead set it to about its 50 percent luminance rated output. For testing and recording we used DisplayCAL.
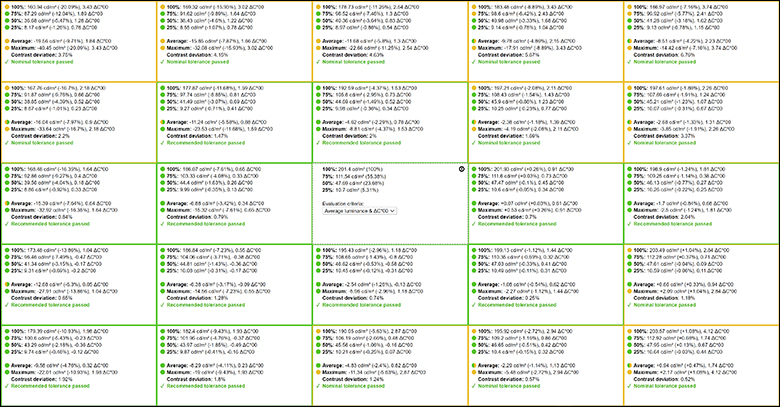
Like most IPS panel-based monitors there is almost always going to be some light leakage (especially in the corners). It is just the nature of the IPS beast and something you have to be willing to live with when buying an IPS based monitor. With that said, the EDG274X is decent in this department with about a 20 percent variance. Not perfect, but certainly ‘good enough’ for most buyers.
Response Rate
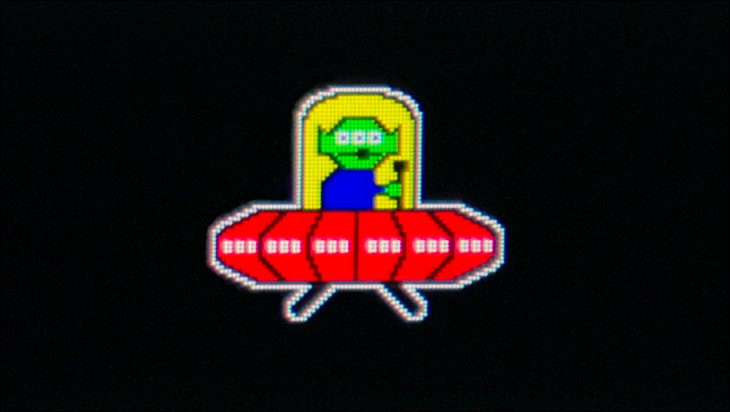
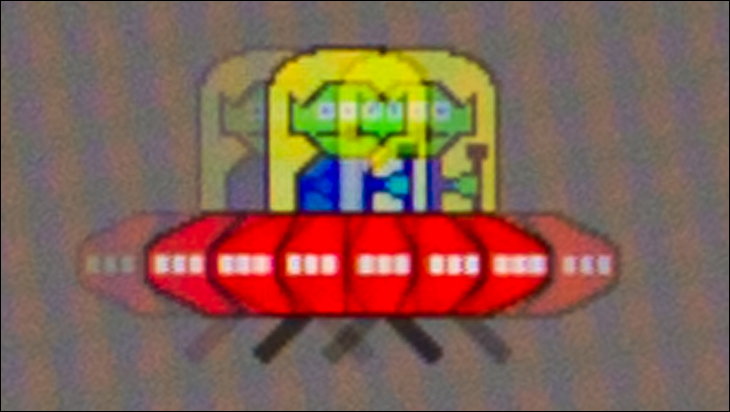
Even though a panel is rated in both milliseconds (response rate) and Hz (frame rate) the reality is this will give at best only a rough picture of a panels true abilities. Things such as ghosting, or worse still reverse ghosting, where there is more than one image displayed at a time will negatively impact enjoyment and immersion in fast paced scenarios. This is why we use a combination of Blur Busters online Ghosting test and a high-speed camera to capture real world response rate using the ‘out of the box’ settings. To give as clear a picture, pardon the pun, as possible we have also included the best and worst results observed over 2,000 images taken.
Please note, in this test images move from Left to Right on the screen.
