The number one reason for purchasing an ultra-thin ‘tower’ style CPU cooling solution is for ease of use it offers. In this regards the E12 RGB is every bit as good as better-known options. Put simply, there are only nit-picky things to point out as this is as easy to use, easy to install cooler as you could want. It just has a few tricky things to be aware of to ensure that the installation is stress free. The most obvious is, just like all 120mm tower designs, not every case will fit it. The vast, vast majority of cases will… but for small-form factor ‘shoe box builds’ it will be too tall. This pretty much is the same as saying water is wet, and the sky is blue.
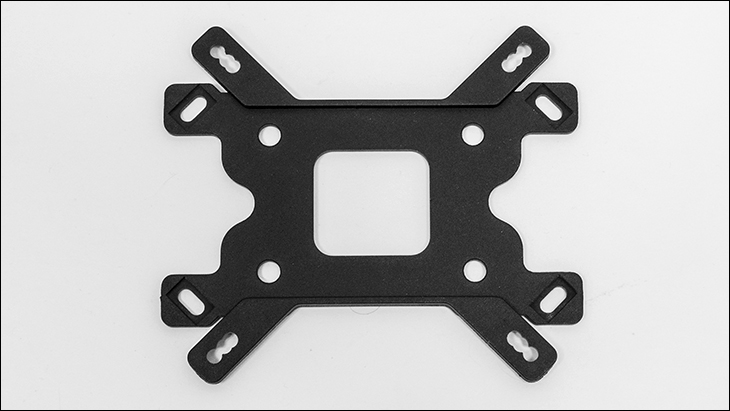
Next up is the only ‘real’ issue is actually choosing and mounting the proper hardware for your CPU socket type. With the exception of Intel 775 and AMD TreadRipper socket-based systems the Reeven E12 RGB will work… albeit if you mount the hardware in the proper manner and use the proper parts. The best place to start is with prepping the backplate which is straightforward albeit a bit tricky the first time. This is because in the accessories bag is a single backplate. This backplate is designed to work on both AMD and Intel based systems. One side is for AMD the other is for Intel… and both use different attachment points. The ‘end’ points are for AMD, the ones veering off at about 45-dreegee angles for the end are for Intel.
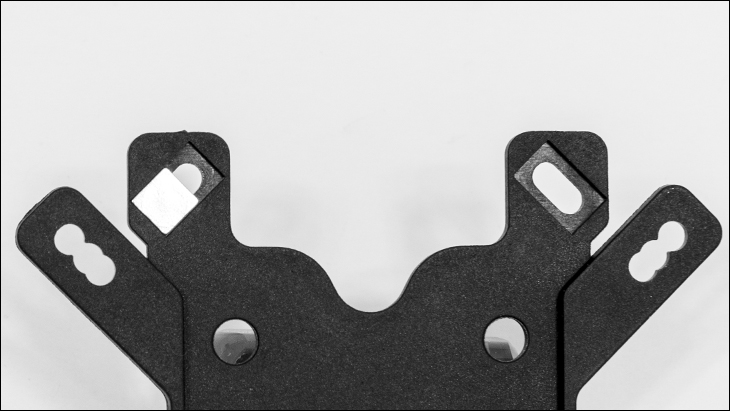
If you pay careful attention you will also notice that there are not multiple holes, and rather notches in AMD tabs but actual holes for Intel. Depending on the style of Intel socket type you will have to install the silver colored mounting posts in different holes. The AMD ones are a bit tricky. For AM4 systems you will have the posts nearest the Intel tabs. For the rest of AMD sockets have them nearest the other end (with them closest together) in the notches.
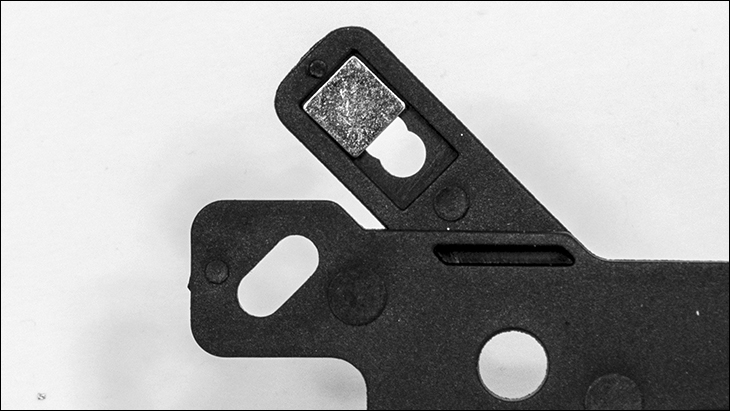
On the Intel ends. The furthest out are for 1366, and the nearest are for 115x systems. If you do have an Intel 20xx based system you will not be using the thick plastic back plate and instead will be using the ‘stock’ backplate that is already attached.
Before we continue, it goes without saying that the E12 may indeed be compatible with Intel HEDT 20xx socket types but only with the ‘square’ Integrated Loading Mechanism (80x80mm) style. If you have the rare, and oddball, ‘narrow’ ILM on your motherboard… you are going to have a bad day, as it will not work. Reeven does not mention this on their website, which is disappointing, but you should be aware of this minor issue before you buy.
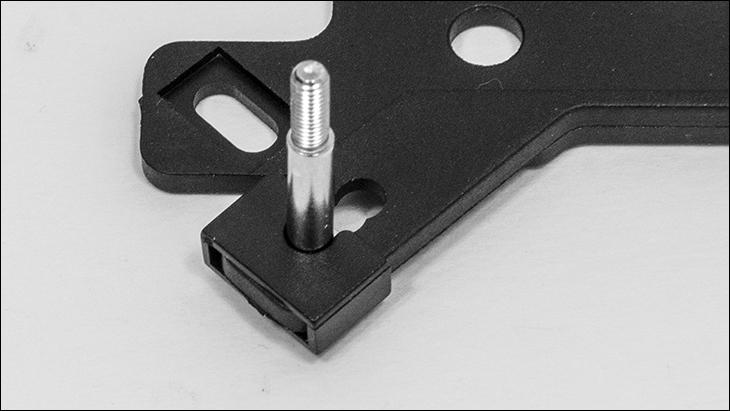
Back to the backplate. Once you have figured out which side you need, and threaded the four silver posts through their proper holes in the backplate you then grab the proper locking tabs and slip it over the ends of the backplate. This ‘locks’ the posts in place. It is pretty obvious which way they go… the cutout end goes around the post, the ‘solid’ end goes over the back of the post to keep it from falling out.

The only tricky part is while Intel based systems all use the small ‘square’ ones, AMD uses both the black and gray rectangular ones. Each top bracket gets a black and gray (obviously either a black or gray per post). To imagine how it should look. Place the backplate flat on a desk lengthways. The two posts furthest away should have one black and one gray. The nearest two should also have black and gray. There is an included pictograph in the instructions so as long as you follow them you will get it right the first time.
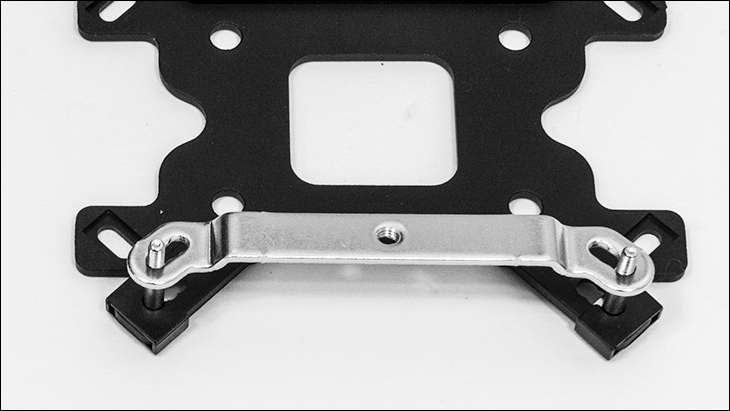
With this accomplished, you then thread the posts and backplate up through your motherboard, slip on the plastic spacers, and then attach the top brackets. For Intel users you do have the option of N/S or E/W orientation. For most users you will want to mount them so both brackets are pointing from the top edge of the motherboard down to the PCIe slots. This will give you a ‘front to back’ airflow direction.
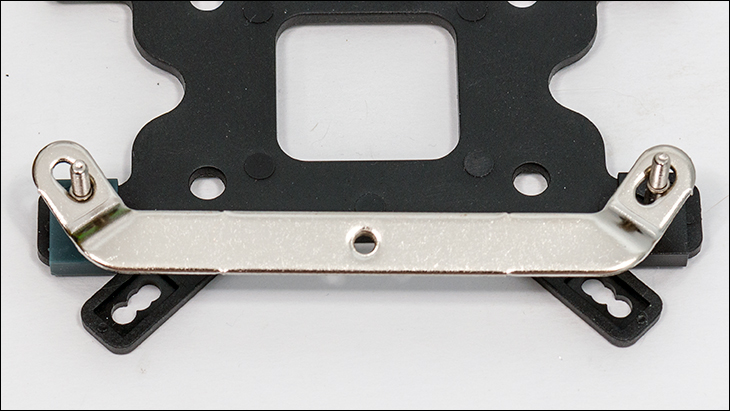
Remember that the Intel ones should be pointed inwards towards the CPU, and on AMD systems the brackets should bow out and away from the socket… otherwise you will have to start over. To lock the top brackets in place… use the proper nuts in the bag. They are knurled but to tighten them down you may want to grab a screwdriver… that is not included.
Next apply TIM, place the E12 RGB in place… and use the last two ‘bigger’ bolts to lock the cooler in place. You may have to twist it back and forth a bit as the preinstalled CPU bracket has to align with the two small threaded holes in the top brackets. When they are aligned the bolts will screw down through the cooler’s preinstalled mounting bracket and into the top bracket. It is a bit tricky the first time. It is best to do a ‘one turn / one turn’ methodology. Where you spin the bolt one turn on one side, then spin the other one full turn. Rinse and repeat until it is locked down. This reduces uneven pressure on the CPU and is a very good idea to say the least.
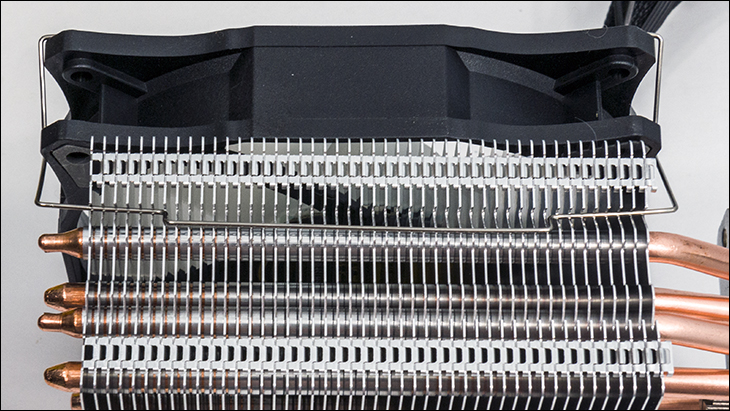
The last minor nitpick is that the included fan mounting hardware consist of thin wire brackets… which are a bit of a nuisance to use. They are a bit on the flimsy side but if you take your time and hook them into the outer most edge of the fan you will get it installed in no time.
At this point plug the fan in, plug in the RGB 4-pin header… and you are good to go. Overall a fairly hassle-free installation process that is robust and not overly headache inducing… especially for the price. We say ‘for the price’ as this corner of the market is filled with absolute trash mounting hardware. Everything from push-pins to poorly thought out designs. So, while the Reeven E12 RGB may not have the absolute best hardware and installation process we have seen, it is above average to say the least.
ADVERTISEMENT
Reeven E12 RGB Review
ADVERTISEMENT
ADVERTISEMENT
Last updated on February 22, 2026 8:32 pm
Page 4 of 15
ADVERTISEMENT
Leave Comment
