Introduction
Introduction
As most enthusiasts already know one of the absolute coolest, ‘most fun you can have with your clothes on’ build is creating a high end mITX system. As long as you can get by with only using one video card, mITX builds make a whole lot of sense for many scenarios. They are easier to carry to LAN parties, they take up way less room in your living room and all round look different than the typical tower system. More importantly they give system builders a real chance to show what they can do. The only problem is most mITX cases are either boring, too small to really do everything you want to do with a build, or in some other way cause you to make compromises.
Approximately two years BitFenix recognized this sorry state of affairs and went about fixing it. After all BitFenix is known as a company that cares about enthusiasts so when they found this niche in dire need of attention the end result was the BitFenix Prodigy. A mITX case that was ground breaking but was not without a few flaws. First and foremost amongst them was the looks of the Prodigy, and to put it mildly it was rather utilitarian in the looks department. Another issue was the internal cables were a touch short and some motherboard’s onboard USB 3.0 headers were simply too far away from the front of the case to allow these cables to reach.
Like any company worth their salt BitFenix has taken these criticism and not only improved upon the original Prodigy series, but also released another model that uses the same internals as the Prodigy but one that puts a higher priority on the overall aesthetics of the case. The end result of this hard work is the BitFenix Phenom, a mITX case which promises to be everything the Prodigy is but better.

To do this BiFenix’s engineers have totally redesigned the prodigy case and everything from the side panels to the front panel has been changed to make the case look as good as it performs. This however does not mean that you can fit any less parts inside; rather the Phenom can be considered an improved Prodigy that will cater more to consumers who do not mind working around a few minor issues in order to get a case that looks like it could have been ‘designed in Cupertino’. As such the Phenom still accepts up to five 3.5″ hard drives (plus one in the now defunct 5.25″ bay), numerous 2.5″ hard drives, multiple All In One water cooling units – including dual bay 120mm designs, and even has room for a full-on water cooling setup. It even has room for a full size Power Supply and can accommodate dual slot video cards that are nearly thirteen inches in length. More impressive still, the Phenom can do all this while being only about twice as tall as the typical mITX case. The only major difference – besides its drop dead gorgeous looks – is the Phenom lacks an external 5.25″ bay and the front panel is solid instead of mesh. That is it. Even the online average price of $83 is close enough to the Prodigy to make no never mind.
While the changes are seemingly minor, the Phenom is focused in on a different consumer niche than the Prodigy and as such will not replace it; rather both will co-exist in BitFenix’s current mITX line up. However, paper specifications and reality can drastically diverge and it is only after using a case in a build that you can truly understand its strengths and weaknesses. To this end, we will not only be showing you the features of the Phenom in greater detail but will walk you through a complete build using this new beast from the east. Hopefully our final opinion will be as favorable as it is going into the review.
Phenom Specifications
Phenom Specifications
Manufacture Product Page: http://www.bitfenix.com/global/en/products/chassis/phenom-mini-itx/
Model Number: BFC-PHE-300-WWXKK-RP
Price: $83 average online price
Warranty: 1 year
Up Close and Personal with the Phenom
Up Close and Personal with the Phenom

Like many mITX cases which cost under a hundred dollars, BitFenix uses a cardboard box for the Phenom’s shipping container. Also like most mITX cases the outside is liberally covered in details, specifications and other data you will need to make an informed decision on whether or not this is the right case for you. To be honest the only noteworthy thing about this shipping container is the sheer size of it. We are not exaggerating when we say that we have seen mATX cases come in boxes not much bigger than this.

While the box itself may be large, the same cannot be said of the number of included accessories. To be fair the usual assortment of screws, brackets, installation pamphlet and zip ties are included; however the only real noteworthy included feature is the USB 3.0 to USB 2.0 adapter. This adapter sells separately for about ten dollars so it does -somewhat- help elevate the accessories to slightly above average, but we were hoping to see more. For example a PSU adapter bracket to allow for deeper than usual power supplies would have been certainly welcome.

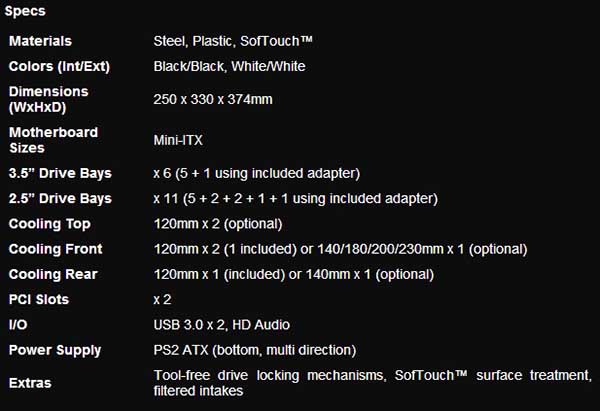
Even on just a quick perusal two things standout about the Phenom. Firstly with dimensions of 250 x 330 x 374mm and an internal capacity rated at 31 liters this is easily one of the largest mITX cases you are going to find on the market. Compared to a more typical sized mITX case like the Cooler Master Elite 110 (which has an internal capacity of 15L), the BitFenix Phenom literally dwarfs it in both the height and depth department. Luckily it is not that much wider than a typical mITX case so finding room for it should not prove to be too difficult.
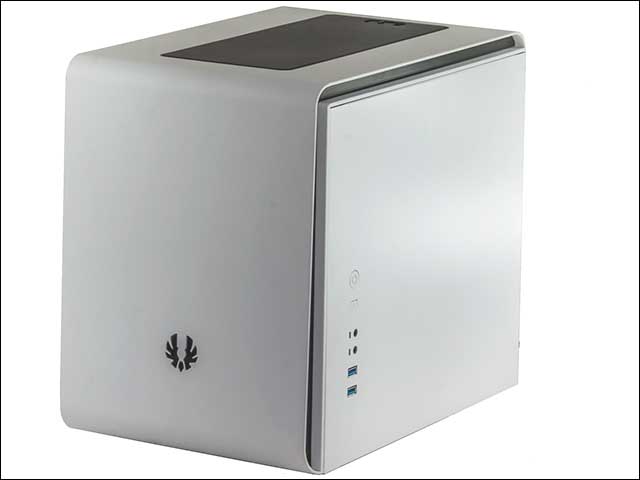
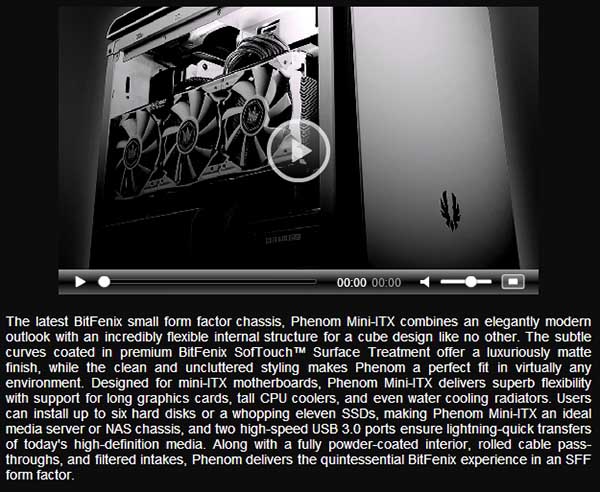
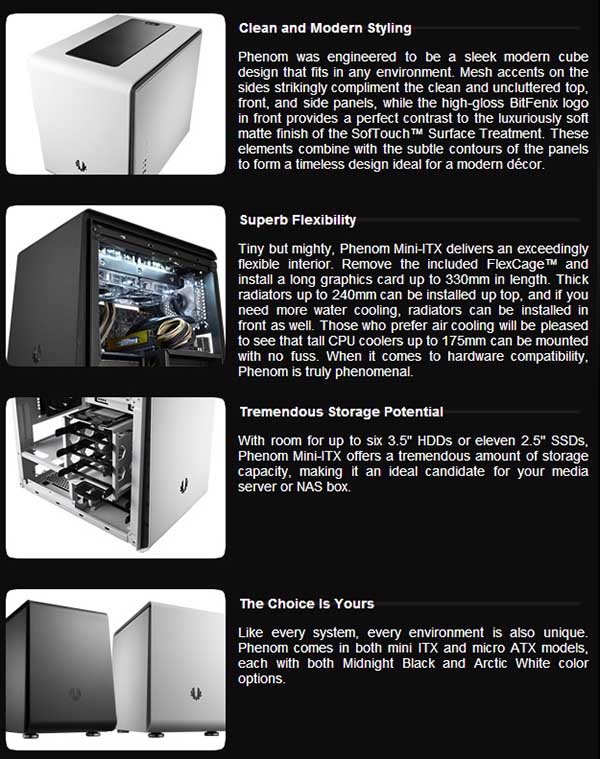
The other blatantly obvious feature of the Phenom is it is a downright gorgeous looking mITX case. While it does come in black or white, our sample was the ‘Arctic white’ version and to be perfectly candid BitFenix really have put a lot of effort into improving the overall aesthetics of their mITX cases. We seriously would not have been surprised in the least to have seen an Apple logo and not a BitFenix logo on the front – as it literally is that elegant and that graceful a design. The only minor issues anyone will have with this case when it comes to its overall looks is that the two side panels are not quite the same color white as the top and front fascia. They are very close, but while the top and front are more a cream white, only the two sides are what we would call a pure white. This is because BitFenix has once again opted to not cover the side panels with their excellent SofTouch rubber coating. This seems to be a ‘thing’ with BitFenix and while we are sure it does help shave a few cents off the cost of the side panels it does mar an otherwise perfect first impression.
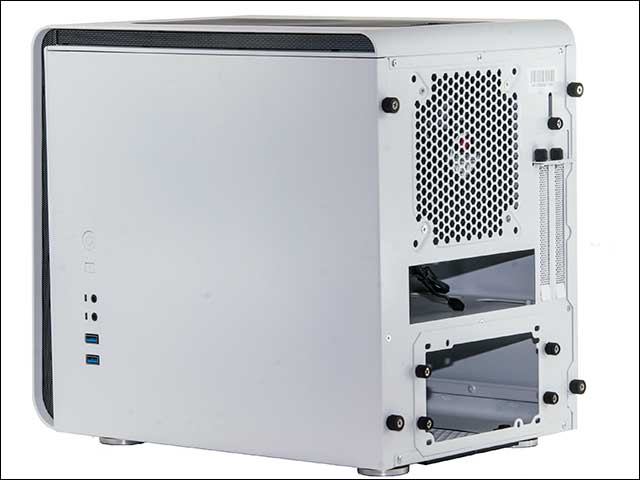
On the positive side, these two small side panels are as thick and as heavy as you are likely to encounter in the mITX case marketplace. On a weight vs weight basis you would have to move up to mATX tower style cases to find side panels which come even close to weighing as much as these two do.
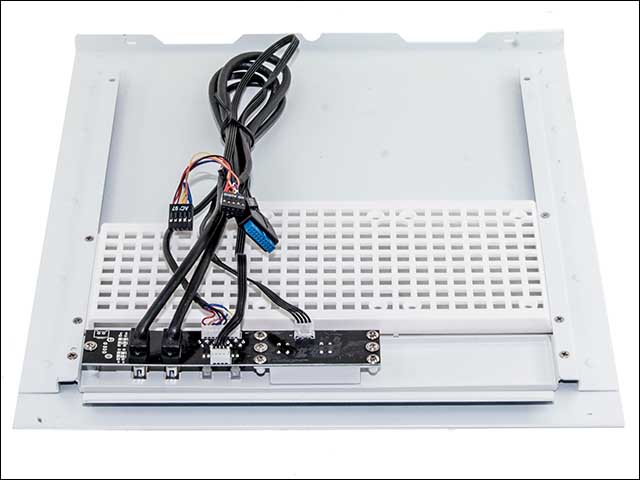
We always like it when manufactures don’t skimp out the construction of their cases and no one needs worry about accidentally bending these panels while simply removing them. This however does not make up for the difference in colors and we truly wish BitFenix had taken the extra time and effort to coat these panels. We are a big fan of this rubber-type coating and it certainly would have helped keep the panels free of scratches during transportation to and from LAN parties.

The next big thing which stands out about this case is the lack of venting. Not only are both side panels lacking venting so too is the front. This solid front certainly helps the Phenom look like it just stepped off a Paris fashion runway but keeping the internal components fed with enough air will be a challenge. To help make things easier there is a black mesh covering running along the top and sides of the case, but most of this mesh is only there for aesthetic reasons. There literally is only a few circular holes cut out in chassis underneath the side mesh covering and the rest is also a solid surface. Of course removing this mesh and then drilling or cutting out more air holes is a relatively simple mod, but much like the side panels we wish BitFenix had made the extra effort and gone that extra mile for consumer. Aesthetics is all well and fine, but at the end of the day cooling is even more important.
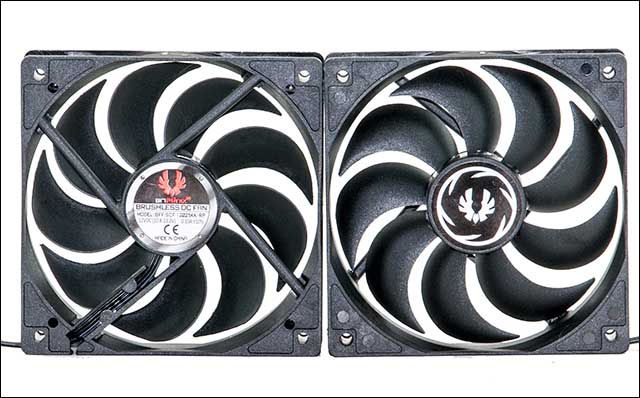
These small restrictive air vents will increase the static pressure requirements of any front mounted fan. This is a shame as this mITX case – just like the prodigy- not only accepts the usual 120 or 140mm fan options, but can accommodate either two 120mm fans, a single 200mm fan or even one massive 230mm fan. However, considering the number of high static pressure 200mm+ fans on the marketplace we doubt that many will opt for them if internal air flow is a high priority. On the positive side, the front case has enough room to mount a dual 120mm radiator here. If you combine a radiator with four high speed, high static pressure fans we doubt there will be much problem in the cooling department – small air vents or not.
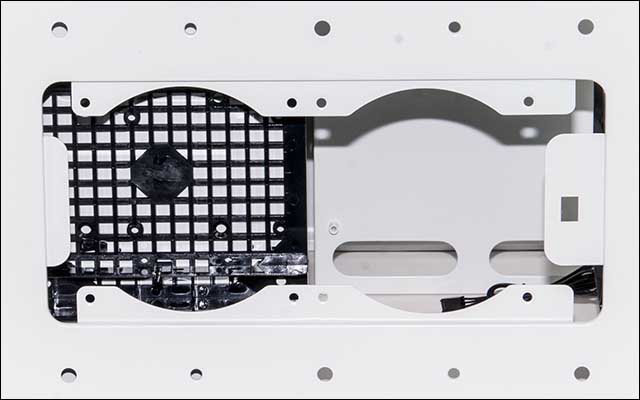
Equally impressive is the top of the unit has been designed for mounting dual 120mm radiators. Even if you do not go for a dual bay radiator, two 120mm fans in combination with the rear 120/140mm fan and a front fan(s) should provide more than enough air flow to keep even the hottest of running systems happy. We just wish that BitFenix had included more than just a front and rear fan. Consumers will have to take this additional cost into consideration before opting for this rather expensive – for its niche – case.
Moving on from the cooling potential of this case one thing which some consumers will love and others will loath is the location of the front I/O panel. In order to keep the smooth, monolithic front look of this case BitFenix has once opted for side mounted I/O ports. In this instance the large power button, smaller reset, dual USB 3.0 port and the usual headphone and microphone ports are located on the right hand side. We understand the reasoning behind keeping the front as clean looking as possible but a hidden recessed panel with front cover would have looked just as nice and would not have increased the footprint of this case like side mounted I/O panel does. As it stands you will really want to add at least two more inches to side dimensions if you actually want to use the USB 3.0 front ports – otherwise they will prove difficult to access.
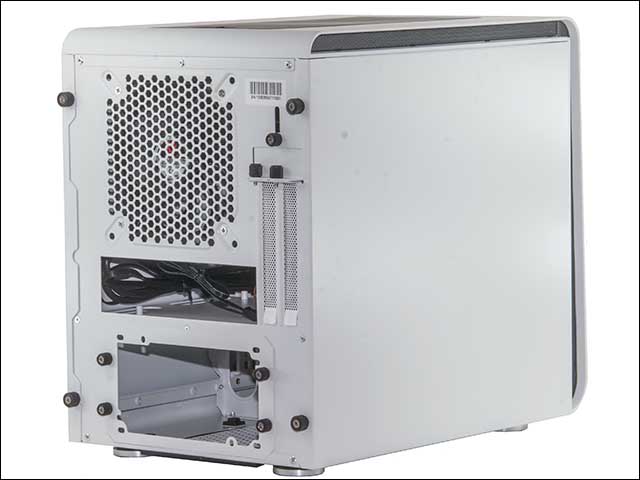
The rear of this mITX case is nicely designed and makes fewer compromises. As mentioned there is a large – for its class – 120/140mm rear exhaust vent that has a nice free-flow design to it. Below this is the motherboard I/O panel and below that is power supply bay area. Next to the rear I/O panel are the dual mounting brackets which allow consumers to use basically any video card they wish. To be precise, with the internal drive cages removed a single, dual slot video card that is up to 330mm in length can easily fit inside this micro-ITX case. Color us impressed.
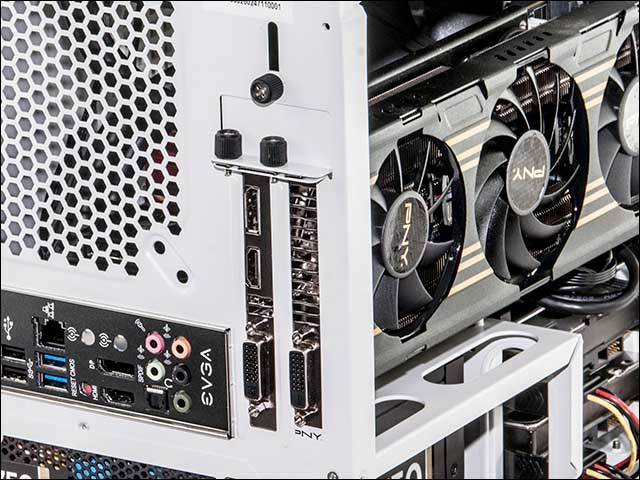
With that being said there is still room for improvement. BitFenix could have easily allowed mega triple slot designs to fit here, but since the basic chassis design has not been upgraded from that of the Prodigy the Phenom is unable to show any improvements in this department. Also, the solid side panel means that the video card will be sharing air with the other internal components rather than sucking fresh air in through the side like they can with most mITX/mATX cases. This is another area that even a semi-skilled ‘mad modder’ can improve upon the basic design and we do recommend doing so, especially if you plan on using a video card with a ‘down draft’ style cooler found on many custom design rather than the stock ‘blower’ coolers found on more mundane video cards.
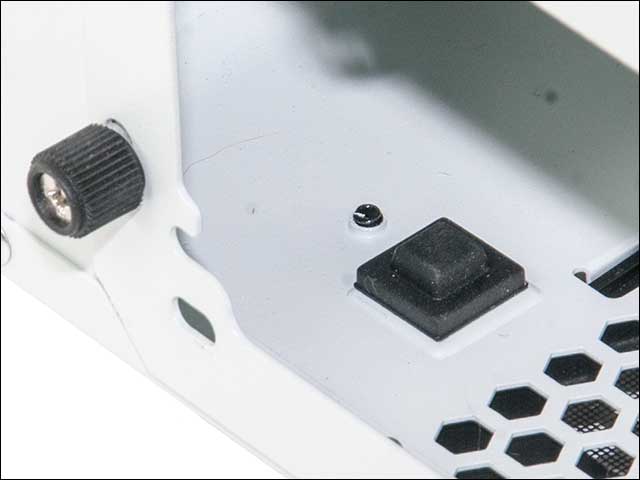
Rounding out the list of exterior features is a removable PSU filter, nice caster feet, and tool-less knurled case screws. The last of which makes disassembly and assembly much easier, though we do wish BitFenix had opted for metal screws instead of black plastic components; however this too is a ‘thing’ with BitFenix and all their cases use plastic tool-less screws. On the positive side, they are even included for the PSU bracket and their deep black color does contrast nicely with the white of the case.
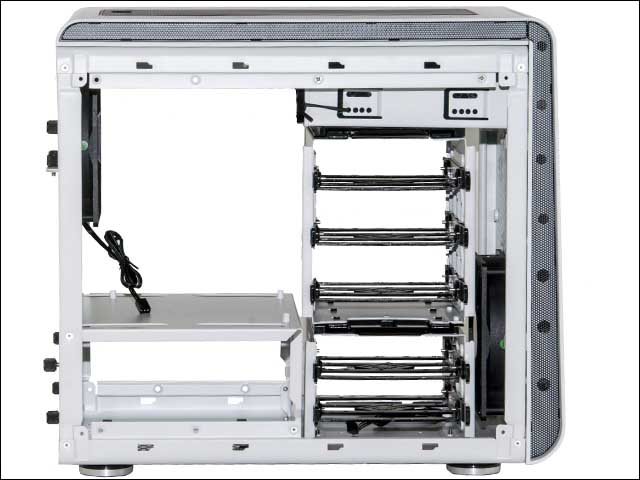
The internal area of the Phenom has been broken into three main areas: the front hard drive area, the motherboard area, and the power supply area. While there is some overlap in cooling of these zones each zone really is meant to be cooled by its own fan(s). In the case of the power supply area, the PSU’s fan is what does the job; whereas the hard drive area sucks cool air in from the front of the case and the ‘exhausts’ it into the motherboard area. While you can mount anything from dual 120mm fans all the way to a single 230mm fan, BitFenix includes a single 120mm fluid dynamic bearing based fan. Specifically it is their 120mm, 1000rpm ‘Spectre’ fan. The motherboard zone has three potential fan locations of which only the rear exhaust fan is included and the top dual 120mm fan ports are empty. On the positive side the included fan – another BFF-SCF-12025KK-RP ‘Spectre’ fan- can be swapped out for a 140mm unit and thus consumers can mount either extra thick, single bay 120mm radiators or single bay 140mm units. This is rare for a mITX case and is impressive.
As mentioned previously the top cooling zone can be used to mount any thickness dual 120mm radiator available on the market today. It can also easily accommodate quad fan configurations; however all fans will have to be mounted inside the case. This is because in a very puzzling move BitFenix has made the top recessed fan area on deep enough for only 20mm thick fans. Using thicker than 20mm fans means and you will not be able to reinstall the removable black mesh fan filter. This is a design flaw that hopefully is fixed in future revisions.
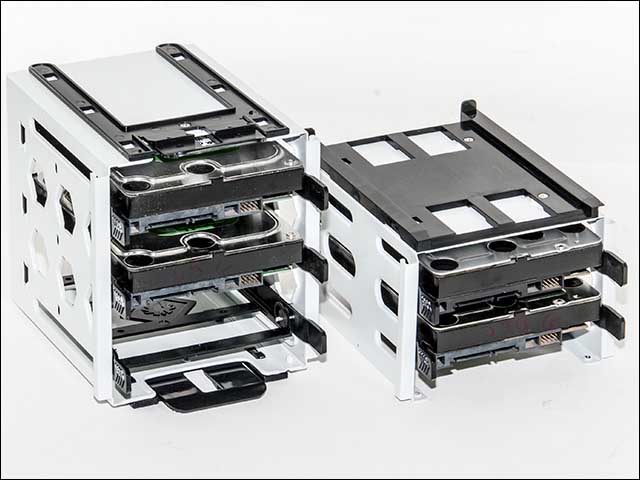
Getting back to the front hard drive zone, BitFenix has opted for two smaller hard drive cages. A dual drive and a three drive cage. Unfortunately while you can rotate their orientation you cannot just use the three drive cage; rather the three drive cage has to be mounted on top of the two drive cage. Of course with a liberal use of a drill you can easily modify the three drive cage to be securely mounted in the two drive cage’s location, but we are unsure why BitFenix did not make their mounting more universal. Also it is worth noting that to properly secure the top most triple drive cage, you need to leave the rather useless 5.25″ caddy in place. If you do remove this caddy – which is needed to be done in certain scenarios that we will go over in the installation section – the top caddy does moved way too much for our comfort. This is a direct result of reusing the Prodigy’s internal design and could have easily been avoided with slight modifications to the drive cage mounting system. For example screws or bolts holding the two cages together would have easily made the entire affair more than secure enough to not need a top reinforcement.
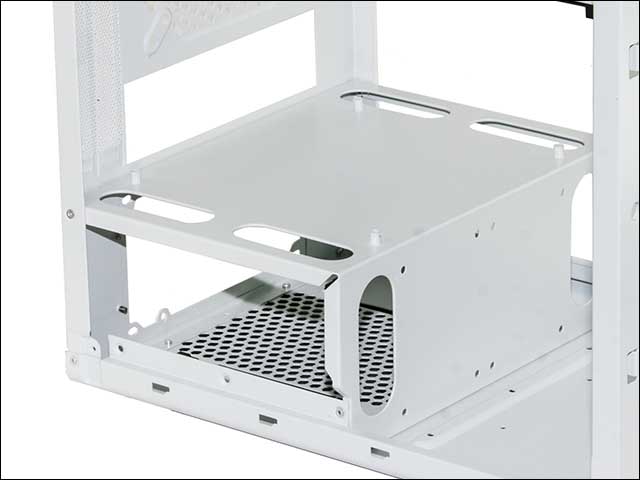
Like most mITX cases the motherboard sits in a horizontal or ‘flat’ orientation. Unlike most mITX cases, with both side panels removed there is plenty of room to maneuver and plugging in any connectors is as easy as it would be on a much larger case. Also of note is the motherboard standoffs are built directly into the non-removable motherboard tray. This does save a step latter on and certainly makes for a more secure installation.
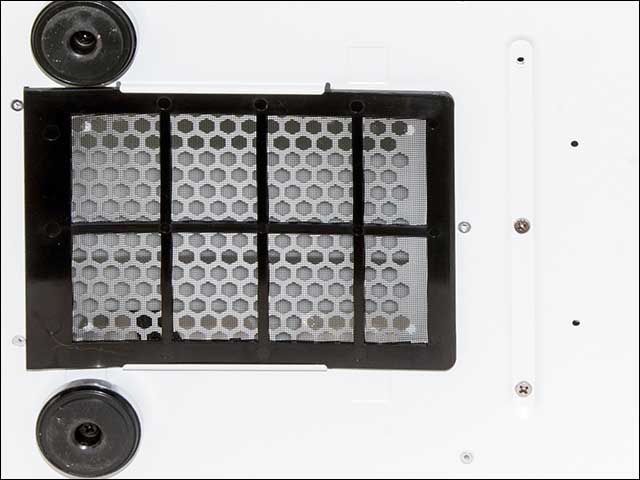
The only glaring issue which jumps out at us is the power supply cage has not been improved or even modified in any way from the Prodigy. Hopefully looks are deceiving otherwise installing even 160mm units may prove to be very troublesome. In talks with BitFenix there is no power supply extension bracket in the works for the Phenom; rather they simply are planning on modifying this area to be more user-friendly. While these improved Phenom’s are starting to trickled on to the market there are no details on how – or even if it is possible – to tell a new Phenom from an ‘old’ Phenom like our sample is. Also on the positive side, the PSU has its own removable filter which will help keep dust from accumulating inside the power supply.
Installation

mITX computer cases are not your typical cases and as such do not follow the same rules or installation procedures that the average build follows. For example, usually with most builds the power supply is one of the first things to install, but for mITX it usually one of the last. Put simply, mITX cases are usually persnickety and require you follow a specific set of steps. Doing anything other than following an exact build order usually means having to stop the build, partially tear down what has been done and do it ‘correctly’. In this regards the BitFenix is well above average and the installation procedure is a lot more forgiving in its installation order. In fact, the Phenom has a level of flexibility that few mITX cases can ever hope to match. With that being said, the Phenom mITX is not perfect and not without flaws. Before we get to these flaws lets go through what can be considered an ‘optimal’ installation process and as we come to these issues we will bring them up and go over potential solutions.
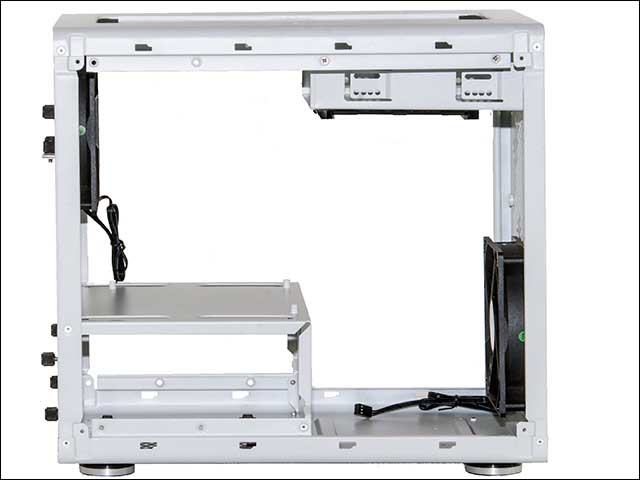
Like any ‘tower’ case the first step is to tear it down to bare metal. For the Phenom this means removing both side panels, the front fascia and the top fascia. Also like most typical cases the front and top panels are held in place with friction posts, to remove simply squeeze them and then gently tug the panel away from the metal chassis. When done you will be left with the skeleton of the Phenom and as you can see it has been fully painted inside and out. This is always nice to see and we just wish that the side panel had a Plexiglas insert to show it off. Of course if you are handy with a nibbler, making a window in one of these side panels is a snap.
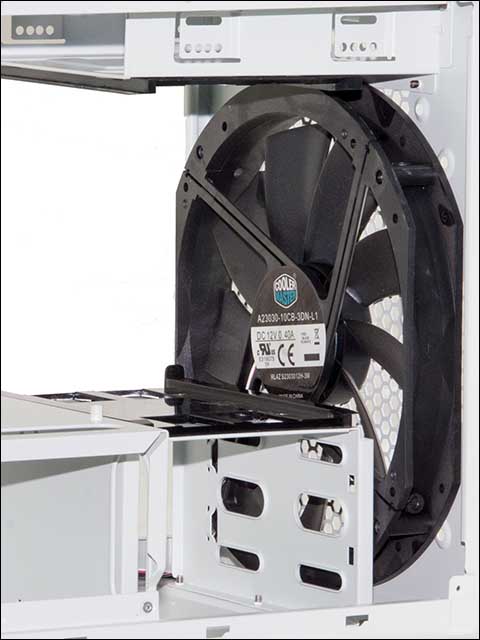
With the chassis fully prepped the next step is to give careful consideration on how you plan on cooling the case. The Phenom may come with a 120mm fan installed in the front, but it is less than optimal in the air movement category. When possible we like using the biggest fans we can get our hands on. Since we did not have a BitFenix 200mm or 230mm fan on hand, but had a Cooler Master ‘Big Boy’ 230mm fan that is what we opted to use. This brings us to the first installation issue with this case. Namely you cannot simply swap out the 120mm and stick a 230mm in there. There is just not enough room between the drive cages and the front of the case. To actually install big fans you will also need to remove both drive cages.
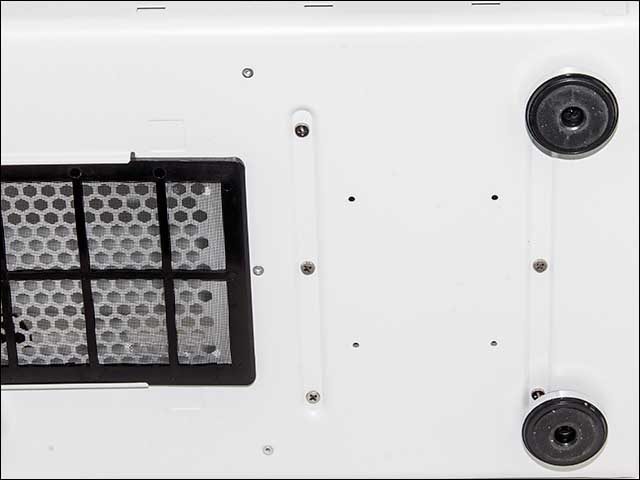
Removing the cages is a fairly simple, if multi-step procedure. First slide out the top 3 drive, drive cage by depressing the black retention mechanism and then pulling it out. The bottom drive cage is a bit more tricky as it is held in place with six screws. To remove these screws you need to flip the Phenom on its side and first remove the front two plastic caster feet. This is necessary as two of the six screws are partially hidden by the front feet. With the front casters off you then unscrew the cage and remove it from the case. We recommend then reinstalling the two front feet and then righting the case. At this point there is now plenty of room to install the 230mm fan; however you will not be able to reinstall the drive cages if you use a wire mesh grill.
With the front fan installed and the two drive cages still out of the case, this is a good time to think about hard drive orientation. While BitFenix does advertise these cages as ‘flex cages’ what this means is you can either have the drives slide in from the right side or the left. You cannot rotate the cage 90degrees to reduce static pressure and its 180 degrees or nothing.
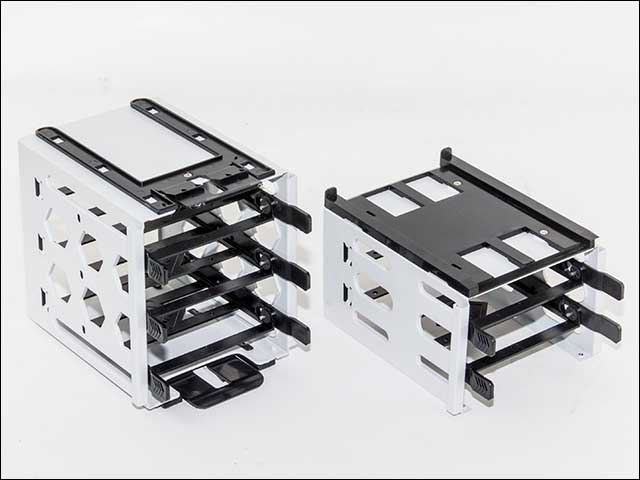
We like the default direction so that is how we installed the bottom drive cage; however you should not install the top most drive cage as you will just have to unstill it (again) later. We also recommend not installing the hard drives into the cage – so they don’t get damaged – but you can install the drives into the drive caddies. Drive caddy design is one area BitFenix has always had problems with and these caddies are no different. While not the absolute worst we have ever used, they are fragile and can break while bending them to get the four pins installed.
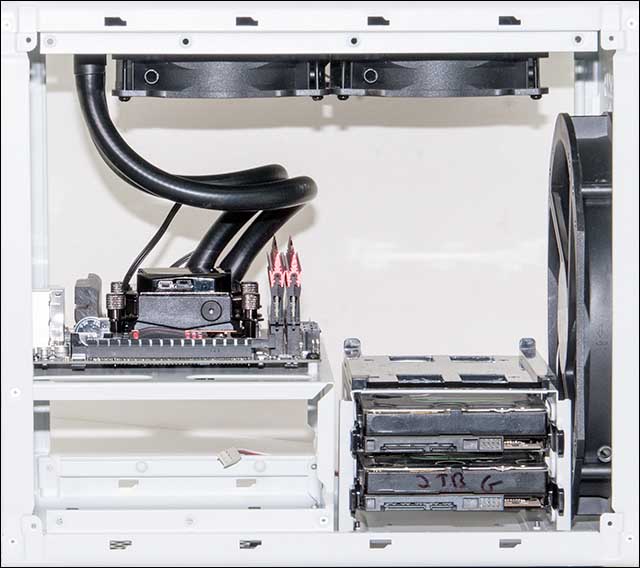
With the front fan installed the next thing to install is your AIO cooler if you have opted for a dual bay radiator. If you have opted for a single bay unit you can install it much later in the build, but let’s face it, dual bay radiator compatibly is one of the major selling features of this big boy.
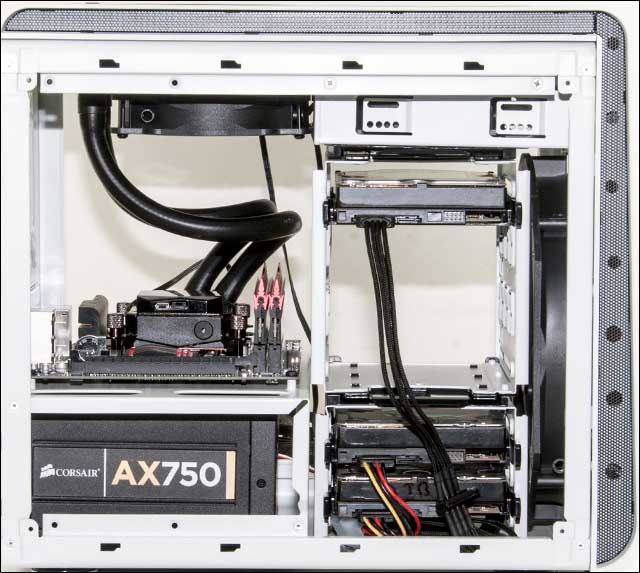
This brings us to the next issue. Much like with the front fan installation you will not be able to simply slide the radiator and fans in place and mount it like in a full or even mid-tower ATX case. There is just not enough room between the front – useless – 5.25 bay and the top of the chassis to angle it into position. Rather you will have to remove six more screws, remove this single 5.25″ bay and then install the AIO with fans. We like to have the fans pushing hot air out of the case so that is the orientation we opted for. With this completed you can then reinstall the 5.25″ bay. However, it will only fit back in place if you have gone with dual instead of quad fan configurations and are using 25mm fans. This makes Antec’s latest Kuhler 1250 a non-starter if you want to use that top most drive cage. If you only need two 3.5″ hard drives you can leave the 5.25″ bay bracket and top 3 bay drive cage out of the case. This however also negates many of the reasons to opt for this case over smaller options. We want to be able to use all the hard drive caddies so 25mm, dual fan configuration is the only real option. Even then the space between the 5.25″ metal, non-perforated cage and the fan is rather slim. This is another area judicious use of a metal nibbler, or even a drill, can help improve the basic design.
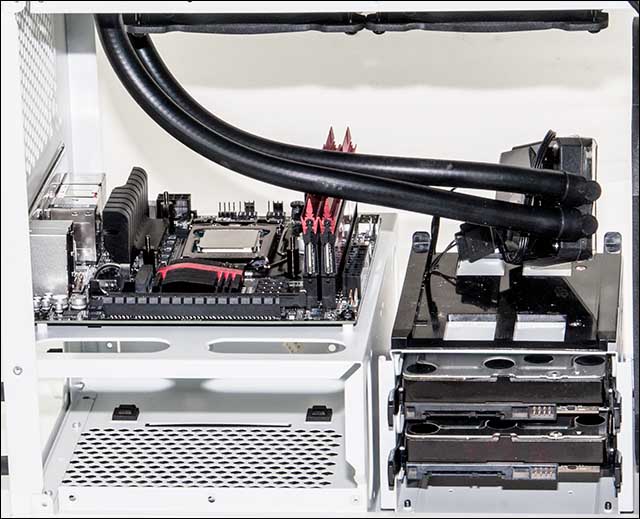
The next thing to install is the motherboard. With so much elbow room this is as easy as pie and follows the standard process that you would use with any case build. Thanks to the horizontal orientation, and built-in standoffs this process is actually easier to accomplish than with most full tower cases. Color us impressed. With this accomplished we would then you can mount the waterblock and move on to other things.
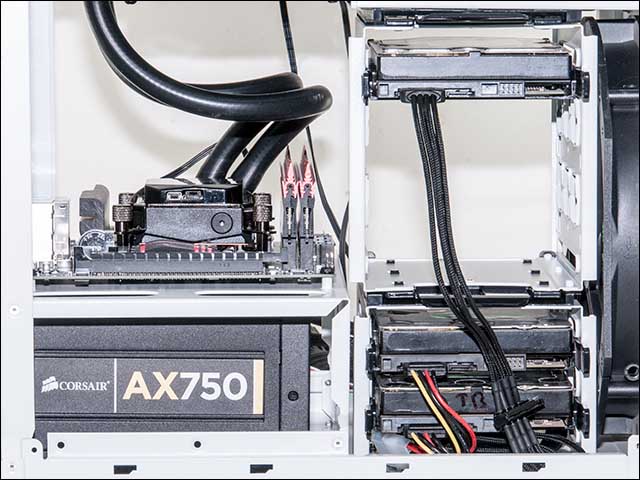
At this point you can re-install the top and front fascia. After this the next step is the power supply. The power supply installation was the biggest weakness of the Prodigy and it is still the biggest weakness of the Phenom. In its default configuration BitFenix claims 160mm units can be installed. This is being ‘overly optimistic’. Our Corsair AX760 would fit, but only as long as we did not plug in any cables. A more realistic length is 140mm for the power supply because the PSU bracket sits flat on the back of the case. BitFenix needs to take a page from Cooler Master and use an offset bracket that allows 20mm of the PSU to sit outside the case. Instead they are simply making the two cut-outs at the front of the PSU cage larger.
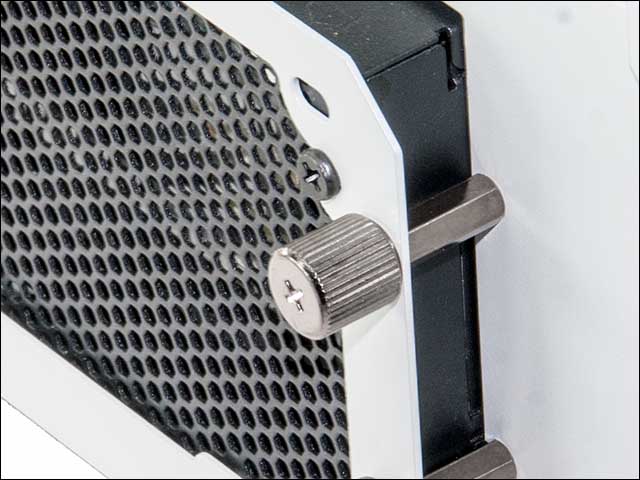
Since we consider that to even be a less than optimal solution a very easy mod that even novices can accomplish is use typical stand-offs found with most AIOs, water-blocks, and even many air based CPU cooling solutions. If you have an older tower cooler kicking around that has fairly tall stand-offs they should work perfectly. We actually had a Cooler Master H105 that was not in use and its approximate 20mm stand offs worked perfectly.
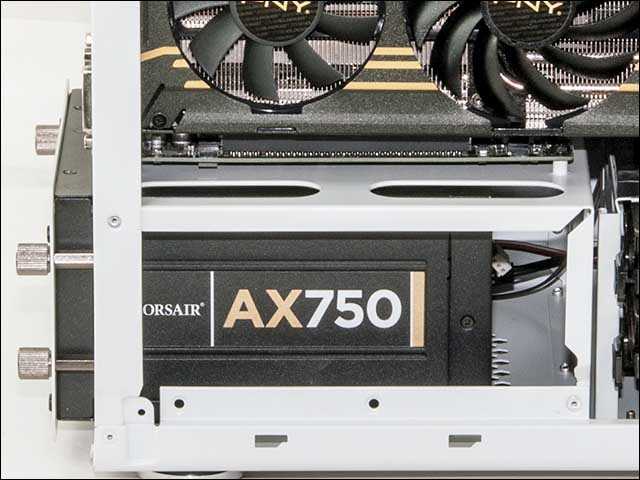
To use them simply screw them into the four PSU brackets holes on the case itself, slide the PSU with PSU bracket attached into place, and then secure the PSU bracket to the standoffs with the ‘stock’ screws. This moves the power supply back enough that 160mm unit will easily fit in the rather cramped PSU bay.
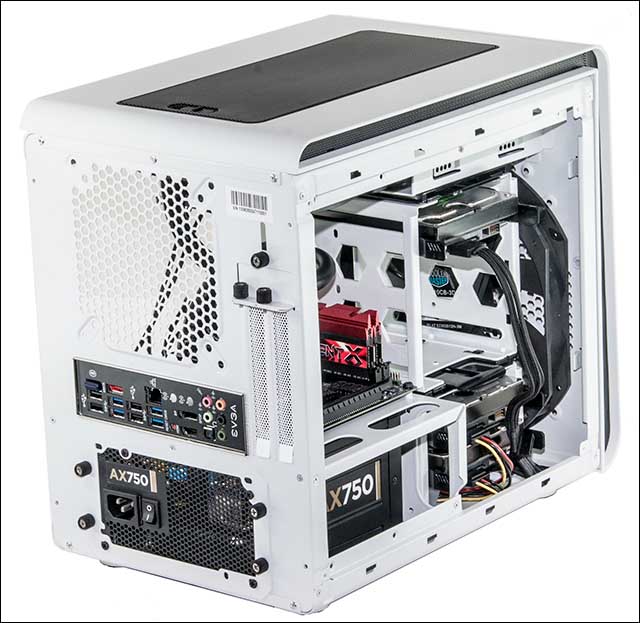
At this point you can install the hard drive cage, the hard drives, and then plug in all the wires. The last thing to do is plug in a video card. In our instance we had a rather long PNY 780 OC video card.
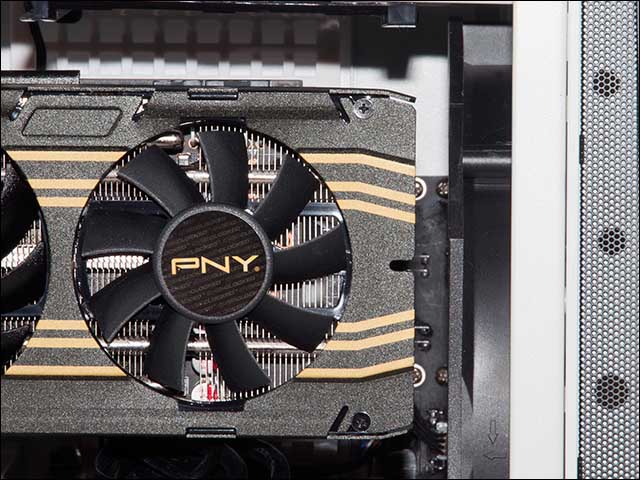
This brings us to the last issue with the Phenom. If you want to use video cards that are much longer than the motherboard – 160mm – you have to remove the top 3-drive hard drive cage. When we realized this our frustration was palpable. However, this is the trade-off you will have to make if you want to use anything more powerful than the latest NVIDIA 760 video cards. With that final issue taken care of, you can reinstall the side panels; power up your brand new, ultra high-performance system and congratulate yourself on a job well done.


